
R
rpenningtonAug 17, 2025
How to change banner page output tray on Toshiba Printer?
- EeschultzAug 17, 2025
To change the output tray for banner pages on your Toshiba Printer, adjust the tray setting for "Raw jobs - Default Output Tray".


How to change banner page output tray on Toshiba Printer?
To change the output tray for banner pages on your Toshiba Printer, adjust the tray setting for "Raw jobs - Default Output Tray".
What to do if network or touch panel display disabled after LDAP search on Toshiba Printer?
If the network or touch panel display is disabled after an LDAP search on your Toshiba Printer, ensure you have entered the correct LDAP settings. Pay close attention to re-entering the password correctly, as it is displayed with asterisks.
Why does the display not change when buttons are pressed on my Toshiba Copier?
If the display on your Toshiba Copier doesn't change when you press buttons or icons, here are a few possible reasons: * The copier might be in energy-saving mode. Press the ENERGY SAVER or START button to exit this mode. Please note that it may take a moment for the copier to become ready. * The power might be off due to the weekly timer. Press the START button to turn the power back on. * You may need to enter the department code. Input the correct code. * The copier could be warming up. Wait for it to become ready.
How to fix black lines on Toshiba e-STUDIO 450 All in One Printer images?
If you are seeing black lines in the images sent from your Toshiba All in One Printer, clean the scanning area of the Reversing Automatic Document Feeder with a soft cloth. This should resolve the issue.
What to do if Toshiba e-STUDIO 450 shows communication error?
If your Toshiba All in One Printer displays a communication error, retry communications. This may resolve the issue.
How to fix memory overflow on Toshiba All in One Printer?
If your Toshiba All in One Printer displays a memory overflow error when scanning documents, the memory has overflowed. You can either wait for the memory to clear, or check the jobs and delete reserved jobs to clear memory.
What to do if Toshiba All in One Printer shows 'Too Many Tel # Digits'?
If your Toshiba All in One Printer displays a 'Too Many Tel # Digits' error, it means that 128 digits or more were registered for a chain dial communication. Confirm the number of digits dialed and register the numbers again.
What to do if Toshiba e-STUDIO 450 All in One Printer job reservation is full?
If your Toshiba All in One Printer indicates that the job reservation is full, it means the number of reserved jobs has exceeded 100. You can either wait for job reservations to be completed, or check the jobs and delete reserved jobs.
What to do if Toshiba e-STUDIO 450 job memory is full?
If your Toshiba All in One Printer displays a 'job memory full' error, it means that the total number of destinations for outgoing call jobs exceeded 1,000. Either wait for outgoing call jobs to be completed, or check the jobs and delete reserved jobs.
What does 'Not allowed now' mean on Toshiba e-STUDIO 450?
If your Toshiba All in One Printer displays a 'Not allowed now' message, it means that further polling transmission reservation was attempted even though polling transmission was already reserved. Either wait for polling transmission jobs to be completed, or check the jobs and delete reserved jobs.
Provides warnings regarding radio interference, static discharge, and operational safety.
Explains the meaning of signal words like Warning, Caution, and Note for safe operation.
Highlights features like copying speed, warm-up time, and optional functions.
Safety guidelines for installing, moving, and handling the equipment properly.
Specific warnings and cautions related to operating the equipment safely.
Safety guidelines and precautions for performing maintenance tasks on the equipment.
Safety advice and precautions when handling consumables like toner cartridges.
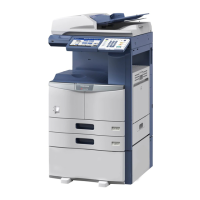
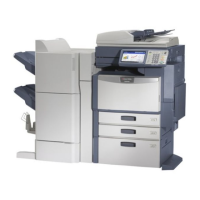
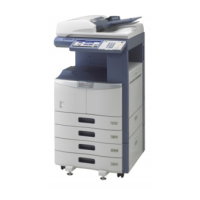
Details the various components and parts of the equipment.
Lists and describes available optional hardware attachments for the copier.
Explains the layout and function of buttons on the copier's control panel.
Explains the automatic clearing of settings after a period of inactivity.
Step-by-step guide for turning the copier's power on and off correctly.
Instructions on how to activate and exit the copier's energy-saving mode.
Guides on selecting and loading paper into the copier drawers.
Specifies the types and sizes of paper that can be used in the copier drawers.
Provides recommendations for paper and guidance on handling and storing it.
Instructions for adjusting drawer settings for different paper sizes.
Details acceptable original types, sizes, and maximum sheet capacity.
Guides on how to properly place originals on the glass platen for scanning.
Specific instructions for placing book-type originals on the glass.
Instructions and precautions for using the optional automatic document feeder.
Explains how to use the ADF for continuous feeding of originals.
Details the default settings applied when the copier is powered on or reset.
Step-by-step guide for performing a standard copying operation.
Instructions on how to reserve copy jobs for automatic execution later.
Guides on how to temporarily pause a copy job and resume it later.
Instructions for using the bypass tray for special paper types or sizes.
Specific steps for using the bypass tray with standard paper sizes.
Instructions for using the bypass tray with non-standard paper dimensions.
Explains different methods for selecting paper for copying.
Explains how the copier automatically selects paper based on original size.
Guides on manually selecting paper size when automatic detection fails.
Instructions for configuring custom paper sizes not listed in menus.
Guides on setting up the copier for originals of different sizes in the ADF.
Allows automatic calculation of zoom ratios for reduction/enlargement.
Guides on manually setting original and copy sizes for reduction/enlargement.
Instructions for using manual zoom buttons for reduction/enlargement.
Explains available finishing options and compatible finisher models.
Guides on sorting or grouping copies into separate sets.
Explains how to rotate and sort copied sets for output.
Details the process of automatically stapling copied sets.
Describes creating booklet-style documents with folding and stapling.
Instructions for using the optional hole punch unit on copies.
Explains different duplex copying options for originals and copies.
Default duplex setting for copying one-sided originals to one-sided copies.
Guides on copying one-sided originals to two-sided output.
Instructions for copying two-sided originals to two-sided copies.
Guides on copying two-sided originals to one-sided output.
Specific duplex copying instructions for book-type originals.
Guides on choosing modes based on original type for optimal image quality.
Explains automatic and manual ways to adjust copy image density.
Allows adjustment of the original's background density.
Details how to adjust the background density of originals.
Guides on adjusting the sharpness of copied images.
Introduces various functions for modifying images before copying.
Adjusts the image position to create binding margins.
Removes black stains from dirty or torn original edges.
Erases shadows in the center of book originals.
Copies facing pages onto separate sheets or duplex copies.
Reduces and copies multiple originals onto a single sheet.
Sorts copies for folding and binding like magazines.
Allows trimming or masking specific areas of an original for copying.
Reverses images horizontally for copying.
Inverts black and white areas of an image for copying.
Adjusts reproduction ratios independently for horizontal and vertical directions.
Adds blank or copied sheets as covers to copy sets.
Inserts special sheets at specified pages within copy sets.
Adds the scanning date and time to copies.
Adds page numbers at specified positions on copies.
Scans and stores multiple originals as a single job for copying.
Adjusts image orientation for 1-sided to 2-sided copies.
Selects feeding mode for the automatic document feeder.
Instructions for storing scanned or copied documents in the e-Filing system.
Detailed steps for saving documents into the e-Filing system.
Guides on copying originals and storing them to a share folder.
Explains how to use the on-screen keyboard for text input.
Overview of how to configure scanning settings via the touch panel.
Details the process of selecting scanning modes and destinations.
Instructions for scanning documents directly into the e-Filing system.
Guides on scanning documents and saving them to a file on a PC or network.
Instructions for scanning documents and sending them as email attachments.
Introduces the Internet Fax function and its benefits.
Explains the functionality of sending and receiving faxes via the internet.
Details how to configure resolution, image quality, and exposure for transmissions.
Guides on entering recipient email addresses directly or via address book/groups.
Steps for registering and using recipient information from the address book.
Instructions for creating and using groups of recipients for transmissions.
How to search for recipients using their ID number.
How to search for recipients by name or address.
Using an LDAP server to search for recipients via the network.
Sending the same original to multiple recipients simultaneously.
Details advanced functions like 2-sided original TX and priority transmission.
Instructions for sending two-sided originals using the ADF.
Explains the different protocols (POP3, SMTP) for receiving faxes.
Details receiving methods using POP3 and SMTP protocols.
POP3 Server Setup for Auto Receive.
Explains how to view and manage print, fax, and scan job statuses.
Details the information displayed for each job in the waiting status.
Describes how to view, delete, pause, and move print jobs.
Steps for removing print jobs from the list.
Instructions for pausing and resuming print jobs.
Guides on reordering the sequence of print jobs in the queue.
Explains how to perform a proof print before printing multiple copies.
Guides on printing documents using a password for security.
Explains how to use department codes for job management and restrictions.
How to check the status of fax and internet fax transmissions.
How to view the status of scan jobs.
Explains how to view print, fax, internet fax, and scan logs.
How to register contacts into the address book from log entries.
Instructions for printing the fax send/receive history.
Displays the current status of drawers and active printing.
Lists various error codes and their corresponding corrective actions.
Introduces the e-Filing system for managing documents electronically.
Details the capabilities of the e-Filing system for document management.
Guides on creating and configuring user boxes within the e-Filing system.
Instructions for modifying box names and passwords in e-Filing.
Steps for removing user boxes and their contents from e-Filing.
Guides on printing documents previously saved in the e-Filing system.
Introduces the template feature for saving and recalling function combinations.
Explains how to register and use function combinations as templates.
Guides on retrieving saved templates for copy, scan, or fax functions.
Step-by-step instructions for saving current settings as a new template.
How to modify existing template or user group data.
Instructions for removing unwanted templates or user groups.
Explains the meaning of blinking symbols on the touch panel and required actions.
Explains the "Add Paper" indicator and how to refill paper.
Indicates when the toner cartridge needs replacement.
Explains how to clear paper jams from various machine parts.
Instructions for refilling staple cartridges in optional finishers.
Guides on how to clear jammed staples from optional finishers.
Instructions for emptying the hole punch dust bin.
Alerts for service needs or scheduled maintenance requiring technician intervention.
Routine checks and cleaning procedures for daily upkeep.
Lists items to check daily for optimal equipment performance.
Instructions for cleaning the charger unit to maintain copy quality.
Provides solutions for common problems like failure to start or display issues.
Addresses problems with image density being too light or too dark.
Solutions for issues causing stained or blurred images on copies.
Troubleshooting for partially missing images or functions that cannot be set.
Lists the technical specifications of the main copier unit.
Detailed technical specifications for the copier model.
Details the specifications for optional equipment like feeders and finishers.
Technical details for the optional ADF unit.
Technical specifications for the MJ-1024 saddle-stitch finisher.
Technical specifications for the MJ-1023 multi-staple finisher.
Technical specifications for the MJ-1022 single-staple finisher.
Lists the items included in the product package.
Part 1 of a table detailing compatible copying function combinations.
Part 2 of a table detailing compatible copying function combinations.
| Print Speed (Black) | 45 ppm |
|---|---|
| Copy Speed (Black) | 45 cpm |
| Fax Modem Speed | 33.6 Kbps |
| Monthly Duty Cycle | 150, 000 pages |
| Standard Paper Capacity | 1, 150 sheets |
| Automatic Duplexing | Yes |
| Duplex Printing | Yes |
| Functions | Copier, Printer, Scanner |
| Scan Resolution | 600 dpi |
| Max Paper Size | A3 |
| Connectivity | Ethernet, USB |
| Original Size | A3 |
| Memory | 1 GB |