M
moorerobertJul 27, 2025
What to do if my Toshiba All in One Printer does not start?
- EEdward LeeJul 27, 2025
Make sure the power cord is fully inserted. Also, ensure that the cover is properly closed.
What to do if my Toshiba All in One Printer does not start?
Make sure the power cord is fully inserted. Also, ensure that the cover is properly closed.
Why does my Toshiba Copier jam so much?
If you're experiencing frequent paper jams with your Toshiba Copier, here's what to check: * If the message “Check paper size setting on control panel for drawer N (Bypass)” appears, ensure the paper size in the drawer or bypass tray matches the setting on the equipment. * If the paper exceeds the indicated line inside the side guide, remove some sheets so the paper height doesn't exceed the line. * Make sure there's an appropriate space between the side guide and the paper in the drawer or bypass tray, and that the paper is placed straight along the side guide. * Ensure all jammed paper has been removed, following the guidance on the touch panel to locate any hidden pieces.
Safety guidelines and procedures for installing and moving the equipment.
Precautions and safety measures for operating the multifunctional system.
Safety instructions for performing maintenance and inspection procedures.
Guidelines for safely handling consumables and supplies for the equipment.
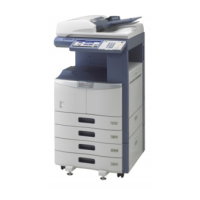
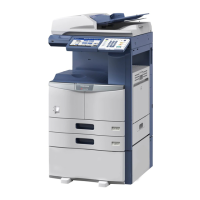
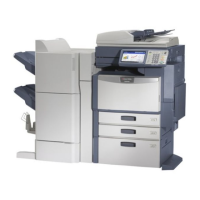
Details and identification of the main parts and components of the equipment.
Procedures for powering the equipment on and off safely.
Information on how to use and manage the equipment's energy saving features.
Instructions for loading and configuring different types of paper in the equipment.
Guidance on preparing and placing originals for copying.
Step-by-step instructions for performing the copying process.
Instructions for using the bypass tray for special paper or sizes.
Function to check copy settings before mass copying.
How to select the appropriate paper source for copying.
Procedures for enlarging or reducing copy sizes.
Options for post-copy processing like sorting, stapling, and hole punching.
Instructions for performing double-sided copying.
Selecting modes for optimal image quality based on original type.
Adjusting the density of copies for optimal output.
Adjusting the background density of the original.
Adjusting the sharpness of the image outline.
Creating margins for binding by shifting the image.
Eliminating black stains along dirty or torn original edges.
Erasing shadows in the center of book originals.
Copying facing pages of a book onto separate sheets or duplex.
Reducing and copying multiple originals onto a single sheet.
Sorting originals for folding and binding like magazines or booklets.
Functions for trimming, masking, mirror image, and negative/positive reversal.
Setting different reproduction ratios for X and Y directions.
Inserting special sheets as cover sheets into copies.
Inserting special sheets into specified pages of a copy set.
Adding the date and time of scanning to copies.
Adding page numbers to the copies.
Copying different kinds of originals at one time with optimal settings.
Adjusting copy direction for lengthwise originals.
Rotating the back side of original for 180 degrees.
Selecting paper feeding mode for the Automatic Document Feeder.
Storing, printing, and managing documents obtained by copying, printing, and scanning.
Procedure for setting up user boxes for document management.
Modifying settings such as names and passwords for user boxes.
Steps to delete unnecessary user boxes and their contents.
Saving scanned original data and copy mode settings into e-Filing.
Instructions for printing documents stored in e-Filing.
Procedures for deleting folders and documents from e-Filing.
Registering and recalling frequently used function combinations.
Creating and registering user groups and templates.
Modifying names, passwords, and automatic start settings.
Retrieving registered templates for use in operations.
Procedures for removing user groups and registered templates.
Overview of job status monitoring.
Checking the status of print jobs, including pausing and moving.
Checking the status of scan jobs.
Viewing histories of copy, print, scan, fax, and email jobs.
Displaying and managing print job errors.
List of error codes and their corresponding solutions.
Overview of various blinking symbols on the equipment's display.
Indication on the touch panel when the paper drawer is empty.
Symbol indicating the toner cartridge needs replacement.
Symbol indicating the used toner bag needs disposal.
Symbols indicating paper misfeed locations and how to clear them.
Symbol indicating the need for service or maintenance.
Message indicating the need to check or replace staple cartridges.
Message for checking staples in the Saddle Stitch Unit finisher.
Message indicating a jammed stapler in the finisher.
Indicates stapler readiness or potential jam/out-of-staples condition.
Message for examining stapler issues in the Saddle Stitch Unit.
Indicates readiness or issues with the Saddle Stitch Stapler.
Message indicating the hole punch dustbin is full.
Message indicating an interruption due to power failure.
Message indicating that periodic maintenance is required.
Error message for mismatch between paper size and setting.
Message indicating the need to restart the equipment.
Routine cleaning and checks for optimal scanner performance.
Common problems and their solutions, including when to call for service.
Detailed technical specifications of the e-STUDIO352/452 model.
Technical specifications for various optional equipment.
List of items included in the product package.
Table showing compatible combinations of copying functions.
| Print Speed | 45 ppm |
|---|---|
| Copy Speed | 45 cpm |
| Duplex Printing | Yes |
| Original Size | A3 |
| Paper Capacity | 1, 150 sheets |
| Connectivity | USB 2.0, Ethernet |
| Functions | Print, Copy, Scan |
| Zoom | 25% - 400% |
| Scan Resolution | 600 dpi |