EasyManua.ls Logo

Toshiba e-studio 4540c - User Manual

Toshiba e-studio 4540c
338 pages
Print Icon
To Next Page IconTo Next Page
Loading...
File No. SME11002600
R110621J9200-TTEC
Ver00_2011-08

Table of Contents

Other manuals for Toshiba e-studio 4540c

Question and Answer IconNeed help?

Do you have a question about the Toshiba e-studio 4540c and is the answer not in the manual?

Toshiba e-studio 4540c Specifications

General IconGeneral
BrandToshiba
Modele-studio 4540c
CategoryAll in One Printer
LanguageEnglish

Summary

Trademarks

Revision Record

Purpose of the Imaging Manual

Precautions in Servicing

Provides precautions for service technicians and general servicing guidelines.

Icons

Explains the meaning of icons used throughout the manual for clarity.

1. General Adjustments - Copying, Printing and e-Filing (Output from Box)

1.1 To Obtain a Darker Image

Adjust image density for darker copies.

1.3 To Achieve the Image Quality Most Suitable for the Paper Used

Optimize image quality based on paper type to reduce blur/graininess.

1.5 To Correct Out-of-Registration Colors

Correct color misalignment in prints for better registration.

2. Copier-specific Adjustments

2.1 To Copy Text Clearly (To eliminate faint, smudged or blurred text)

Ensure clear, sharp text in copies, eliminating blur.

2.2 To Closely Match the Color Balance of the Original

Align copy color balance with original for accurate reproduction.

2.8 To Eliminate Moiré

Eliminate moiré patterns in copied images.

3. Printer-specific Adjustments

3.1 To Maintain a Steady Color Balance

Maintain consistent color balance on printouts over time.

3.7 To Easily Adjust the Overall Brightness

Adjust overall brightness of print images easily.

3.10 To Obtain a Sharper Print Image

Enhance sharpness for clearer print images.

4. e-Filing-specific Adjustments

4.1 To Clearly Store a B;W Image in the Auto Color Mode

Store B/W images clearly in Auto Color mode with threshold adjustment.

4.2 To Store an Original while Reducing the File Size

Reduce file size of scanned images by adjusting compression.

4.9 Appendix

Appendix providing supplementary information for e-Filing settings.

5. Scanning-specific Adjustments

5.1 To Clearly Scan Text (To reduce noise around text)

Scan text clearly by reducing noise around it.

5.4 To Scan the Original, while Reducing the File Size

Reduce scanned file sizes by adjusting compression or resolution.

5.9 To Eliminate Shading around Scanned Images

Eliminate white void or shading around scanned images.

6. Printer-specific Adjustments (GA-1211)

6.1 To Maintain a Steady Color Balance (Calibration)

Maintain steady color balance through periodic calibration.

6.3 To Print in Desired Color Balance (How to Use Color Editor)

Adjust color balance and print using the Color Editor.

6.5 To Adjust Tone of Gray or Black Area

Adjust the tone of gray and black areas for consistent reproduction.
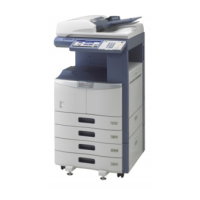
Related product manuals