
B
Brendan ChandlerAug 15, 2025
What causes a Toshiba DC Drive to display Heavy Load?
- EErika OconnorAug 15, 2025
A Heavy Load error on a Toshiba DC Drive indicates that the load is too heavy for the motor.
What causes a Toshiba DC Drive to display Heavy Load?
A Heavy Load error on a Toshiba DC Drive indicates that the load is too heavy for the motor.
What does a Comm1 Error mean on my Toshiba DC Drive?
A Comm1 Error on a Toshiba DC Drive suggests that the ASD is improperly programmed.
Why is my Toshiba DC Drive overheating?
The Toshiba DC Drive may be overheating because the cooling fan is not working.
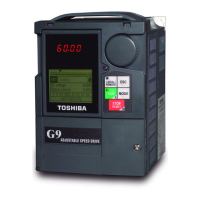
What causes Over-Current in Toshiba G9?
Over-current in Toshiba DC Drives can be caused by the ASD output to the motor being connected incorrectly.
Why is my Toshiba DC Drive showing an External Fault?
An External Fault in a Toshiba DC Drive system indicates that one of the ASDs in a multiple ASD system has faulted, causing the non-faulted ASD(s) to incur the External Fault.
Why does my Toshiba DC Drive show Over-Torque?
The Toshiba DC Drive may show Over-Torque because it is not correctly matched to the application.
Why is my Toshiba DC Drive showing ASD Overload?
The carrier frequency might be too high.
What causes a Control Under-Voltage error on a Toshiba DC Drive?
A Control Under-Voltage error on a Toshiba DC Drive may be caused by a defective control board.
What does a Pre Over-Torque error mean on Toshiba G9?
A Pre Over-Torque error on Toshiba DC Drives indicates that Parameter F616 requires an adjustment.
What causes a Brake Fault in Toshiba G9?
A Brake Fault in Toshiba DC Drives can be caused by pulses received from the encoder during torque proving.
Contains critical disclaimers and warranty information.
Describes the symbol indicating potential personal injury hazards.
Defines DANGER, WARNING, and CAUTION signal words used in the manual.
Guidelines for selecting a safe and suitable installation location.
Specifies secure and upright installation in a well-ventilated area.
Emphasizes that installation and operation must be by qualified personnel.
Explains the Autotune feature for optimizing ASD response to motor parameters.
Discusses motor cooling and torque requirements at lower speeds.
Details ASD trip conditions when design specifications are exceeded.
Explains how Vector Control produces high torque at low speeds.
Important considerations before connecting the ASD and motor to power.
Thermal specifications and installation guidelines for mounting the ASD.
Safety precautions for handling and using the 120 VAC PCB.
Description of analog and discrete input terminals and their functions.
Description of analog and discrete output terminals and their functions.
Step-by-step guide to operating the motor locally via the EOI.
Procedure for viewing and changing default parameter settings.
Overview of the Startup Wizard and how to exit or proceed.
Parameter for setting the ASD operating mode (Hoist, Traverse, Custom).
Defines the primary source for command input to the ASD.
Establishes the source of the frequency control input for the ASD.
Guide to accessing and modifying motor control parameters directly.
Lists ASD alarm codes, descriptions, and possible causes.
Details on physical dimensions and conduit plate configurations.
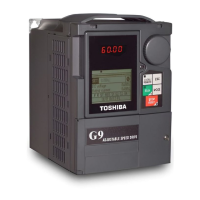
| Model | G9 |
|---|---|
| Category | DC Drives |
| Control Type | Digital |
| Ambient Temperature | 0 - 40°C (32 - 104°F) |
| Cooling Method | Fan-cooled |
| Communication | Optional |
| Communication Interface | Profibus |
| Protection | Overcurrent, Overvoltage, Undervoltage, Overtemperature |
| Humidity | 5-95% (non-condensing) |