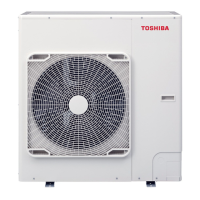
Outdoor Unit
Installation Manual
– 10 –
(1)
(3)
(2)
5 Refrigerant piping
■ Refrigerant Piping
1. Usethefollowingitemsfortherefrigerant
piping.
Material:Seamlessphosphorousdeoxidized
copperpipe.
ø6.35,ø9.52,ø12.7Wallthickness0.8mmor
more
ø15.88Wallthickness1.0mmormore
Donotuseanycopperpipeswithawall
thicknesslessthanthesethicknesses.
Removing service panel
• Remove the screws at 3 locations and slide the
service panel down. Next, detach the right-side
claws followed by left-side claws to remove the
service panel.
When doing this, pulling the service panel towards
the front could damage the claws.
When attaching the service panel, attach the left
claws followed by the right claws and lift the service
panel upwards and secure it with screws in the
3 locations.
<HWT-80,110,140>
■ Knockout of Pipe Cover
Knockout procedure
<HWT-80,110,140>
■ Optional Installation Parts
(Locally procured)
<HWT-80,110,140>
■ Refrigerant Piping
Connection
CAUTION
Takenoteofthese4importantpointsbelowfor
pipingwork
1. Keep dust and moisture away from inside the
connecting pipes.
2. Tightly connect the connection between pipes
and the unit.
3. Evacuate the air in the connecting pipes using a
VACUUM PUMP.
4. Check for gas leaks at connection points
<HWT-40,60>
Left-side
claws
Service panel
Right-side panel
Right-side
claws
A
Rear direction
Supplied protective bush
Supplied passage hole guard material
* Attach the guard material securely so that it
does not come loose.
Pipe cover
Down direction
• The hydro/outdoor connecting pipes can be
connected in 4 directions.
Take off the knockout part of the pipe cover through
which pipes or wires will pass through the base plate.
• Detach the pipe cover and tap on the knockout
section a few times with the shank of a screwdriver.
A knockout hole can easily be punched.
• After punching out the knockout hole, remove burrs
from the hole and then install the supplied protective
bush and guard material around the passage hole to
protect wires and pipes.
Be sure to attach the pipe covers after pipes have
been connected. Cut the slits under the pipe covers
to facilitate the installation.
After connecting the pipes, be sure to mount the
pipe cover. The pipe cover is easily mounted by
cutting off the slit at the lower part of the pipe cover.
* Be sure to wear heavy work gloves while working.
Flaring
1. Cut the pipe with a pipe cutter.
Be sure to remove burrs that may cause a gas leak.
2. Insert a flare nut into the pipe, and then flare the
pipe.
Use the flare nuts supplied with the Air to Water Heat
Pump or those for R32.
Insert a flare nut into the pipe, and flare the pipe.
Use the flare nuts supplied with the Air to Water Heat
Pump or flare nuts for R32 or R410A.
However, the conventional tools can be used by
adjusting the projection margin of the copper pipe.
Projection margin in flaring: B (Unit: mm)
Rigid (Clutch type)
Outerdia.of
copper pipe
R32 or R410A tool used
6.4
0 to 0.5
12.7
15.9
Flaring diameter size: A (Unit: mm)
Outerdia.ofcopperpipe A+
0
–0.4
6.4
9.1
12.7
16.6
15.9
19.7
Side direction
Front direction
Parts name Q’ty
A
Refrigerant piping
Liquid side: Ø6.4 mm dia
Gas side: Ø15.9 mm dia
One each
B
Pipe insulating material
(polyethylene foam, 10 mm thick)
1
C
Putty, PVC tape
One each
Piping connection
Liquid side
Outer diameter Thickness
6.4 mm 0.8 mm
Gas side
Outer diameter Thickness
12.7 mm 0.8 mm
15.9 mm 1.0 mm
Parts name Q’ty
A
Refrigerant piping
Liquid side: Ø6.4 mm dia
Gas side: Ø12.7 mm dia
One each
B
Pipe insulating material
(polyethylene foam, 6 mm thick)
1
C
Putty, PVC tape
One each
B
Knockout section
19-EN
20-EN
 Loading...