29
Adjustment of respective parts
4.Stitch width
(3D only)
[Condition]
Pattern selection dial: "4"
[Diagnosis]
1. Move the stitch width lever to left till the lever
is stopped.
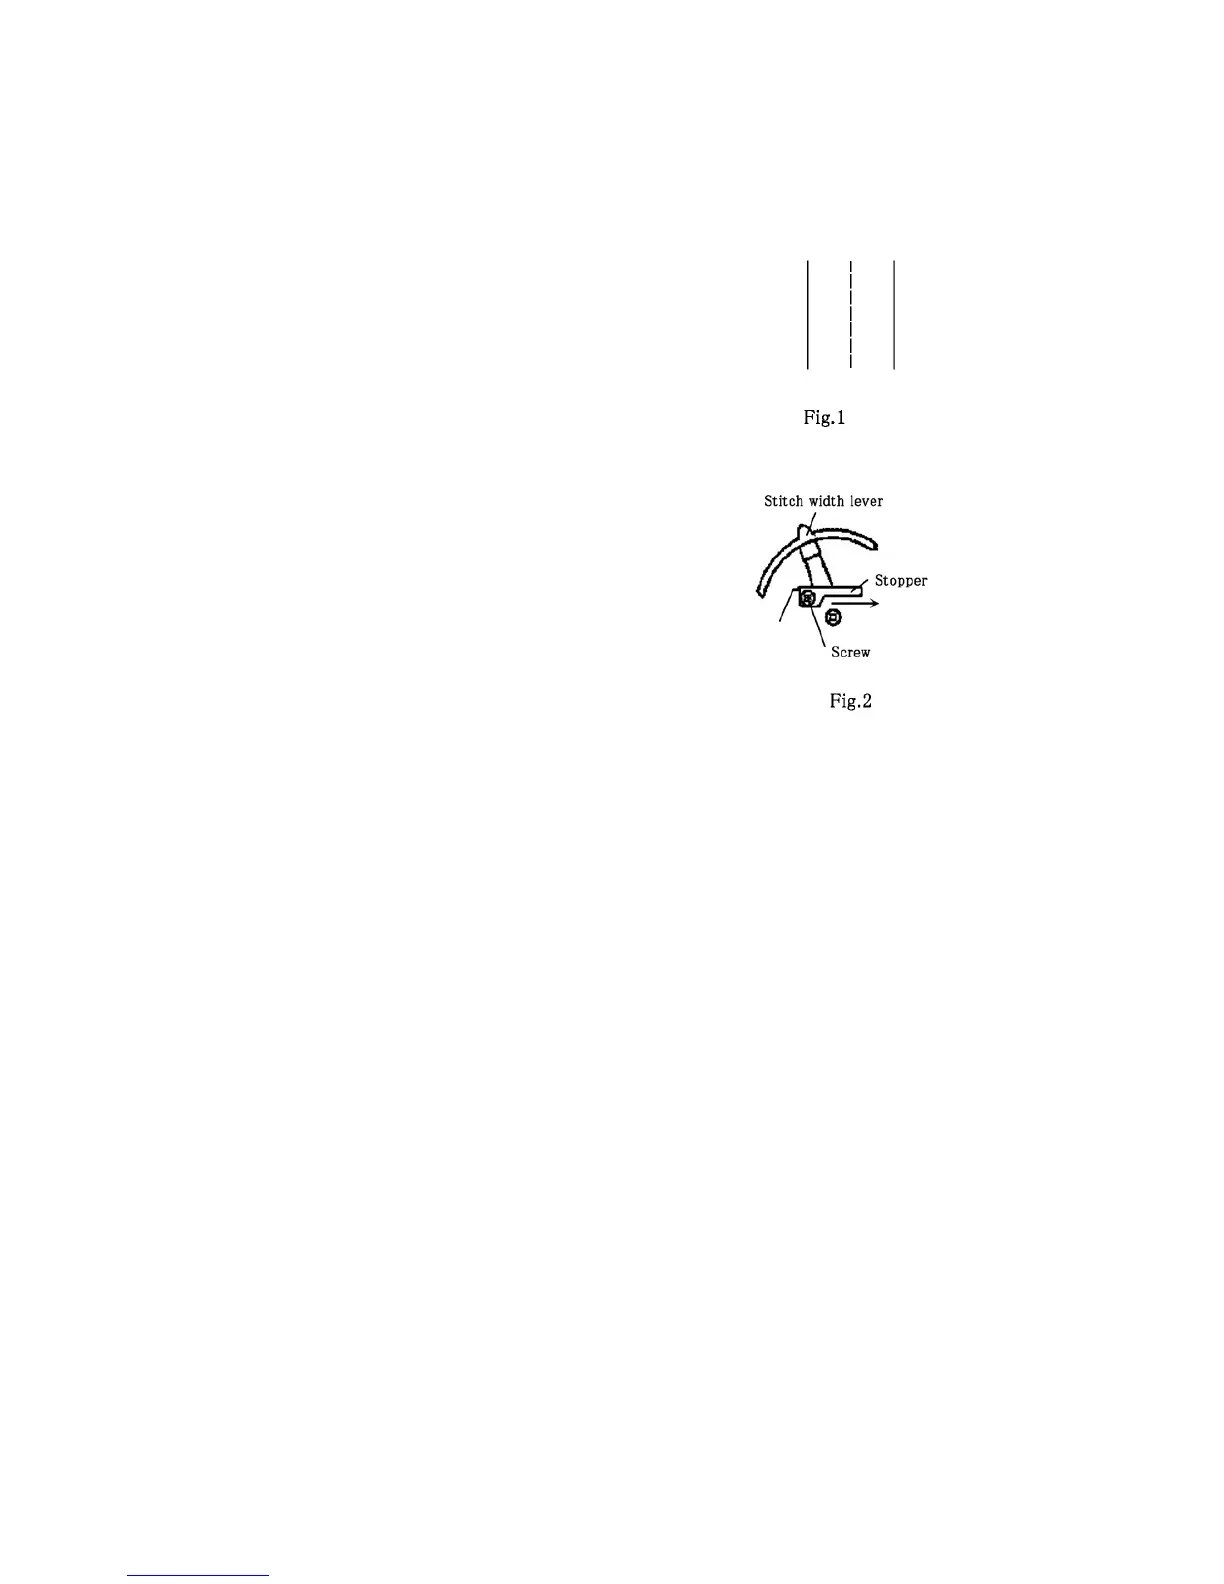
2. Check the state of stitch after sewing a fabric.
(Fig. 1)
[Standard]
Stitches must be straight. (Fig. 1)
* If the stitches become zigzag as a result of
diagnosis, adjust this.
[Adjustment]
1. Remove the external panels and others to
see the adjusting section. (See:page.45)
2. Loosen the screw, move the stitch width lever
to left till the lever is stopped.(Fig. 2)
3. Push the stitch width lever till it contacts
stopper, them tighten the screw.(Fig. 2)
* Repeat the adjustment till the standard is met.