26
Adjustment of respective parts
2.Timing between needle and hook
Amount of needle elevation
[Condition]
<SD>
Pattern selection dial: "5"
<2D>
Pattern selection dial: "3"
<3D>
Pattern selection dial: "4"
[Diagnosis]
1. Remove the extension table, and open the
shuttle cover.
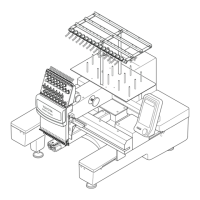
2. When the hook blade point is aligned with the
needle center by rotating the handweel, mea-
sure the travel distance (A) of needle bar,
regarding the lower dead point of needle bar
as 0.(Fig. 1)
[Standard]
A = 1.85 ± 0.15 mm (Fig.1)
* Make adjustment if the diagnosis result fails to
meet the standard.
[Adjustment]
1. Remove external panels and others to allow
sewing machine seen from the bottom.
(See:page.45)
2. Loosen the screw at the right side of lower
shaft, adjust the position of hook.(Fig. 2)
3. Tighten the screw.(Fig. 2)
* Repeat the adjustment till the standard is met.
Clearance between needle and hook
[Condition]
<SD>
Pattern selection dial: "6"
<2D>
Pattern selection dial: "4"
<3D>
Pattern selection dial: "3"
Stitch width lever: "0"
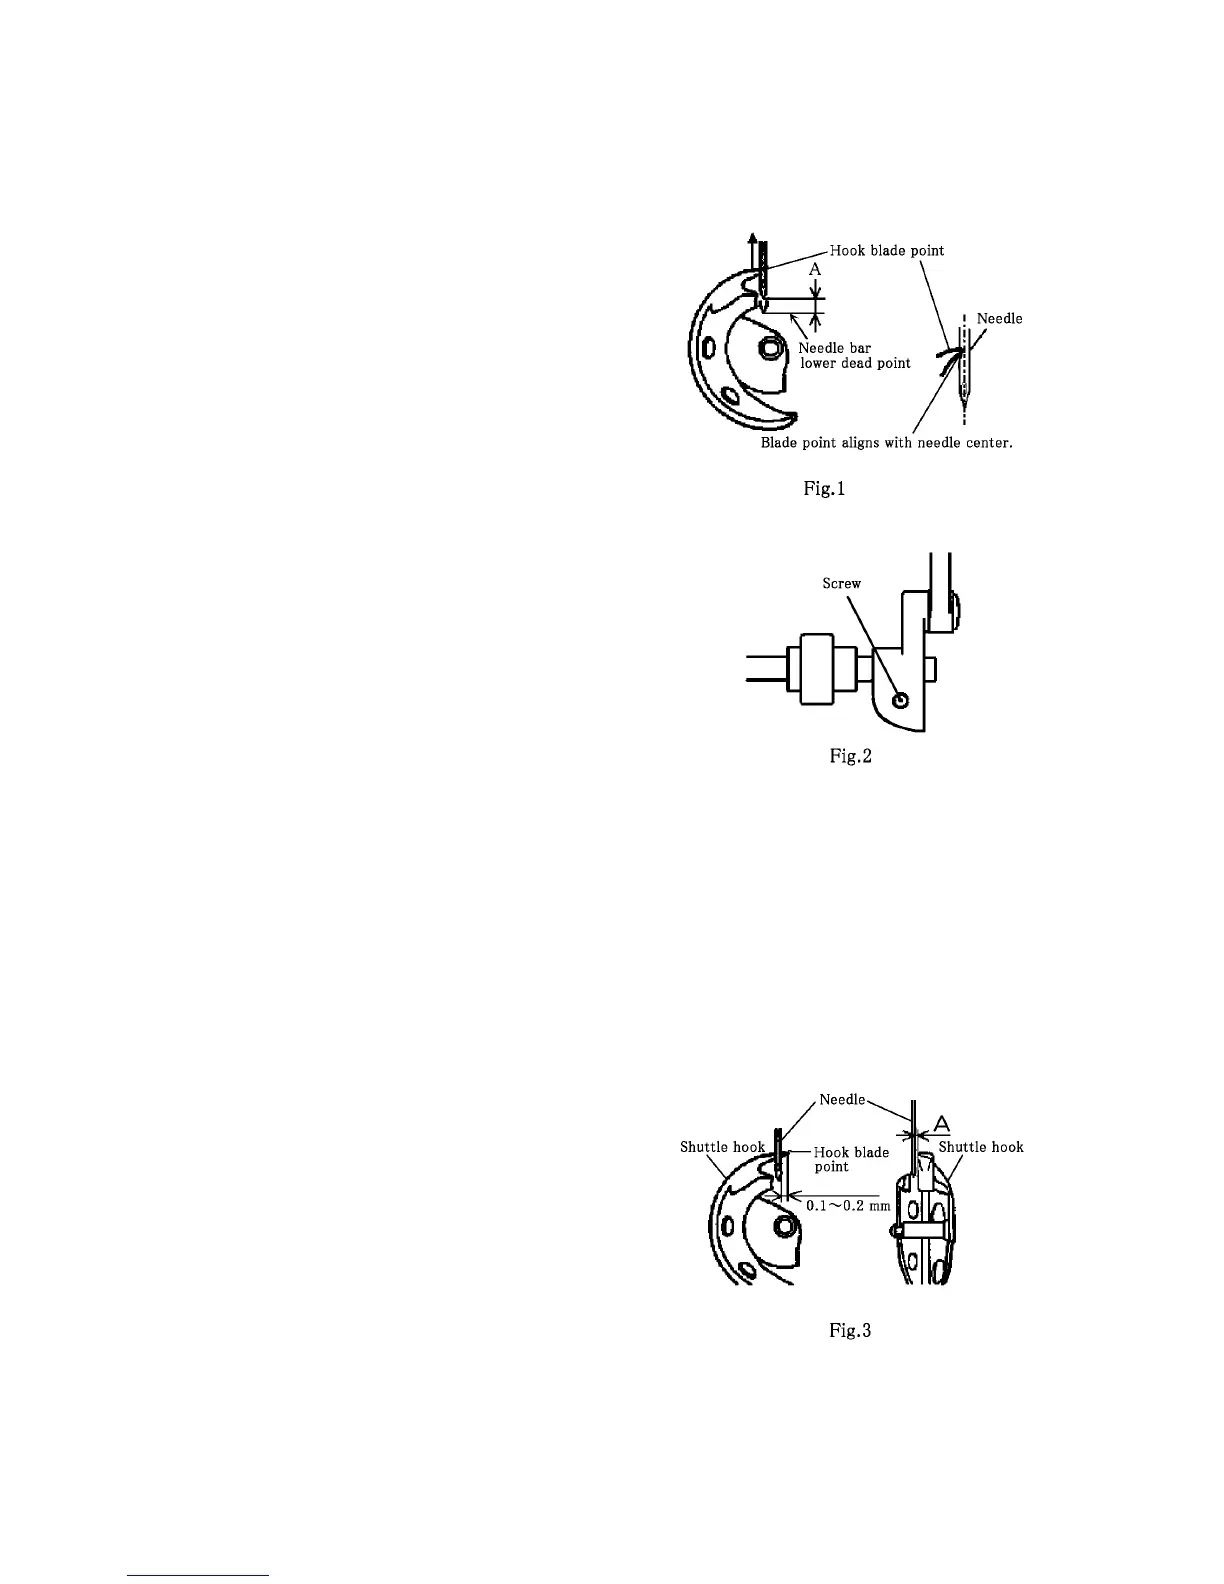
[Diagnosis]
1. Turn the handweel beyond the lower dead
point of needle bar. When the hook blade
point has protruded by 0.1 to 0.2 mm from the
side face of needle, measure the clearance
(A) between the needle and the hook.(Fig. 3)