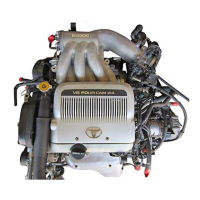
(b) Using a piston ring compressor, push the correctly numbered
piston and connecting rod assemblies into each cylinder with
the front mark of the piston facing forward.
6. INSTALL CONNECTING ROD CAPS
A. Place connecting rod cap on connecting rod
(a) Match the numbered connecting rod cap with the connecting
rod.
(b) Install the connecting rod cap with the front mark facing
forward.
B. Install connecting rod cap nuts
HINT:
•The connecting rod cap nuts are tightened in two
progressive steps (steps (b) and (d)).
•If any connecting rod bolt is broken or deformed, replace
them.
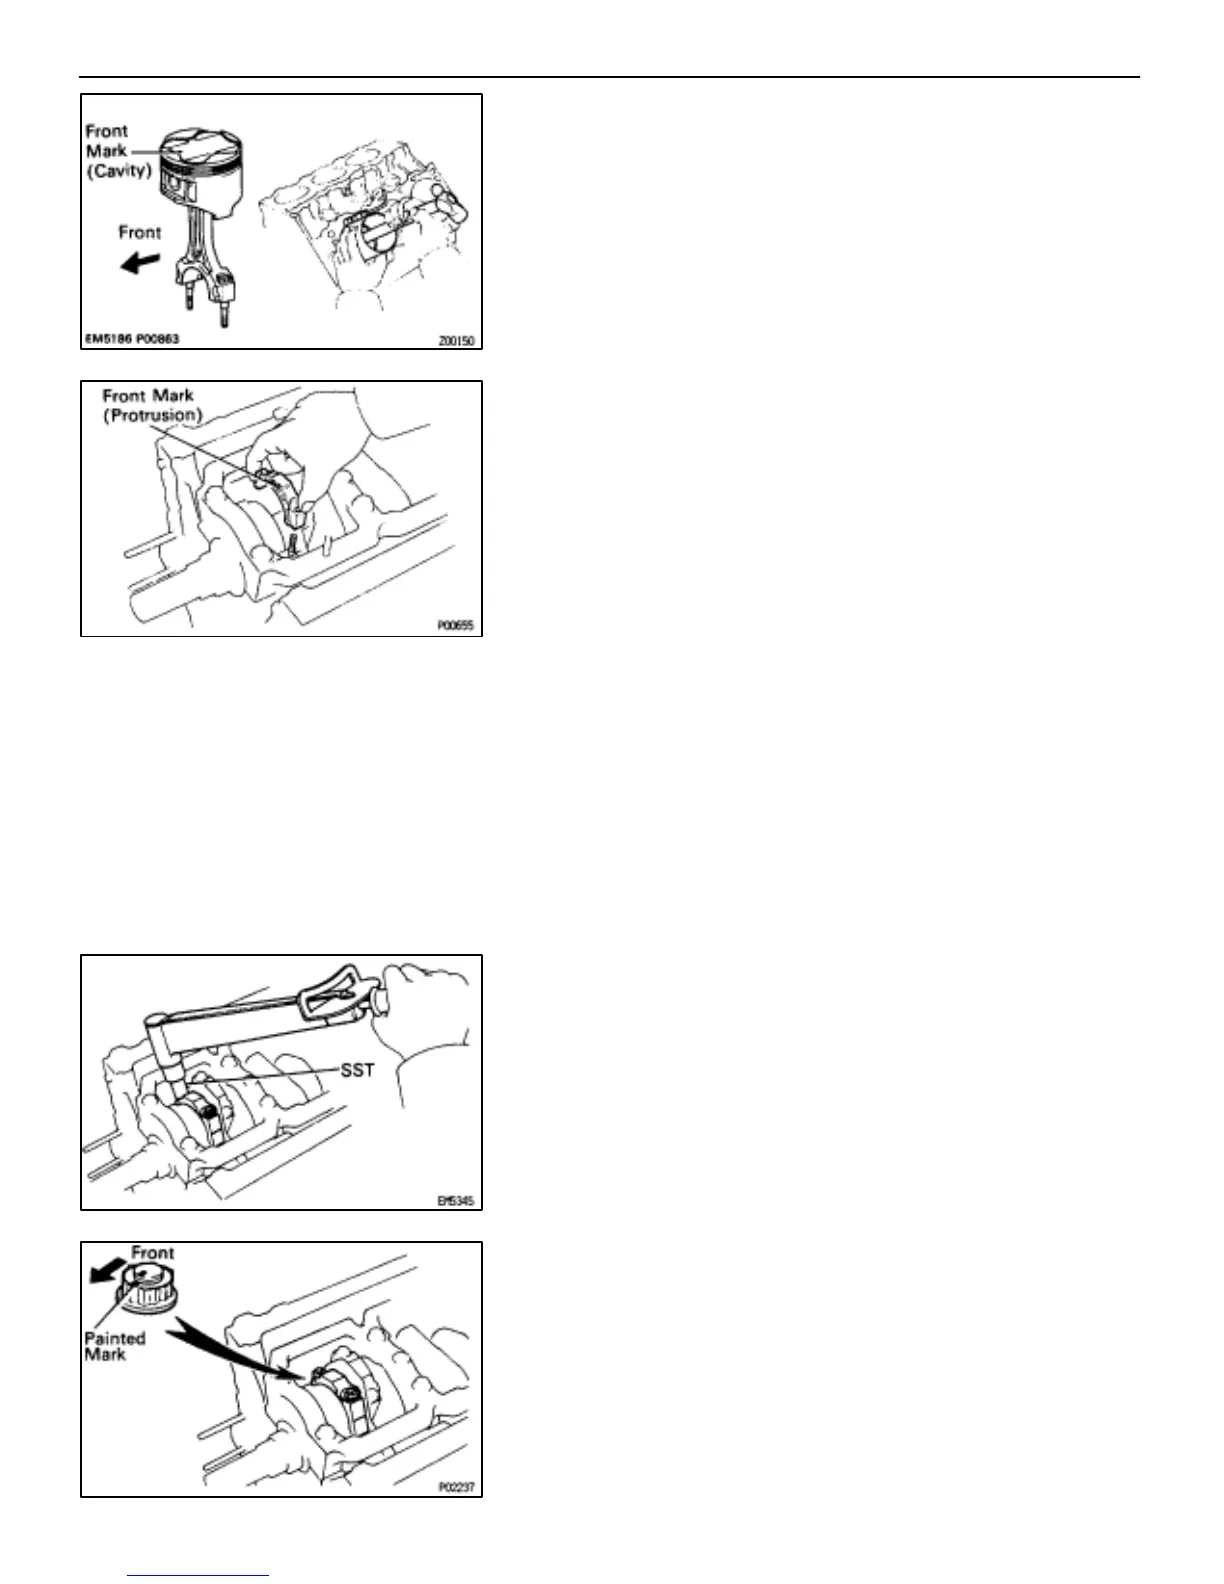
(a) Apply a light of engine oil on the threads and under the nuts
of the connecting rod cap.
(b) Using SST, install and alternately tighten the nuts of the
connecting rod cap in several passes.
SST 09011–38121
Torque: 25 N⋅m (250 kgf⋅cm, 18 ft⋅lbf)
If any one of the connecting rod cap nuts does not meet the
torque specification, replace the cap nut.
(c) Mark the front of the connecting rod cap nut and bolt with
paint.
EG–124
–ENGINE TROUBLESHOOTING ENGINE MECHANICAL
 Loading...