84
Chapter 13
For example, my house covers a large area. The wireless coverage of the router I’m
using (the root router) is limited. I want to use an extended router to extend the wireless
network of the root router.
Note:
• WDS bridging only requires configuration on the extended router.
• WDS bridging function can be enabled either in 2.4GHz frequency or 5GHz frequency for a dual-band router. We use
the WDS bridging function in 2.4GHz frequency as example.
1. Visit http://tplinkwifi.net, and log in with your TP-Link ID or the password you set for
the router.
2. Go to Advanced > System Tools > System Parameters. Focus on 2.4GHz/5GHz WDS
section.
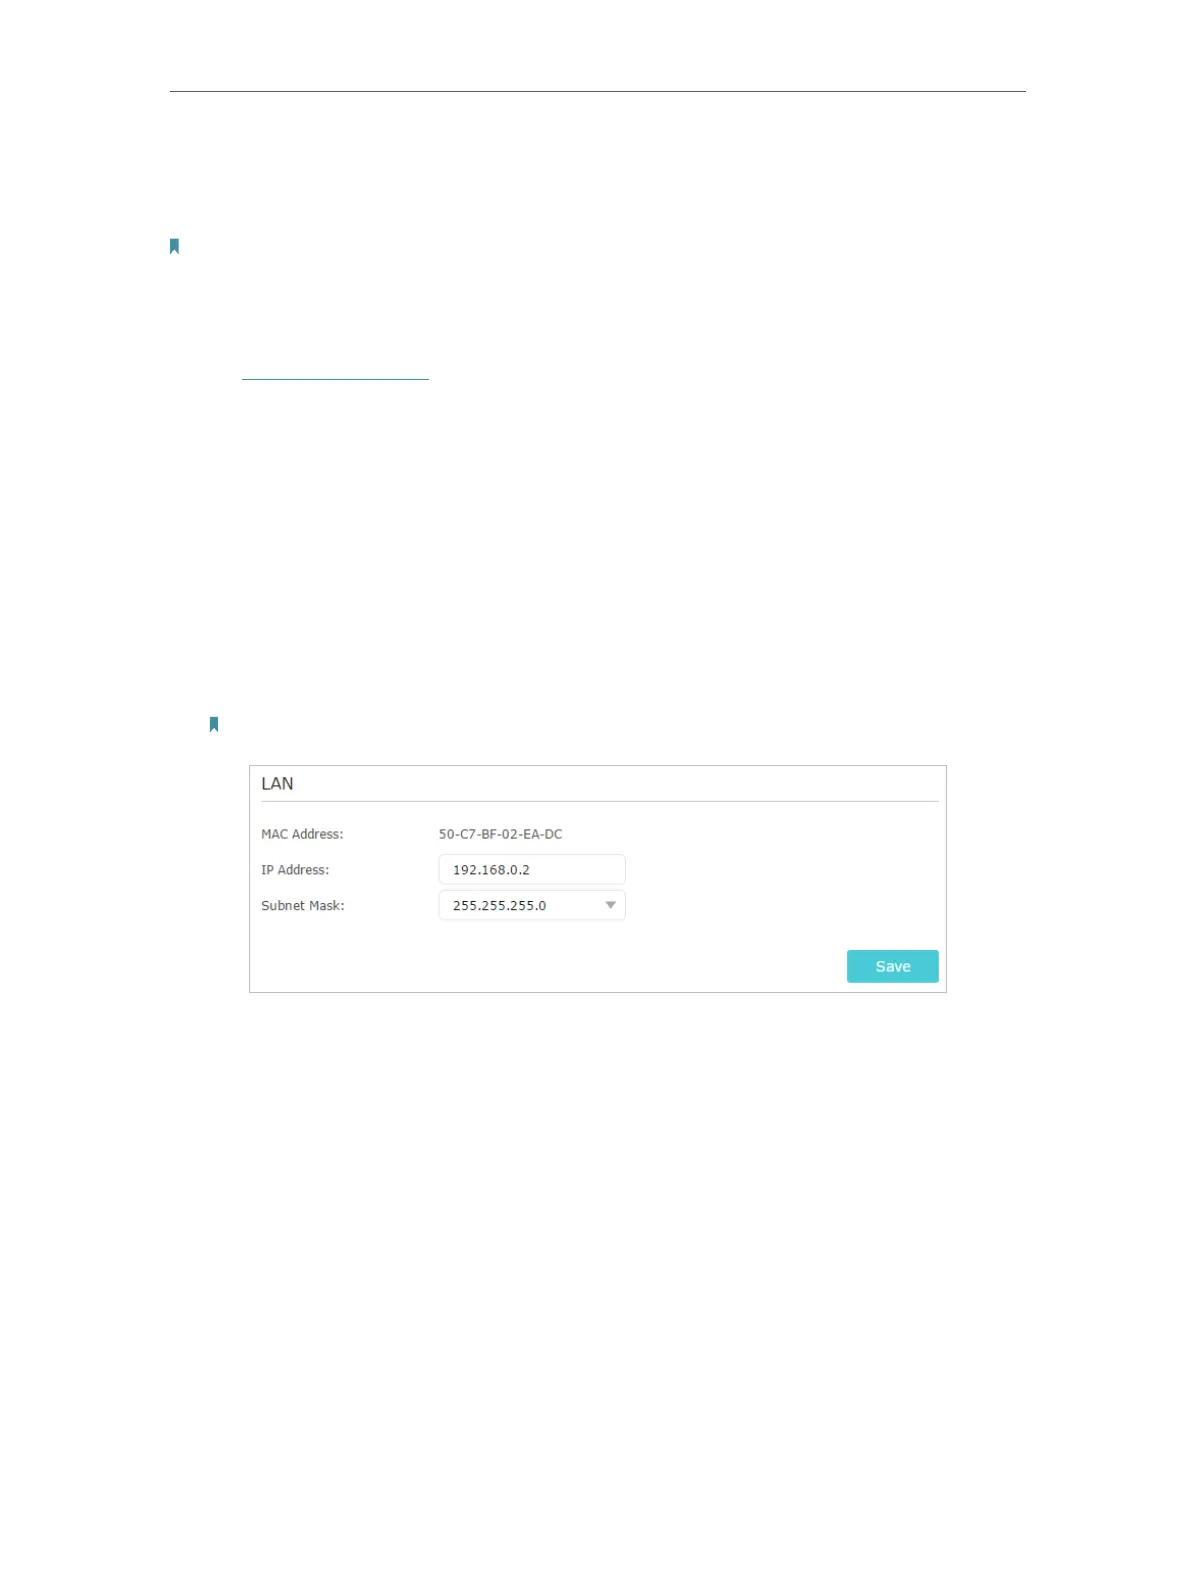
3. Configure the IP address of the router:
1 ) Go to Advanced > Network > LAN, configure the IP address of the extended
router to be in the same subnet with the root router; (For example, the IP address
of the root router is 192.168.0.1, the IP address of the extended router can be
192.168.0.2~192.168.0.254. We take 192.168.0.2 as example.)
2 ) Click Save.
Note: Log in to the web management page again if the IP address of the router is altered.
4. Survey the SSID to be bridged:
1 ) Go to Advanced > System Tools > System Parameters and focus on the 2.4GHz
WDS section, click Enable WDS Bridging.
2 ) Click Survey, locate the root router’s SSID and click Survey (Here we take
TP-Link_4F98 as example). Keep the WDS mode as default.
3 ) If the root router has the wireless password, you should enter the wireless
password of the root router.
4 ) Click Save.