■
Option2
:
Ceiling Mounting
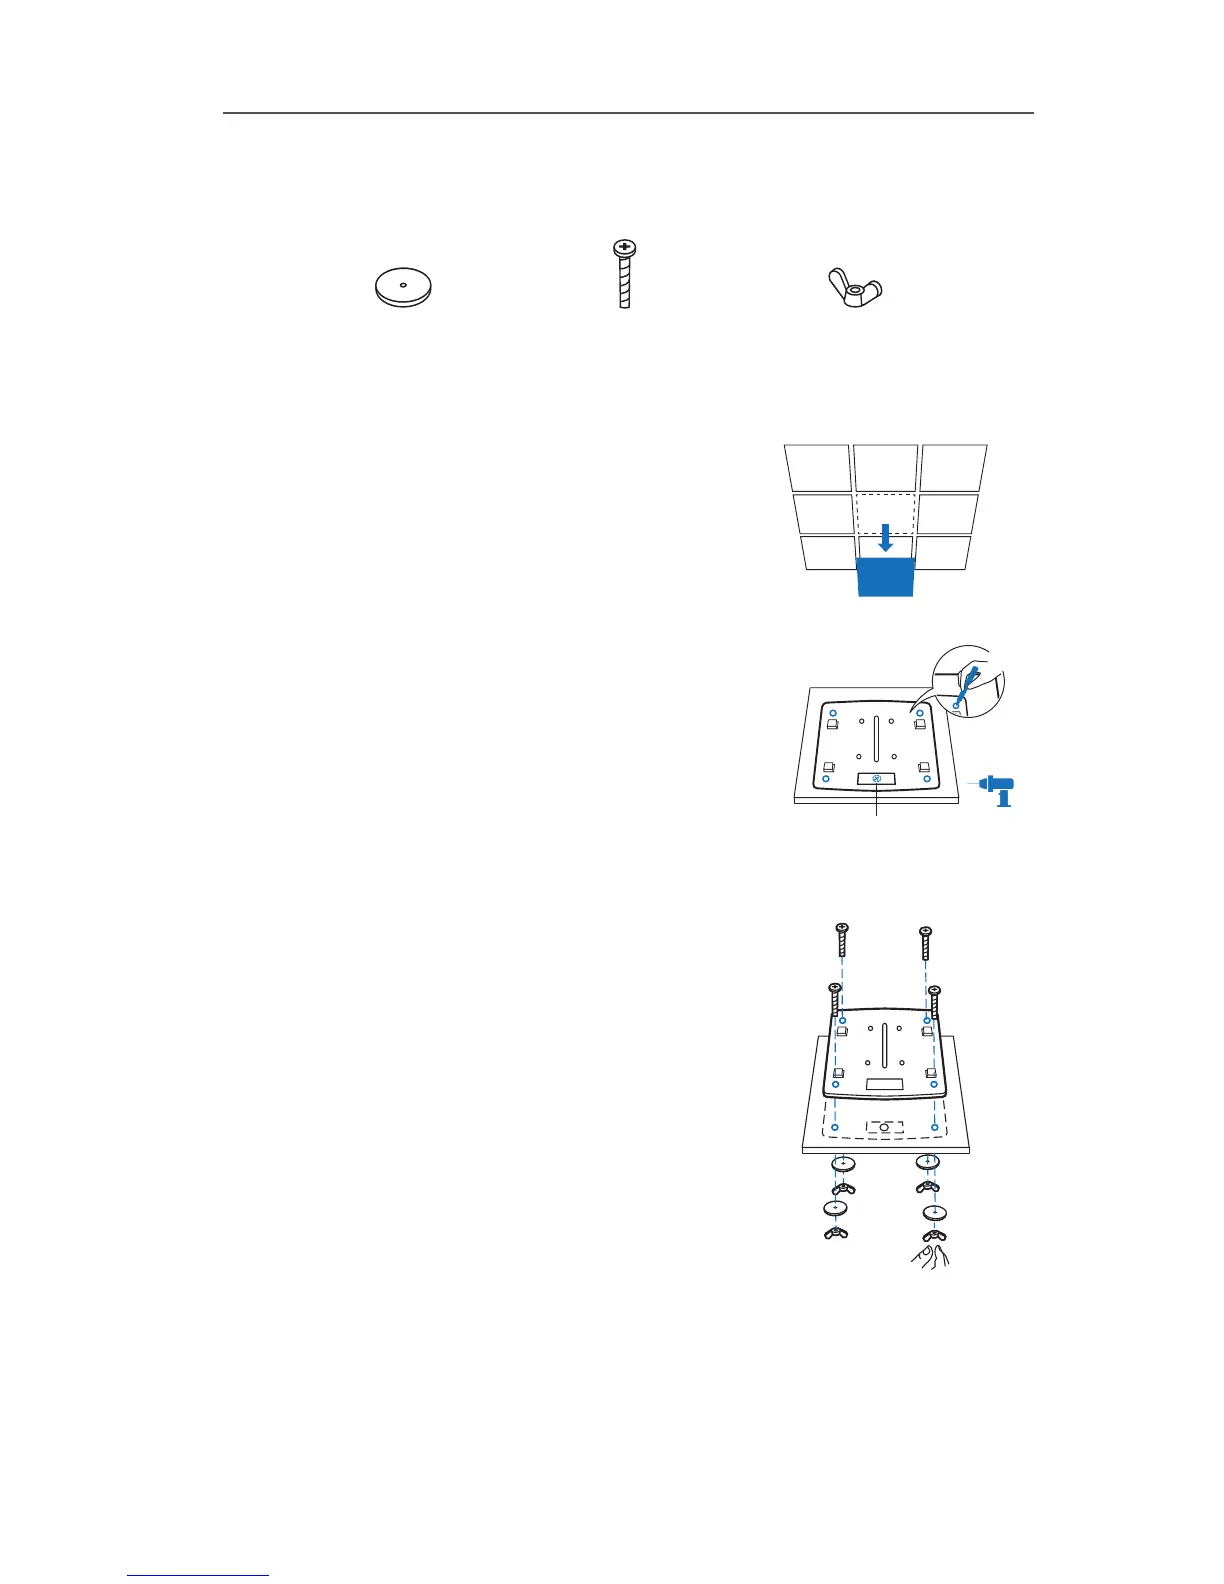
Follow the steps below to install the EAP with the provided accessories:
1
Remove the ceiling tile.
2
Place the mounting bracket in the center of
the ceiling tile. Mark the four positions of
the screw holes and a hole for the Ethernet
cable to feed through. Drill four 4mm holes
for the screws and a 10mm hole for the
Ethernet cable.
X4
3
Secure the mounting bracket to the ceiling
tile using four M3x30 pan-head screws,
washers and wing nuts.
Washers
(Qty.4)
M3×30 Pan-head Screws
(Qty.4)
Wing Nuts
(Qty.4)
Hole for Ethernet cable