EasyManuals Logo

TP-Link Jetstream Series Installation Guide

TP-Link Jetstream Series
20 pages
To Next Page IconTo Next Page
To Previous Page IconTo Previous Page
Page #15 background imageLoading...
Page #15 background image
JetStream Smart Switch
12 Connection
Chapter 3 Connection
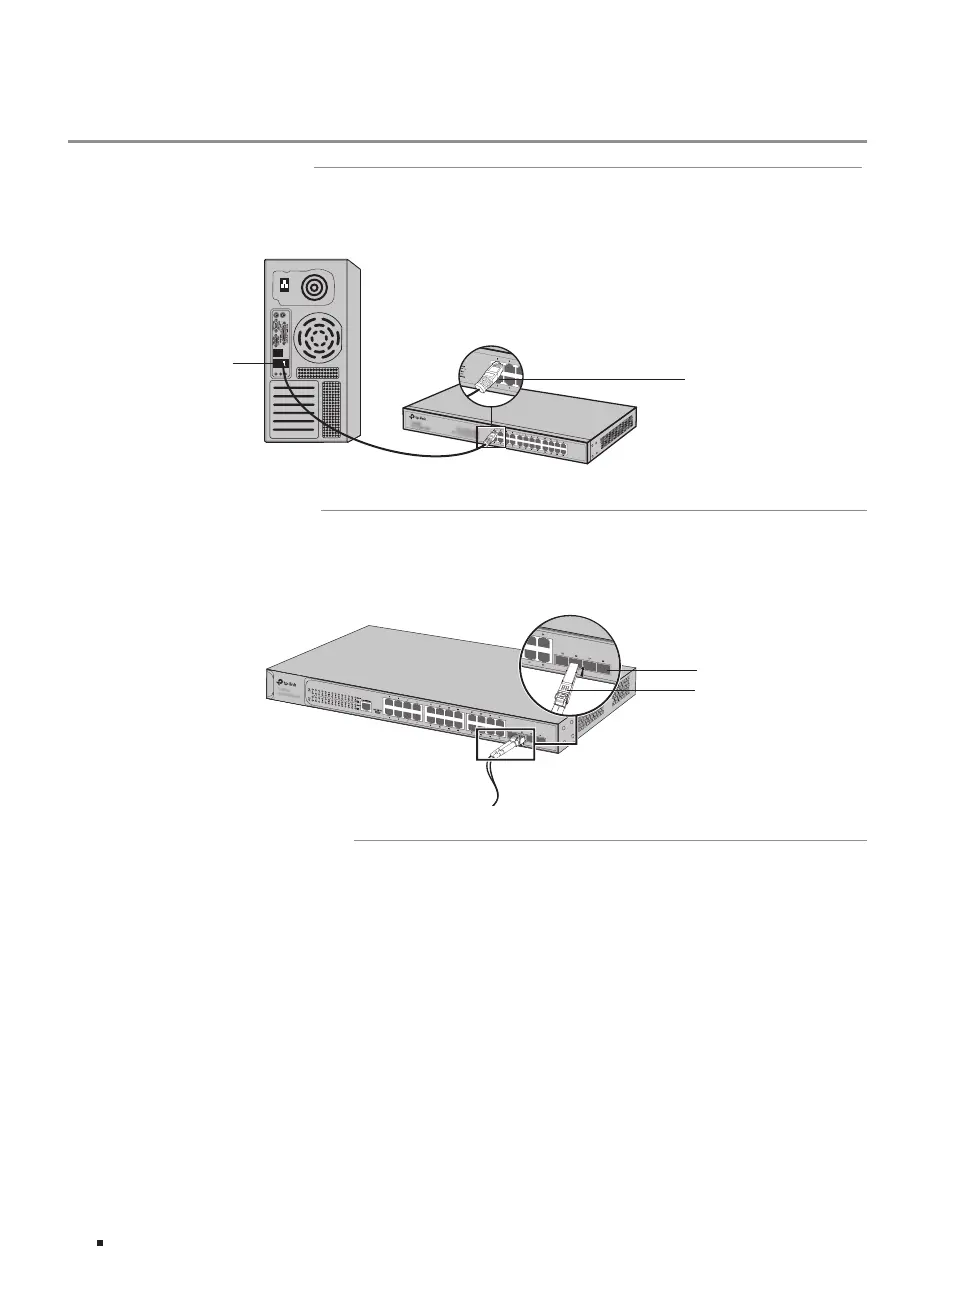
3.1 Ethernet Port
Connect an Ethernet port of the switch to the computer by RJ45 cable as the following figure shows.
Figure 3-1 Connecting the RJ45 Port
RJ45 Port
RJ45 Cable
3.2 SFP/SFP+ Port
The following figure demonstrates the connection of SFP port to an SFP module.
Figure 3-2 Inserting the SFP Module
SFP/SFP+ Slot
SFP/SFP+ Module
3.3 Verify Installation
After completing the installation, verify the following items:
There should be 5 to 10 cm of clearance around the device for ventilation and make sure the air flow
is adequate.
The voltage of the power supply meets the requirement of the input voltage of the device.
The power socket, device and rack are well grounded.
The device is correctly connected to other network devices.

Other manuals for TP-Link Jetstream Series

Questions and Answers:

Question and Answer IconNeed help?

Do you have a question about the TP-Link Jetstream Series and is the answer not in the manual?

TP-Link Jetstream Series Specifications

General IconGeneral
ModelJetstream Series
TypeMultiple types exist within the Jetstream Series
PortsMultiple port configurations exist within the Jetstream Series
LayerLayer 2/Layer 3
PoE SupportAvailable on some models
Uplink PortsVaries depending on the specific model
Switching CapacityVaries depending on the specific model
Forwarding RateVaries depending on the specific model
MAC Address TableVaries depending on the specific model
Packet BufferVaries depending on the specific model
Power ConsumptionVaries depending on the specific model
DimensionsVaries depending on the specific model
WeightVaries depending on the specific model
VLAN SupportYes
QoSYes
ManagementCLI, SNMP

Related product manuals