Do you have a question about the TP-Link Kasa KS200M and is the answer not in the manual?
Explains formatting conventions and hyperlink usage in the guide.
Provides links for product specifications and technical support.
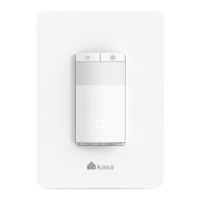
Device sensors detect motion and ambient light for automated control.
Set different light triggers based on user routines for effortless control.
Detailed in-app guide and unique circuit design simplify installation process.
Automatically turns off lights after a set time when a room is vacated.
Control connected fixtures from anywhere using the Kasa Smart app.
Connects directly to your existing Wi-Fi router without needing a separate hub.
Simulates occupancy by turning lights on/off at random intervals while away.
Set lights to automatically turn on/off at specified times throughout the day.
Control devices using voice commands with compatible assistants like Alexa and Google.
Explains the meaning of different LED light colors indicating device status.
Details the actions of the RESTART and RESET buttons for device management.
Guide to downloading and installing the Kasa Smart application on your mobile device.
Steps for creating or logging into a TP-Link ID account within the Kasa app.
Instructions on adding the smart light switch to your Kasa app.
Displays all connected Kasa devices on the app's main screen.
Quickly control the smart switch's connected light from the app's home page.
Access the scheduling section by tapping the switch and then 'Schedule'.
Tap the '+' icon to create a new schedule for turning lights on or off.
Set specific times for the light to turn on or off.
Option to set schedules based on local sunrise or sunset times.
Save created schedules and manage them from the Schedule Page.
Access the timer section by tapping the switch and then 'Timer'.
Set the time for the light to automatically turn on or off.
Start the timer and observe its countdown.
Navigate to Away Mode via the switch and 'Away' option.
Set start/end times and frequency for random on/off activity.
Navigate to the Runtime section by tapping the switch and then 'Runtime'.
Check current, daily average, and total runtime for different periods.
Navigate to settings via the switch and the gear icon.
Change the display name and icon for each outlet.
Remove the device from the app by swiping left and selecting 'Delete'.
Navigate to Device Settings and select 'Remove Device'.
Press and hold the physical reset button for 10 seconds.
Navigate to the Scenes section and tap the '+' icon.
Select a pre-defined scene or start a custom one.
Associate devices with the scene and define their actions.
Assign an icon and a descriptive name to your scene.
View and activate the created scene from the scene list.
Navigate to the Smart Actions section and tap 'Add an Action'.
Select from Motion Sensing, Control With a Switch, Schedule a Scene, or Auto-Off Timer.
Set up actions triggered by motion detected by a Kasa camera.
Define the hours and days when motion detection actions are active.
Optionally set an auto-off timer and name the configured motion sensing action.
Link a Smart Switch's action to control other Kasa devices.
Name the automation for easy identification and confirm its creation.
Schedule a previously created scene to activate at a specific time and frequency.
Name the automation for easy identification and confirm its creation.
Set the switch to turn off automatically after a specified duration.
Name the automation for easy identification and confirm its creation.
Connect Kasa devices with Alexa, Google Assistant, IFTTT, and SmartThings.
FCC statement and RF radiation exposure limits for the device.
Canadian regulatory statements including ICES, NCC, and BSMI notices.
Keep away from water, fire, humidity, hot environments; do not disassemble.
Details on restricted materials used in the product.
Guidelines on operating temperature, installation, electric shock, and wet conditions.
Explanation of symbols like indoor use, AC/DC voltage, and recycling.