NC450 HD Pan/Tilt Wi-Fi Camera with Night Vision
7
Use only the power adapter that comes with this camera in the package.
You can place your camera to your desired location. Just unplug and replug it without having to go
through the app’s setup again. Place the camera within the coverage of your wireless network.
You can place the camera in various ways:
Place it on a flat surface.
Mount it on the wall or ceiling with the provided screws and base.
When you finish positioning your camera, use the tpCamera app to check that your camera can
see what you want to keep an eye on. Adjust its position if needed.
Detailed instructions on mounting your camera to a wall or ceiling are shown as follows.
Wall Mounting
Get the provided accessories for camera’s wall mounting ready, and follow the instructions below
to mount the camera. After relocating your camera, remember to power on it.
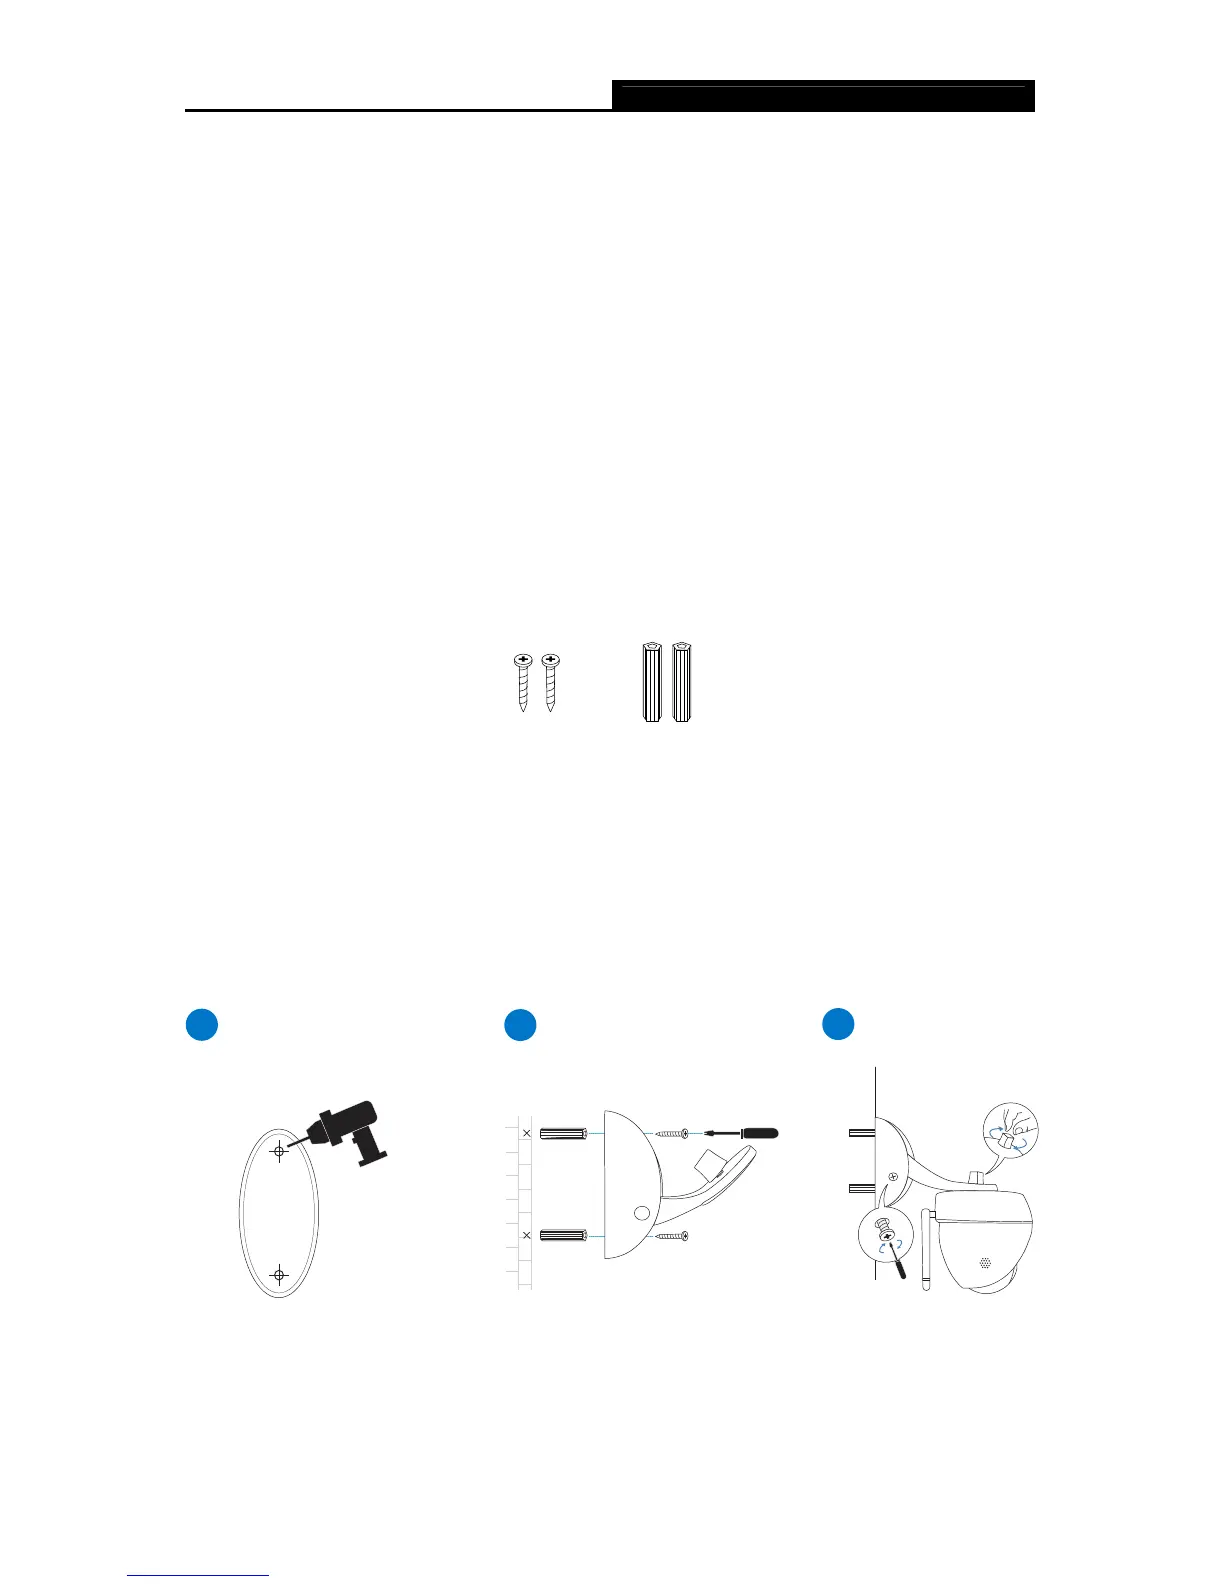
all plugsscrews
A) Place the paper drill guide where you want the camera. Check the alignment using a level.
B) Using a 0.24 inch (6mm) drill bit, drill holes through the two circles on the guide. Remove the
paper.
C) Insert the two anchors into the holes. Place the camera mount over the anchor and use the
screws to secure it.
D) Attach the camera.
2
Mount Base
3
Secure Cam era
1
Drill Holes
Ceiling Mounting
Get the provided accessories for camera’s wall mounting ready, and follow the instructions below
to mount the camera. After relocating your camera, remember to power on it.