9
Chapter 2 Set Up Internet Connection
Tips:
For more intuitive location assistance, access extender settings via Tether and go to Tools > Location
Assistant. You can also manage your extender via Tether, such as controlling LEDs, sharing passwords of
your networks and blocking devices.
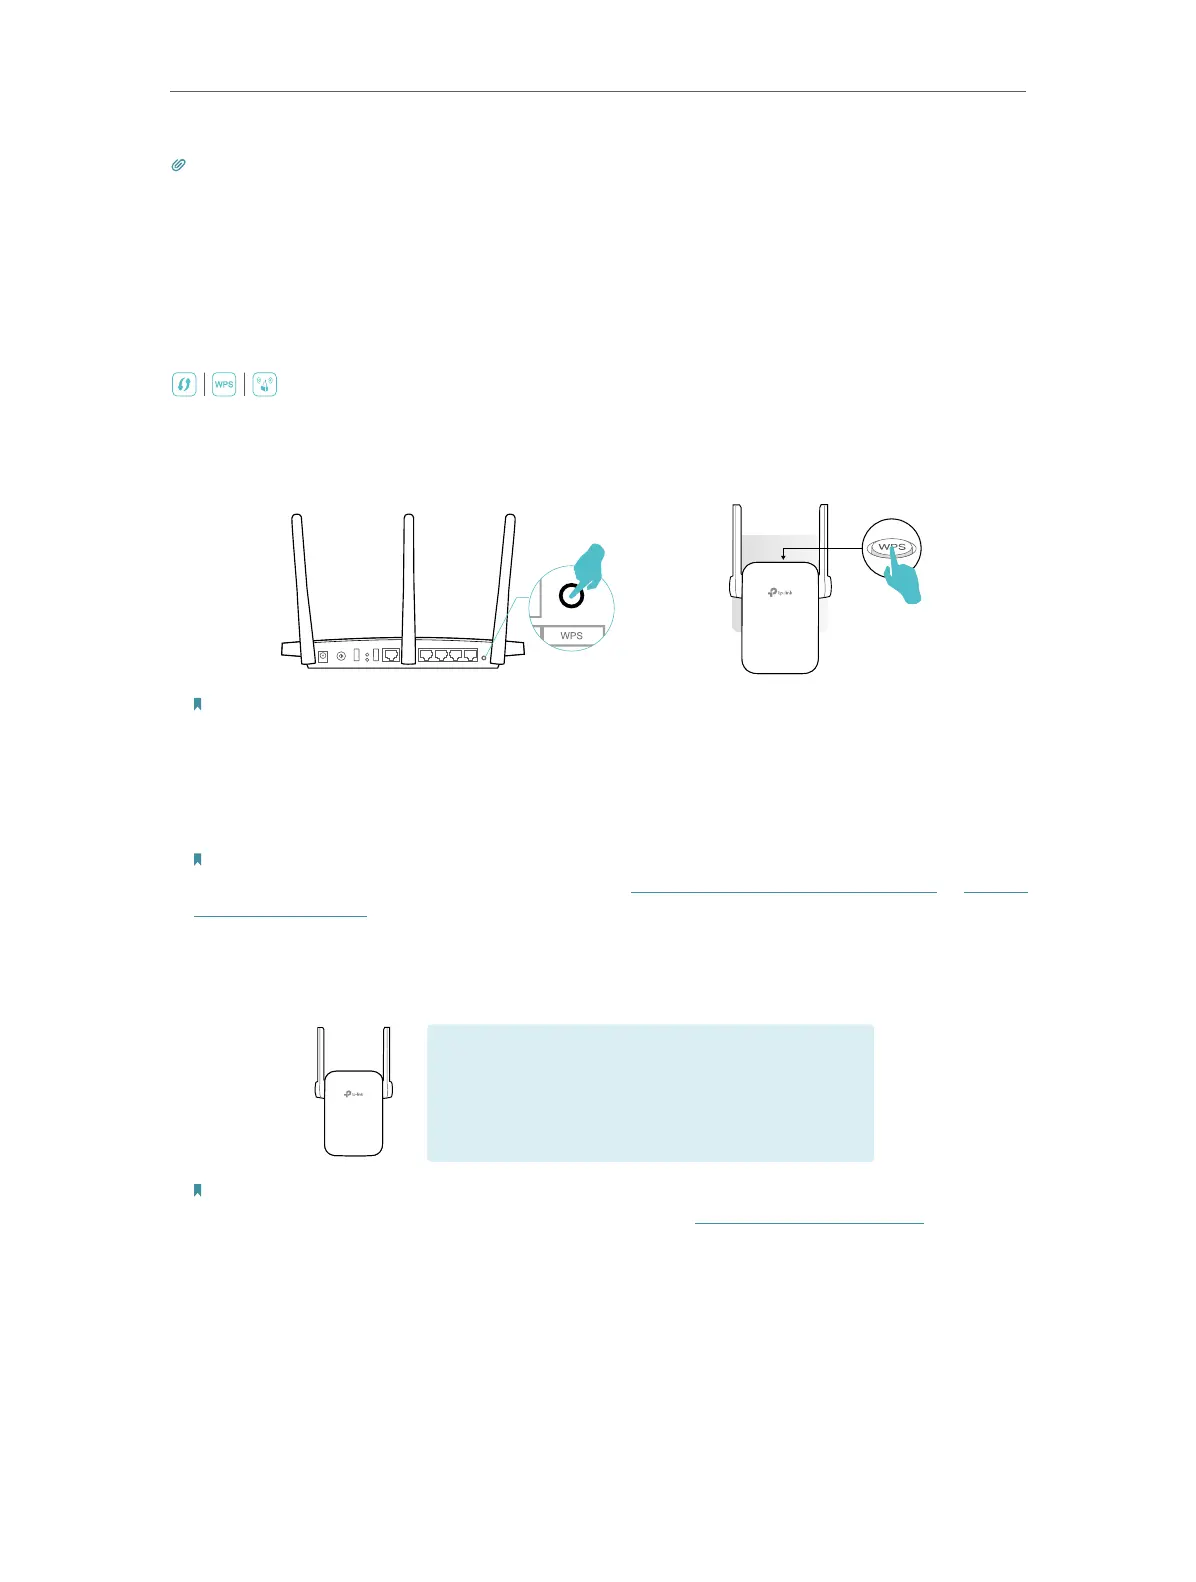
2. 2. 2. Method 2: Via the WPS Button
Use this way if your router has a WPS button. The button might look like one of these:
.
1. Press the WPS button on your host router, and then press the WPS button on the
extender for 1 second within 2 minutes.
Note:
For more information about using WPS button on your host router, please refer to the router’s user
guide.
2. Wait until the Signal LED changes from blinking to solid on, indicating successful
connection.
Note:
If the LED does not turn solid on, try again or refer to Method 1: Via the TP-Link Tether App or Method
3: Via a Web Browser.
3. The extender uses your router’s network name with _EXT at the end and shares the
same password as your router.
Extended Network Name:
Router’s network name with
_EXT
at the end
Password:
Same as your router’s
Note:
If you want to customize the extended network name, refer to Configure Wireless Network.
4. Relocate your extender for optimal Wi-Fi coverage and performance.
3 ) Plug in the extender about halfway between your router and the Wi-Fi dead zone.
The location you choose must be within the range of the host network.
4 ) Wait for about 2 minutes until the Signal LED turns solid blue. If not, relocate the
extender closer to the router to achieve better signal quality.
 Loading...