18-GF81D1-1A-EN
31
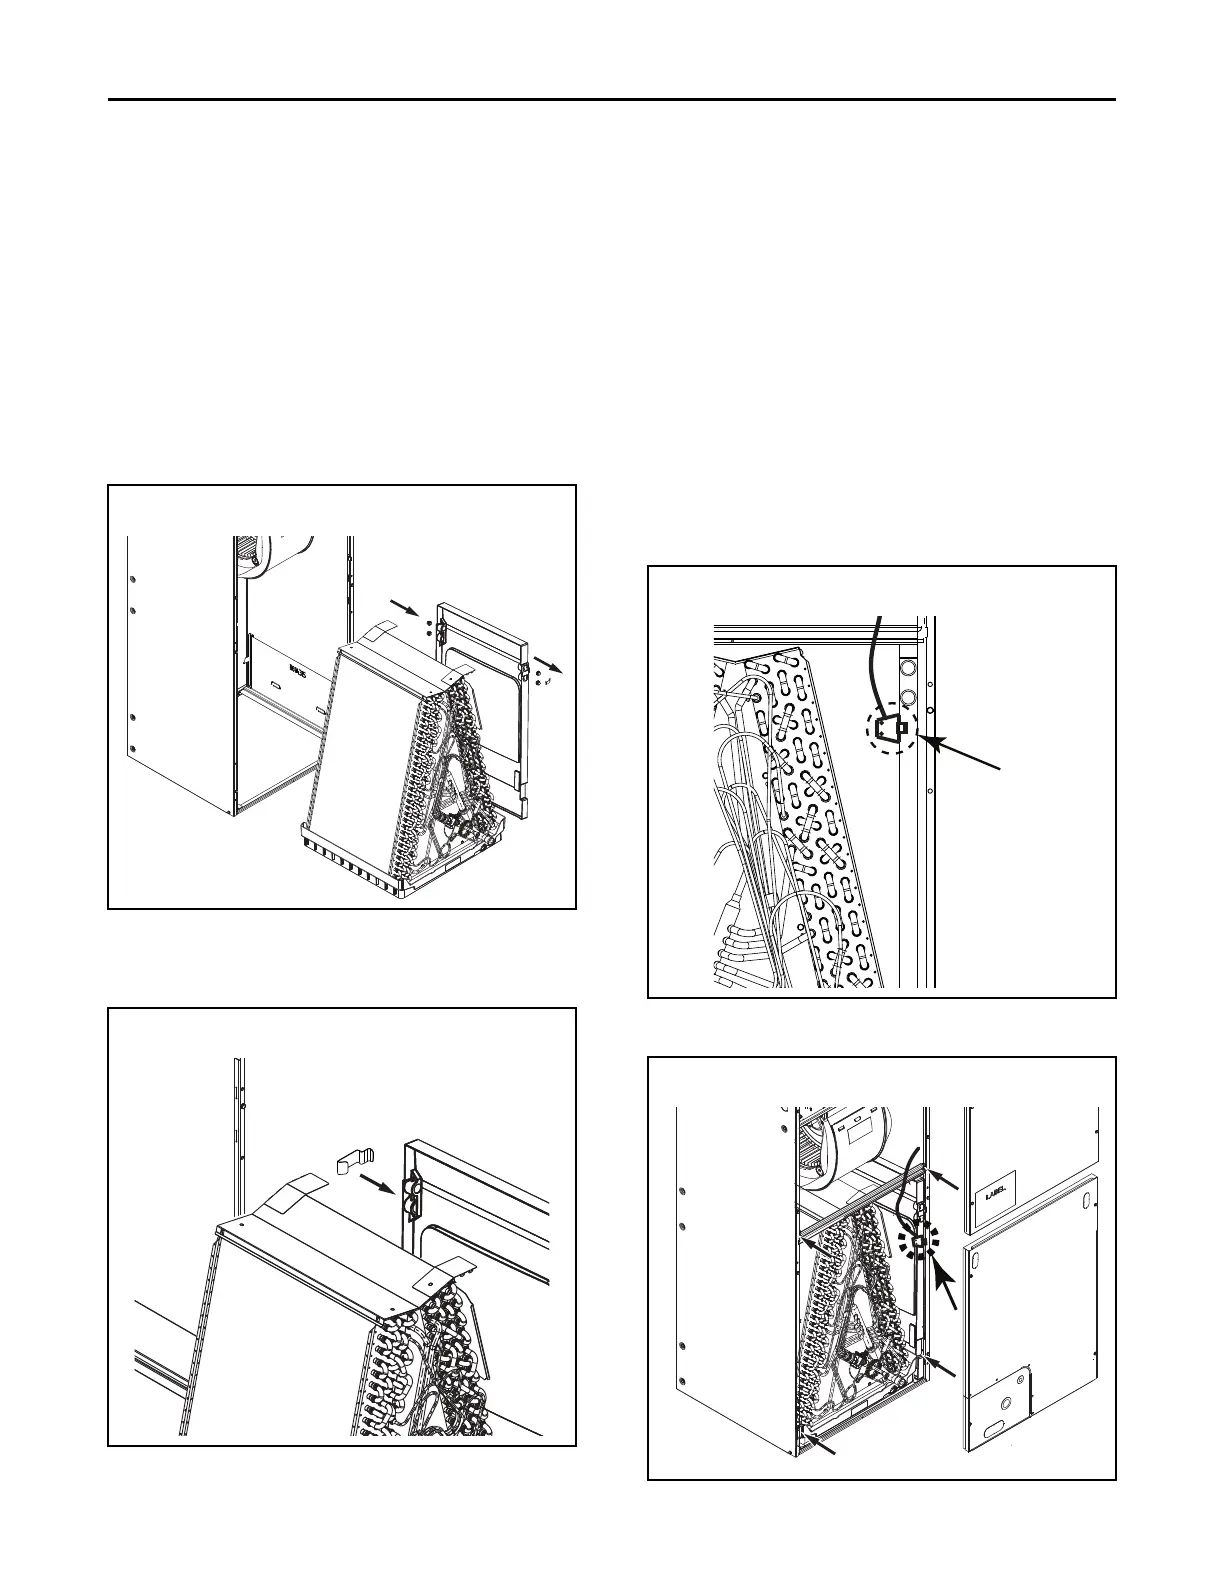
11. To allow the horizontal pan to slide in on the right,
cut and remove the zip tie holding the sensor wire
harness on the right side of the coil cabinet.
12. Relocate the horizontal drain pan from the left side
of the coil to the right side.
13. Remove the drain pan support bracket. Do not
discard. Remove the two drain plugs from the front
of the drain pan and insert them in the drains at the
rear of the drain pan.
IImmppoorrttaanntt:: When reinstalling coil in Step 13, it is
important that the coil corner locks in place
under the tab in the side bracket to support
the coil weight horizontally.
Figure 19. All models
14. Reinstall the drain pan support bracket. The bracket
should be located between the two drain plugs as
shown.
Figure 20. All models
15. Slide the coil assembly back into the air handler
cabinet.
IImmppoorrttaanntt:: Make sure that the coil corner locks in place
under the tab in the side left bracket to
support the coil weight in the horizontal
right position.
16. Replace the center horizontal bracket using screws
removed earlier in Step 3.
17. Replace the two coil retaining brackets removed in
a previous step.
18. Rotate unit into horizontal right position.
19. Install sensor onto secondary drain pan using the
provided clip. Sensor should be positioned close to
the drain lines. Reconnect the sensor to the wire
harness and position extra wire length in the drain
pan.
Figure 21. All Models
20. Replace all panels.
Figure 22. All Models
UUnniitt CCoonnvveerrssiioonn IInnssttrruuccttiioonnss
 Loading...