ACC-SVN155D-EN 5
Installation
WARNING
Hazardous Service Procedures!
Failure to follow all precautions in this manual and on
the tags, stickers, and labels could result in death or
serious injury.
Technicians, in order to protect themselves from
potential electrical, mechanical, and chemical hazards,
MUST follow precautions in this manual and on the
tags, stickers, and labels, as well as the following
instructions: Unless specified otherwise, disconnect all
electrical power including remote disconnect and
discharge all energy storing devices such as capacitors
before servicing. Follow proper lockout/tagout
procedures to ensure the power can not be
inadvertently energized.When necessary to work with
live electrical components, have a qualified licensed
electrician or other individual who has been trained in
handling live electrical components perform these
tasks.
Field Installed Option
WARNING
Hazardous Voltage with Capacitors!
Failure to disconnect power and discharge capacitors
before servicing could result in death or serious injury.
Disconnect all electric power, including remote
disconnects and discharge all
motor start/run
capacitors before servicing. Follow proper lockout/
tagout procedures to ensure the power cannot be
inadvertently energized. Verify with a CAT III or IV
voltmeter rated per NFPA 70E that all capacitors have
discharged.
1.
Trane Configuration
Assemble connecting rods 4 to return air damper 3 by
aligning holes 1 and 2, and attach rods using two screws
as shown below.
Figure 2. Assemble connecting rods (Trane)
Carrier Configuration
Assemble connecting rods 2 to return air damper 3 by
aligning holes 2 and 3, and attach rods using two screws
on each side. See Figure 3.
Figure 3. Assemble connecting rods (Carrier)
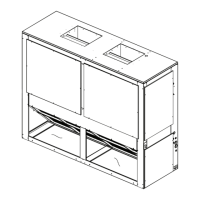
2. Remove the filter/fan compartment access panel and
the
unit end panel
(evaporator end).
Figure 4. Remove panels
Trane Configuration
a. Place the return air damper assembly into the
return air opening as illustrated in Figure 5. Ensure
the damper is positioned
with the sheet metal lip in
the upward position.
b. Attach the pivotal brackets to the unit using 2
screws per bracket.
c. Raise
the damper and rods into the vertical
position. Tie the connecting
rods to the filter rack to
prevent them from interfering with the economizer.
See Figure 5.
d. Ensure damper is positioned with sheet metal lip in
the upward position as
illustrated in Figure 5.
1
2
 Loading...