CVHE-SVN04M-EN
25
NNOOTTIICCEE
EEqquuiippmmeenntt DDaammaaggee!!
PPrrooppeerrllyy ssuuppppoorrtt tthhee ccoommpprreessssoorr ccaassttiinngg ffoooott ttoo
aavvooiidd pprreevveenntt bbrreeaakkaaggee aanndd eeqquuiippmmeenntt ddaammaaggee..
NNoottee:: Plan ahead where the compressor will be
secured. Build a suitable plant form to support
the assembly before the lift. Gently set
compressor onto prefabricated pre-formatted
support. Use care not to damage the cast
compressor foot (see foot in Figure 8, p. 22).
Similarly, avoid damage to the discharge volute
flange (see discharge flange in Figure 9, p. 22).
8. Remove the compressor/motor assembly. Remove
the locating dowel pins from the compressor foot
and discharge flange connections as shown in
Figure 8, p. 22 and Figure 9, p. 22. To remove the
dowel pin, first remove the nut on the dowel pin,
place a bushing on the pin, and then reinstall the
nut. As the nut is tightened, the dowel pin should
pull out of its hole; at this point, remove the
compressor/motor assembly.
Compressor Motor Mount
Disassembly
If additional vertical clearance is required, the height of
the compressor motor mount can be reduced. Use the
following procedure:
1. Before cutting off the motor mount, first fabricate a
1/4-inch steel backing plate.
a. Cut the backing plate to shape and clamp it to
the motor mount.
b. Drill four 1/4-inch holes through the motor
mount and the backing plate as shown in Figure
16, p. 25. These holes with bolts or roll pins
installed will be used to align the components
during reassembly.
c. Remove the backing plate.
2. Using an oxyacetylene torch, cut the mount as
shown in Figure 16, p. 25.
During reassembly, use the backing plate with bolts or
roll pins to locate the pieces properly. After the pieces
are located, Trane recommends welding the mount and
backing plate in place.
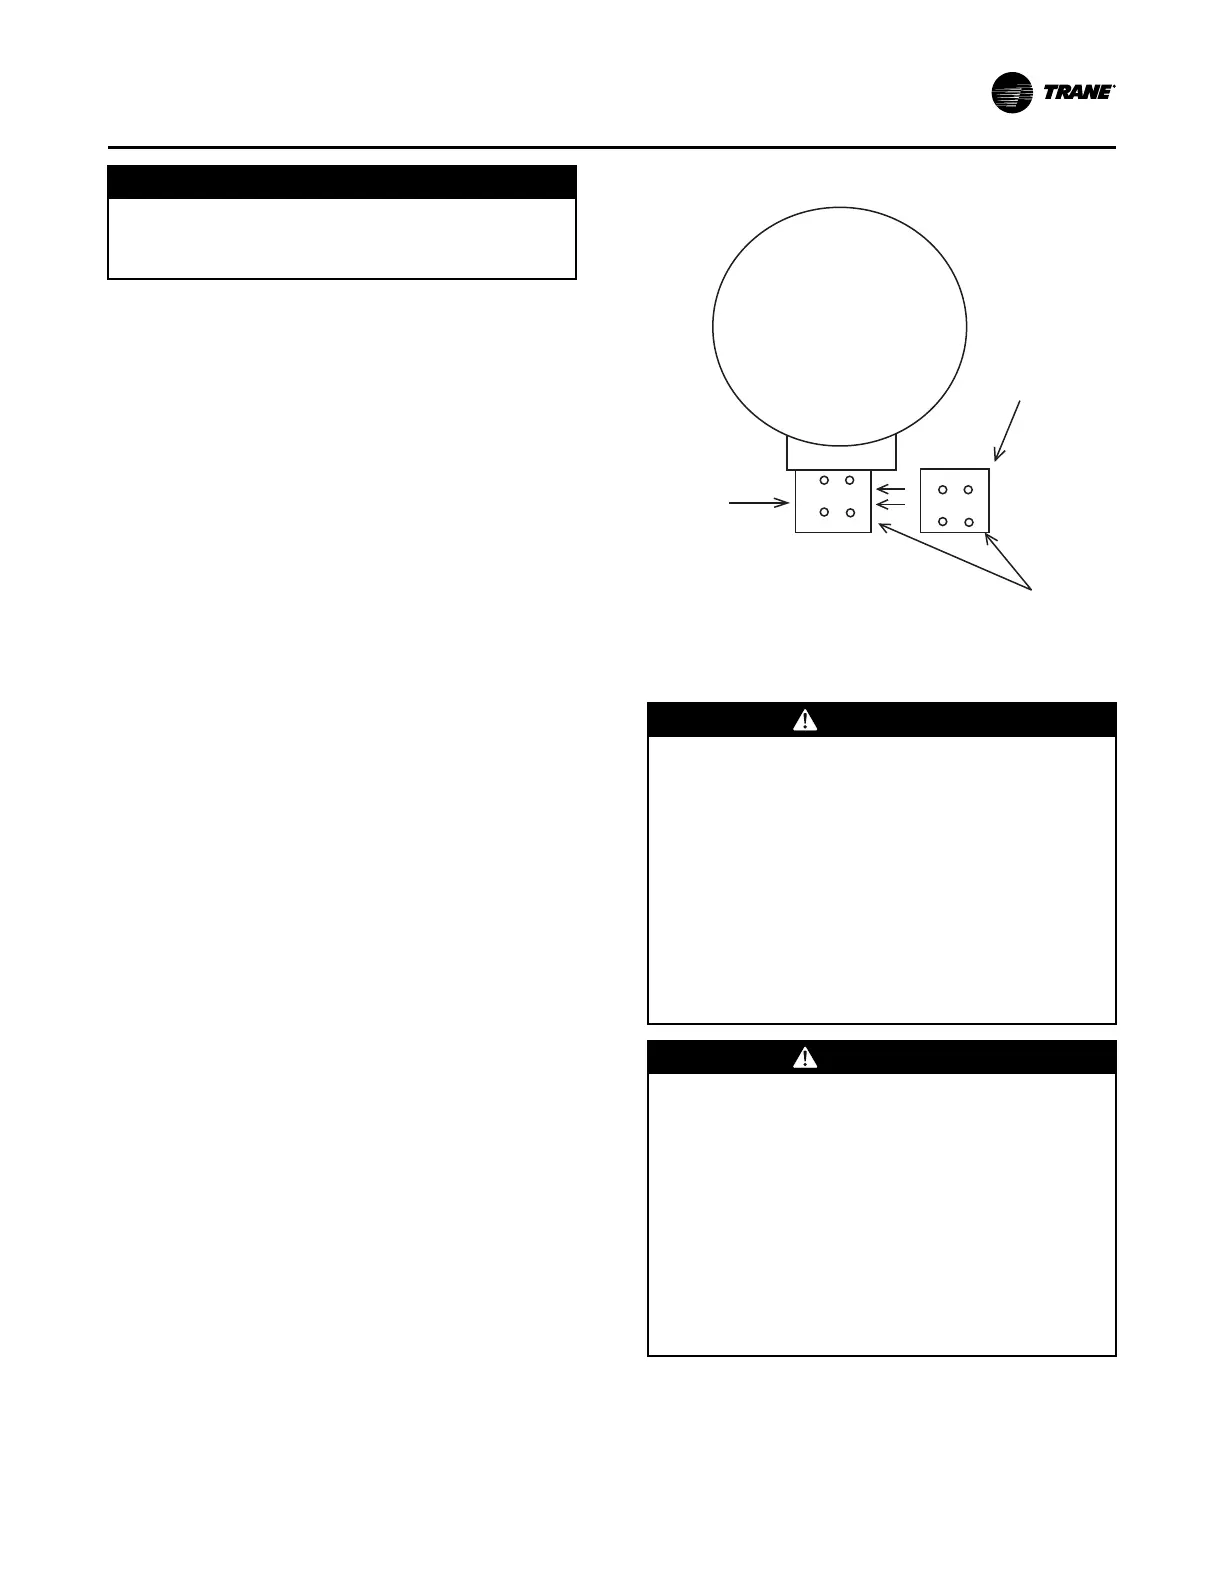
Figure 16. Motor support detail
Cut Here
Compressor Motor
1/4-inch Steel
Alignment
Backing Plate
Bolt Holes
Economizer Removal
WWAARRNNIINNGG
RReeffrriiggeerraanntt MMaayy BBee UUnnddeerr PPoossiittiivvee
PPrreessssuurree!!
FFaaiilluurree ttoo ffoollllooww iinnssttrruuccttiioonnss bbeellooww ccoouulldd rreessuulltt iinn
aann eexxpplloossiioonn wwhhiicchh ccoouulldd rreessuulltt iinn ddeeaatthh oorr
sseerriioouuss iinnjjuurryy oorr eeqquuiippmmeenntt ddaammaaggee..
SSyysstteemm ccoonnttaaiinnss rreeffrriiggeerraanntt aanndd mmaayy bbee uunnddeerr
ppoossiittiivvee pprreessssuurree;; ssyysstteemm mmaayy aallssoo ccoonnttaaiinn ooiill..
RReeccoovveerr rreeffrriiggeerraanntt ttoo rreelliieevvee pprreessssuurree bbeeffoorree
ooppeenniinngg tthhee ssyysstteemm.. SSeeee uunniitt nnaammeeppllaattee ffoorr
rreeffrriiggeerraanntt ttyyppee.. DDoo nnoott uussee nnoonn--aapppprroovveedd
rreeffrriiggeerraannttss,, rreeffrriiggeerraanntt ssuubbssttiittuutteess,, oorr nnoonn--
aapppprroovveedd rreeffrriiggeerraanntt aaddddiittiivveess..
WWAARRNNIINNGG
HHeeaavvyy OObbjjeecctt!!
FFaaiilluurree ttoo ffoollllooww iinnssttrruuccttiioonnss bbeellooww ccoouulldd rreessuulltt iinn
uunniitt ddrrooppppiinngg wwhhiicchh ccoouulldd rreessuulltt iinn ddeeaatthh oorr
sseerriioouuss iinnjjuurryy,, aanndd eeqquuiippmmeenntt oorr pprrooppeerrttyy--oonnllyy
ddaammaaggee..
EEnnssuurree tthhaatt aallll tthhee lliiffttiinngg eeqquuiippmmeenntt uusseedd iiss
pprrooppeerrllyy rraatteedd ffoorr tthhee wweeiigghhtt ooff tthhee uunniitt bbeeiinngg
lliifftteedd.. EEaacchh ooff tthhee ccaabblleess ((cchhaaiinnss oorr sslliinnggss)),, hhooookkss,,
aanndd sshhaacckklleess uusseedd ttoo lliifftt tthhee uunniitt mmuusstt bbee ccaappaabbllee
ooff ssuuppppoorrttiinngg tthhee eennttiirree wweeiigghhtt ooff tthhee uunniitt.. LLiiffttiinngg
ccaabblleess ((cchhaaiinnss oorr sslliinnggss)) mmaayy nnoott bbee ooff tthhee ssaammee
lleennggtthh.. AAddjjuusstt aass nneecceessssaarryy ffoorr eevveenn uunniitt lliifftt..
1. Support the weight of the economizer with a
movable floor jack. Do not lift the economizer;
simply support it. Economizer weights are provided
in Table 10, p. 18; also see submittal. It is
DDiissaasssseemmbbllyy
 Loading...