Do you have a question about the Trane ProSpace PTEF and is the answer not in the manual?
Describes the on-board computer and real-time diagnostics for unit longevity and fault detection.
Explains how control settings are retained in memory after power loss for seamless startup.
Details the use of two fan motors and tangential blower for reduced operational noise.
Explains the delay feature to prevent power surges after power outages or restarts.
Details the random start-up delay and minimum run time to protect the compressor.
Ensures indoor temperature stays above freezing, activating fan and heater below 40°F.
Switches to electric heat for quick warm-up when room temp drops below setpoint.
Describes the 8-segment nixie tubes and 13 LED indicators used for unit status and settings.
Explains the Mode Indicator, ON/OFF, Fan Speed, and Dual-8 display data formats.
Details how to configure fan operation for continuous or cycle mode based on application needs.
Covers display units (F/C), sensor biasing, emergency heat, setpoint limits, and display modes.
Describes the 24 Vac input for disabling the unit remotely for energy savings.
Explains connecting a wired wall thermostat and disabling the unit's keypad.
Details determining the appropriate power cord accessory kit based on voltage and amperage.
Provides guidance on NEC and local codes for installing electrical supply wiring and branch circuits.
Explains how the unit is grounded through the service cord or a separate ground wire.
Details checking voltage supply at the outlet and ensuring it matches data plate requirements.
Provides tables for electric heater and cord information for different voltages and sizes.
Explains the fire protection feature of 230/208V cords and requirements for 265V units.
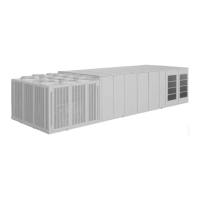
Shows typical unit components ordered and installed, refers to specific installation instructions.
Important notes for retrofit applications, emphasizing foam seals for proper air separation.
Emphasizes thorough inspection of the wall sleeve prior to installation to prevent issues.
Covers compatibility with GE sleeves and preparation steps like removing bottom seals.
Details removing shipping materials, the front panel, and considering electrical connections before insertion.
Covers sliding the unit into the sleeve, securing it with screws, and re-installing the front panel.
Instructions on how to change the air direction by rotating the louver insert on the front panel.
Explains the location and function of auxiliary dip switches for unit configuration.
Details the functionality of each dip switch, including heating modes, thermostat, and energy saver settings.
Describes how to enter keypad configuration and modify display units and sensor biasing.
Covers switching between cooling modes and auto cooling operation settings via keypad.
Provides safety warnings and initial steps for routing wires for wall thermostat connection.
Details connecting thermostat wires to the unit's terminal connector and lists terminal functions.
Covers reinstalling connectors, configuring the unit, and powering up after thermostat installation.
Provides notes on second-stage heating for heat pumps and fan speed wiring.
Explains how the 24 Vac input from a remote energy management system controls unit operation.
Describes the unit's self-checking capabilities and how diagnostic codes are displayed.
Lists diagnostic codes, their descriptions, and how they are indicated on the unit's status LED.
Details the function of each button on the unit's control panel, including ON/OFF, Mode, Fan, and Timer.
Provides important handling instructions and notes for the optional ProSpace remote control.
Explains the operation of ON/OFF, Mode, Fan, Sleep, and Timer functions via the remote control.
Details using the +/- buttons for temperature/time settings and the LOCK function for keypad security.
Provides instructions on how to open the remote and replace the batteries.
Offers guidance on proper battery recycling and the environmental impact of heavy metals.
Instructions for cleaning the unit's exterior using mild detergent and soft brush.
Details regular checking and professional cleaning of the outdoor coil for optimal airflow.
Guidance on periodically checking and cleaning the base pan of the unit.
Explains the importance of cleaning filters every 30 days to maintain unit efficiency and prevent damage.
A checklist for ensuring proper care of the ProSpace unit, covering various components and checks.
Addresses common issues like unit not starting, cooling/heating problems, display errors, noises, and water drips.
Covers issues like ice formation on the indoor coil and compressor protection modes.
| Brand | Trane |
|---|---|
| Model | ProSpace PTEF |
| Category | Air Conditioner |
| Language | English |