10 TTA-SVN03A-EN
System Evacuation
1. After completion of leak check,
evacuate the system.
2. Attach appropriate hoses from
manifold gauge to gas and liquid
line pressure taps.
Note: Unnecessary switching of
hoses can be avoided and
complete evacuation of all
lines leading to sealed system
can be accomplished with
manifold center hose and
connecting branch hose to a
cylinder of R410A and vacuum
pump.
3. Attach center hose of manifold
gauges to vacuum pump.
4. Evacuate the system to hold a 350
micron vacuum.
5. Close off valve to vacuum pump
and observe the micron gauge. If
gauge pressure rises above 500
microns in one (1) minute, then
evacuation is incomplete or the
system has a leak.
6. If vacuum gauge does not rise
above 500 microns in one (1)
minute, the evacuation should be
complete.
7. With vacuum pump and micron
gauge blanked off, open valve on
R410A cylinder and allow
refrigerant pressure to build up to
about 80 psig.
8. Close valve on the R410A supply
cylinder. Close valves on
manifold gauge set and remove
refrigerant charging hoses from
liquid and gas gauge ports.
9. Leak test the entire system. Using
proper procedures and caution,
repair any leaks found and repeat
the leak test.
Refrigerant Charging Procedure
If charging by weight, refer to
refrigerant charges that are given in
Table 3. If additional refrigerant is
needed because of length of line,
calculate the requirement using Table
4.
Gaseous Charging
This procedure is accomplished with
the unit operating. Electrical
connections must be complete. Do
not proceed until the system is ready
to operate.
1. Connect R410A drum with gauge
manifold to the schrader valves
(pressure taps) on the
compressor discharge and
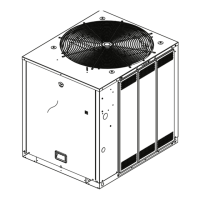
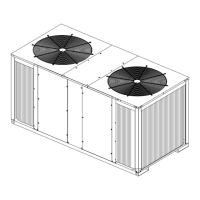
suction lines, Figure 4.
Note: On the TTA200 and 240F, there
is a 1 1/2" diameter refrigerant
gauge access hole(s) with a
removable cap located
adjacent to the refrigerant line
openings.
WARNING
Electrical Hazard!
Use extreme caution while servicing
the unit when the control box access
panel is removed and power is
applied to the unit. Failure to observe
all safety precautions could result in
severe personal injury or death.
2. Turn on power to the unit. Allow
the system to run for five to ten
minutes to stabilize operating
conditions.
3. Measure airflow across the
indoor coil. Compare the
measurements with the fan
performance data in the Data/
Submittal or Service Facts. Once
proper airflow is established,
observe the suction and head
pressure gauges on the gauge
manifold. Pressure reading
should fall approximately at the
points shown by the pressure
curves in Service Facts. Add or
remove refrigerant (gas only) as
required to obtain correct head
and suction pressures. Check
suction line superheat and
condenser sub-cooling to ensure
the unit is operating properly.
Installation
Charge by weight through the gauge
port on the liquid line. Once the
charge enters the system, backseat
(open) the liquid line service valve
and disconnect the charging line and
replace the cap on the gauge port.
Insulating and Isolating
Refrigerant Lines
Insulate the entire suction line with
refrigerant piping insulation. Also
insulate any portion of the liquid line
exposed to temperature extremes.
Insulate and isolate liquid and suction
lines from each other. Isolate
refrigerant lines from the structure
and any duct work.
Note: To prevent possible noise or
vibration problems, be certain
to isolate refrigerant lines
from the building.
Table 3. TTA Refrigerant Charge (R410A)
Table 4. Additional Required Refrigerant
Note: For tubing over 40 ft. calculate
the additional refrigerant
needed, based on note above.
Note: For every 5 lbs. of refrigerant
added over 20 lbs., 1 oz. of
EMKARATE RL 32-3 MAF POE
oil should be added to the
compressors.
Model Refrigerant Charge
TTA240F 41 lbs. 5.0 oz.
TTA200F
1. *Sufficient operating charge for outdoor
unit and 25 feet of nominally sized
refrigerant piping.
Tubin g
Sizes
Additional
Liquid
Additional
Tubing
Length
See
Refrigerant
Note
Suction
1 5/8" 5/8" 15 ft. 1 lb 12 oz 1
1 5/8" 5/8" 25 ft. 3 lb 0 oz 1
1 5/8" 5/8" 32 ft. 3 lb 12 oz 1
1 5/8" 5/8" 40 ft. 4 lb 12 oz 1
1. Amounts shown are based on 1.9 ounces
of refrigerant per foot of 1 5/8" and 5/8"
lines.
!
 Loading...