EasyManua.ls Logo

Trane Variable Speed ComfortLink II 4TTV8048A1000B - User Manual

Trane Variable Speed ComfortLink II 4TTV8048A1000B
28 pages
Print Icon
To Next Page IconTo Next Page
Loading...
SSAAFFEETTYY WWAARRNNIINNGG
Only qualified personnel should install and service the equipment. The installation, starting up, and servicing of heating, ventilating, and
air-conditioning equipment can be hazardous and requires specific knowledge and training. Improperly installed, adjusted or altered
equipment by an unqualified person could result in death or serious injury. When working on the equipment, observe all precautions in the
literature and on the tags, stickers, and labels that are attached to the equipment.
February 2016
18-BC92D1-1F-EN
Variable Speed ComfortLink II
Heat Pumps and Air Conditioners
4TWV8024A1000B
4TWV8036A1000B
4TWV8037A1000B
4TWV8048A1000B
4TWV8049A1000B
4TWV8060A1000B
4TTV8024A1000B
4TTV8036A1000B
4TTV8037A1000B
4TTV8048A1000B
4TTV8060A1000B
Scan to see help
videos on this
product
NNoottee:: “Graphics in this document are for representation only.
Actual model may differ in appearance.
Installers Guide
Question and Answer IconNeed help?

Do you have a question about the Trane Variable Speed ComfortLink II 4TTV8048A1000B and is the answer not in the manual?

Summary

Installers Guide Overview

Key Safety Warning

Highlights a critical safety warning for installers.

Outdoor Unit Safety Precautions

Electrical Hazard and Refrigerant Safety

Covers warnings for hazardous voltage, refrigerant oil, and refrigerant handling.

Electrical Safety and Unit Specifications

High Voltage Electrical Hazard

Warns about 400VDC hazards and required safety waits.

Unit Preparation and Pad Installation

Refrigerant Line Requirements

Refrigerant Line Routing and Isolation

Refrigerant Line Brazing Procedure

Brazing Preparation and Nitrogen Purge

Steps for preparing lines for brazing, deburring, cleaning, and purging with dry nitrogen.

Refrigerant Line Brazing Continuation

Refrigerant System Leak Check

System Charging (Weigh-In Method)

Weigh-In Charge Calculation Worksheets

Provides tables and worksheets for calculating refrigerant charge for new installations and repairs.

Service Valve Operation

High Voltage Electrical Connections

Control Board LED Indicators

System Start-Up Procedure

Startup Steps and Charging Mode

Outlines initial startup steps, thermostat settings, and using the charging mode.

System Charge Adjustment

Subcooling Correction Calculation Worksheet

Guides on measuring temperatures and using correction charts to determine final subcooling.

Refrigerant Charging Charts

Charging and Performance Verification

Gage Pressure, Stabilization, and Performance

Details setting gage pressure, stabilizing the system, and verifying performance with pressure curves.

Communicating Display Assembly (CDA)

Defrost Control System

Final Installation Checkout

Installation Completion Checklist

A checklist to confirm all installation requirements and procedures have been met.

Overview

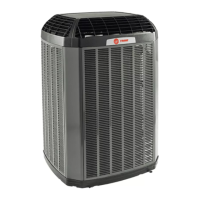
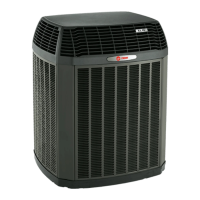
This document is an installer's guide for Trane Variable Speed ComfortLink™ II Heat Pumps and Air Conditioners, covering models such as 4TWV8024A1000B, 4TTV8024A1000B, and others. It provides essential information for the safe and proper installation, start-up, and maintenance of these outdoor units.

Function Description:

The Trane Variable Speed ComfortLink™ II Heat Pumps and Air Conditioners are designed to provide heating, ventilating, and air-conditioning (HVAC) for residential and commercial buildings. These units utilize variable speed technology, which allows for precise control over temperature and humidity, leading to enhanced comfort and energy efficiency. The ComfortLink™ II system enables communication between the outdoor unit, indoor unit, and the comfort control (thermostat), optimizing overall system performance. The units are designed to operate with R-410A refrigerant, which operates at higher pressures than R-22, necessitating specific service equipment and procedures.

Important Technical Specifications:

  • Models Covered: 4TWV8024A1000B, 4TWV8036A1000B, 4TWV8037A1000B, 4TWV8048A1000B, 4TWV8049A1000B, 4TWV8060A1000B, 4TTV8024A1000B, 4TTV8036A1000B, 4TTV8037A1000B, 4TTV8048A1000B, 4TTV8060A1000B.
  • Refrigerant: R-410A. These systems use PVE oil, which readily absorbs moisture from the atmosphere.
  • Operating Range (Cooling): 55°F to 120°F.
  • Operating Range (Heating): -10°F to 66°F.
  • Dimensions and Weight (Estimated, Uncrated):
    • 4TWV/4TTV8024A, 4TWV/4TTV8036A: 41" H x 30" D x 33" W, 195-208 lbs.
    • 4TWV/4TTV8037A, 4TWV/4TTV8048A, 4TWV/4TTV8049A: 41" H x 34" D x 37" W, 225-245 lbs.
    • 4TWV/4TTV8060A: 45" H x 34" D x 37" W, 250 lbs.
  • Refrigerant Line Sizes (Vapor/Liquid):
    • 2.0-3.0 Ton (e.g., 4TWV8024A, 4TTV8036A): 5/8" or 3/4" vapor, 3/8" liquid.
    • 4.0 Ton (e.g., 4TWV8048A, 4TTV8048A): 7/8" vapor, 3/8" liquid.
    • 5.0 Ton (e.g., 4TWV8060A, 4TTV8060A): 1-1/8" vapor, 3/8" liquid.
  • Maximum Refrigerant Line Length:
    • For most models: 150 feet (max vertical change 50 feet).
    • For 4TWV8060A: 80 feet (max vertical change 10 feet).
    • For 4TTV8060A: 80 feet (max vertical change 25 feet).
  • Low Voltage Wiring: 18 AWG, 500 ft. combined maximum cable length for the entire communicating system.
  • Electrical Hazard: 400 Volts DC on inverter test points. Wait two minutes after disconnecting power and verify DC voltage is less than 42 VDC before servicing.
  • Approved Combinations: TZONE 850 Comfort Control or TZONE 950 with Software Version 3.0 or Higher, TAM8C or later models, XC80 Furnace, XC95m Furnace, and approved system accessories.

Usage Features:

  • Installation Location: Guidelines are provided for optimal unit placement, including clearances from walls, shrubbery, and other structures (minimum 12 inches from walls/shrubs, 5 feet above for top discharge, 3 feet in front of control box). Avoid locations near bedrooms or windows due to operational sounds and defrost vapor.
  • Cold Climate Considerations (Heat Pump Only): Units should be elevated 3-12 inches above the pad or rooftop to allow for drainage of snow and ice during defrost cycles. Snow drift barriers may be necessary.
  • Coastal Installations: For units installed within one mile of salt water, the BAYSEAC001 (Seacoast Kit) must be added.
  • Refrigerant Line Installation: Emphasizes proper insulation of the vapor line and, optionally, the liquid line. Direct metal-to-metal contact between lines should be avoided. Isolation hangers are recommended when fastening lines to structural elements to prevent vibration transmission. Brazing is required for all joints, not soldering.
  • Weigh-In Charging Method: This method is used for initial installation or when replacing the system charge, especially when power is unavailable or outdoor/indoor temperatures are outside the subcooling charging method's range. It involves calculating the required refrigerant charge based on factory charge, indoor coil adder, and refrigerant tube length multiplier.
  • Subcooling Charging Method: The only recommended method for charging between 55°F and 120°F ambient outdoor temperature, with indoor temperature between 70°F and 80°F. Subcooling charging correction charts are provided for 2.0, 3.0, 4.0, and 5.0-ton units.
  • Communicating Display Assembly (CDA): Provides access to Technician Menus for monitoring system status, drive stats, tachometer, active alerts, alert history, configuration parameters (external shut down, min airflow, blower delays, custom airflow, PFC), and control tests (forced defrost, EEV test, evacuation, drive diagnostic, OD fan test).
  • Defrost Control (Heat Pump Only): Utilizes a "Demand Defrost" system that measures outdoor ambient and coil temperatures (Delta-T) to determine the need for defrost, ensuring efficient operation. Forced defrost can be initiated via the CDA for testing purposes.

Maintenance Features:

  • Safety Warnings: Crucial safety information is highlighted, including warnings about hazardous voltage, high leakage current (requiring earth connection), refrigerant oil (R-410A specific equipment, PVE oil, system sealing, drier replacement), hot surfaces (compressor), and service valves.
  • Leak Check: After brazing, the refrigerant lines and evaporator coil must be pressurized to 150 PSIG with dry nitrogen and checked for leaks using a soapy solution.
  • Evacuation: The system must be evacuated until the micron gauge reads no higher than 350 microns, and then observed to ensure the gauge does not rise above 500 microns in one minute, confirming a leak-free and dry system.
  • Service Valve Operation: Detailed instructions are provided for opening gas and liquid service valves, emphasizing caution to prevent refrigerant release and property damage.
  • System Start-Up: Includes steps to set the thermostat to OFF, apply power, wait 3 hours if outdoor ambient is below 85°F, and run the "Charging Mode-Cooling" test mode via the comfort control for charge level setting.
  • System Stabilization: After adjustments, the system should stabilize for 20 minutes before final checks.
  • Performance Verification: Refer to System Pressure Curves in the Service Facts document to verify typical performance.
  • Checkout Procedures: A comprehensive checklist is provided to ensure all installation requirements are met, including wiring connections, voltage/current, refrigerant line isolation, leak checks, unit inspection, ductwork sealing, drain line clearance, register/grille/filter status, fan operation, blower motor speed, panel installation, gas heating system checks, and owner instruction.
  • Anti-oxidizing Grease: Supplied for low voltage field wiring connections at the outdoor unit to protect against corrosion.

Trane Variable Speed ComfortLink II 4TTV8048A1000B Specifications

General IconGeneral
BrandTrane
ModelVariable Speed ComfortLink II 4TTV8048A1000B
CategoryHeat Pump
LanguageEnglish

Related product manuals