Installing an MP—Model MP-52
Chapter 3
Trapeze Mobility Point Installation Guide
Version 3.0
58
Confidential—Beta1 Draft—Confidential—Beta1 Draft—20 Sep 04
Solid Wall or Ceiling Installation
1 Drill two pilot holes 6 cm (2-3/8 inches) apart. To install the MP as shown
below, place the holes vertically (not side to side).
2 Insert a mounting screw into each hole. Leave the screws about 6 mm (about
1/4 inch) above the surface. (Do not use the screws from the MP mounting kit.
Use screws appropriate for anchoring the device to the wall or ceiling.)
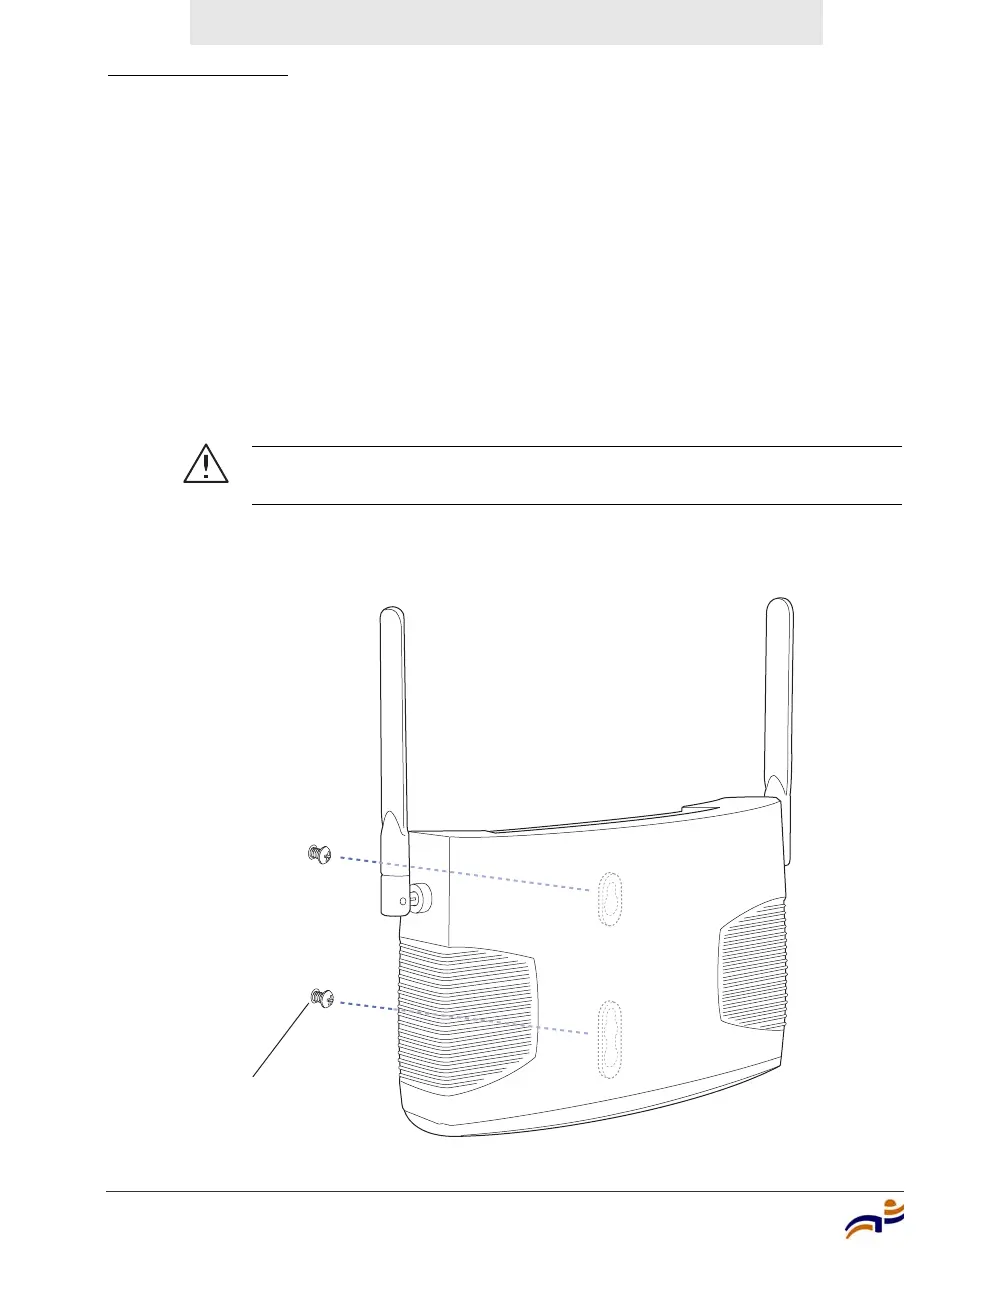
3 With the front panel of the MP facing downward, align the screw holes on the
bottom of the MP-52 over the screws and slide the MP downward to secure it
onto the screws, as shown in Figure 42.
Figure 42. Step 3—Attaching the MP to the Wall or Ceiling
Caution! To prevent possible damage to the MP, make sure the
device is fully locked onto the screws before letting go of it.
840-9502-0086
Screws attached to wall


 To Next Page