Installation (for qualified installers only) 9
© Travis Industries, Inc. 4050608 100-01203_000
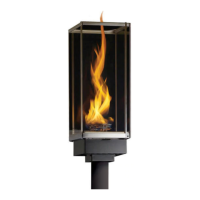
Post Mount and Control Cover Installation
A post mount and control cover are pre-attached to the torch for use with the optional post (3” round lamp post)
or pier mount. If using the wall mount, use the control cover included with the wall mount kit.
(a) Detach the control cover
from the torch assembly.
Keep the two thumb screws
used to attach the cover.
(b) Slide the control cover over
the post.
HINT
: Use low-tack tape to
protect the post from
scratches.
NOTE
: When installing the
post, make sure the post is
positioned with the
mounting holes 45° offset
from the front. The post
mount has obround holes
that allow 20° of rotation
(10° in each direction).
(c) Attach the gas line.
WARNING
: Take care
when handling the torch
assembly to not damage
the gas line.
(d) Attach the torch to the post
using the included ¼-20
screws.
(e) Attach the control cover to
the torch with the two thumb
screws.
! The safety label slides
into place between the
control cover and the
torch body.