6
•
SLEDGE
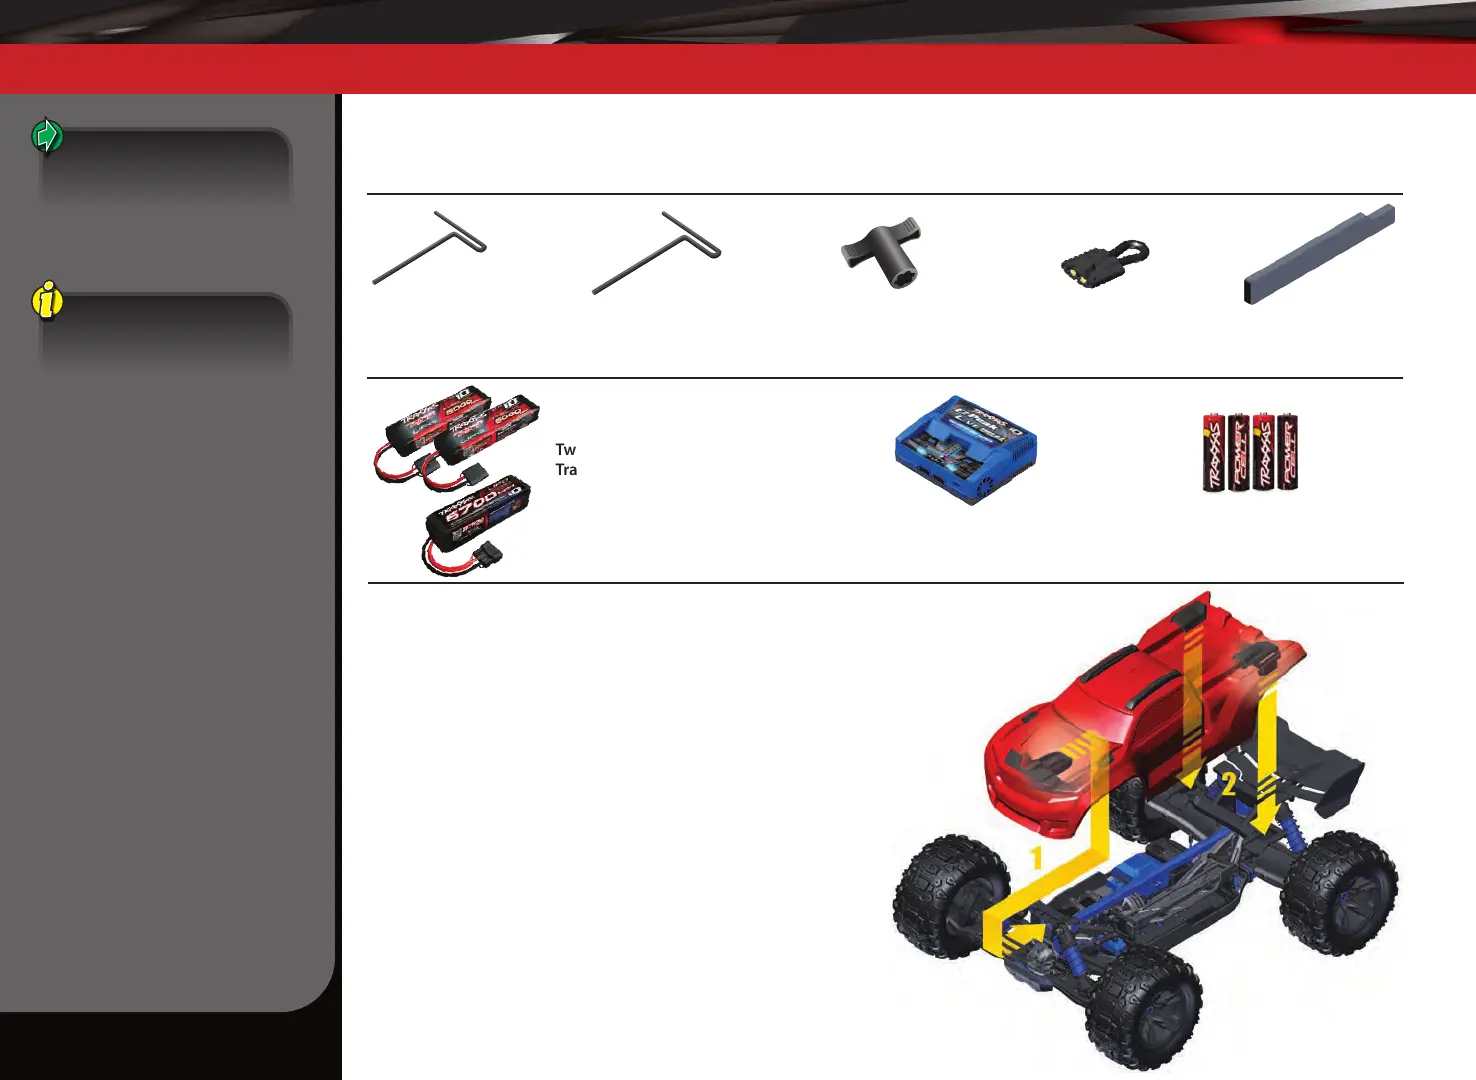
TOOLS, SUPPLIES AND REQUIRED EQUIPMENT
Your model comes with a set of specialty metric tools. You’ll need to purchase other items, available from your hobby dealer, to operate
and maintain your model.
Recommended Equipment
These items are not required
for the operation of your
model, but are a good idea to
include in any RC toolbox:
• Safety glasses
• Traxxas Ultra Premium Tire
Glue, part #6468 (CA glue)
• Hobby knife
• Side cutters and/or needle
nose pliers
• Soldering iron
For more information on
batteries, see Use the Right
Batteries on page 12.
*Battery and charger style is subject to change and may vary from images.
Supplied Tools and Equipment
Required Equipment (not included)
17mm wheel wrench
2.0mm “T” wrench
2.5mm “T” wrench
4 AA alkaline batteries
Battery charger
Two 2s/3s LiPo battery packs with
Traxxas High-Current connectors
(or single 4s LiPo battery pack using the
supplied accessory adapter)
REMOVING AND INSTALLING THE BODY
Your
Sledge™
includes an innovative latching system (patent pending) for
securing the body to the chassis (body clips are not required).
To remove the body for chassis access:
1. Reach beneath the rear of the truck body and pull the latches toward
the outside of the body to release them.
2. Push up on the latches to fully disengage the latches from the body
mount.
3. Slide the body forward away from the front shock tower to release the
front body tab (installation is the reverse of removal.)
4. Lift the body straight up from the chassis.
To reinstall the body:
1. Hook the front body tab into the front shock tower.
2. Slide the body backward and press down on the body at each latch
location until the latches snap into place on the rear body mount.
Note: To keep the clipless system functioning properly, periodically
inspect and clean the latches in the body and the slots on the rear body
mount. If dirt and grime accumulate on these components, the clipless
system will not operate smoothly.
4s accessory adapter Battery pack spacer
EZ-Peak
™
Live Dual
(part #2973)