Charger must be disconnected from the
mains supply when not in use.
After the charging period, remove the charger from
the AC supply socket.
An accessory external remote battery charger
cradle Ref. AIR/P/7 is also available.
Remote Battery Cradle Accessory
Ref. AIR/P/7
Q Remove battery pack from the AIR/PRO.
Q Fit the charger connector into the socket in the
remote battery cradle. Connect charger to a
mains AC supply.
Q Fit the battery into the cradle. The LED lights
up to red. When charging completed LED will
change to green.
Q After charging of battery, switch off the mains
AC supply, remove the battery from the cradle
and remove charger connector from the cradle.
AIR/PRO - USA
-8-
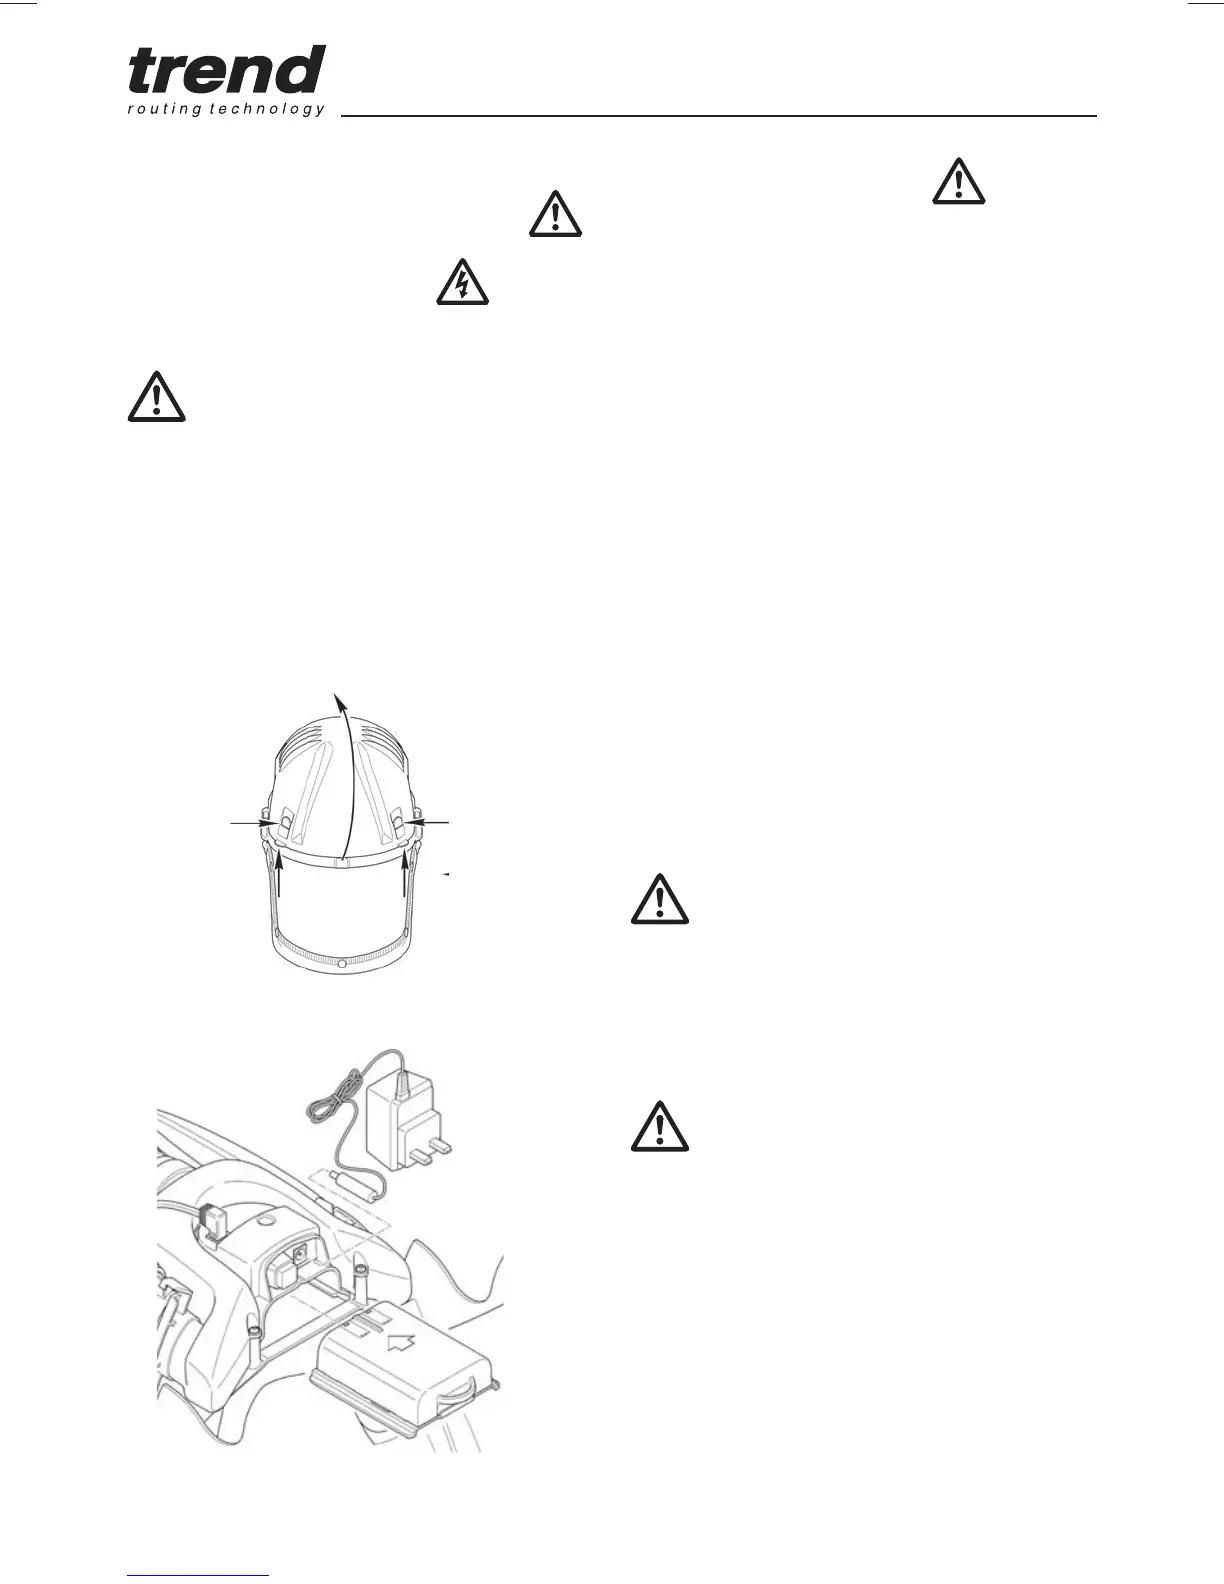
Q Slide the battery pack into its housing as shown
below.
Q Fit the battery charger connector into the rear of
the electronics unit and connect the charger to a
mains AC supply.
Q After charging switch off the mains AC supply,
remove the charger connector from the AIR/PRO.
Battery packs should be initially charged for
24 hours and 14 hours thereafter when fully
discharged. Full working capacity of the battery will
not be achieved until the battery has been through
3 or 4 complete charging cycles. Please note the
light will not extinguish when a full charge has been
achieved.
:KHQSOXJJHGLQWRD¶OLYH·RXWOHWDQGQREDWWHU\
connected LED illuminates as green to show a
live circuit. When connected to an under charged
battery, in helmet or battery cradle, the LED
changes to red. When battery charging is complete,
the LED changes back to green and battery is on a
WULFNOHFKDUJH)URP¶GHDG·WKHFKDUJHUZLOOVWLOOWDNH
about 14 hours (overnight) to fully charge a battery.
The AIR/PRO has a pre-use and low battery audio
signal. Leave the contaminated area if the buzzer
sounds.
Battery Pack Charging
ASSEMBLY, ADJUSTMENT
& OPERATION
Battery Pack Installation
The AIR/PRO is supplied with one rechargeable
battery pack for eight hours duration.
Battery pack must be initially
charged for 24 hours.
Check that the voltage shown on the charger is
suitable for the mains supply. A thermal fuse
protects the charger against short circuiting and
overloading.
Q Lift the cover by pressing the forward side tabs
inwards and rotating the cover rearwards as
shown below:
Q Refit cover ensuring tabs lock the cover in
position.