10133-11
4. ASSEMBLY STEPS
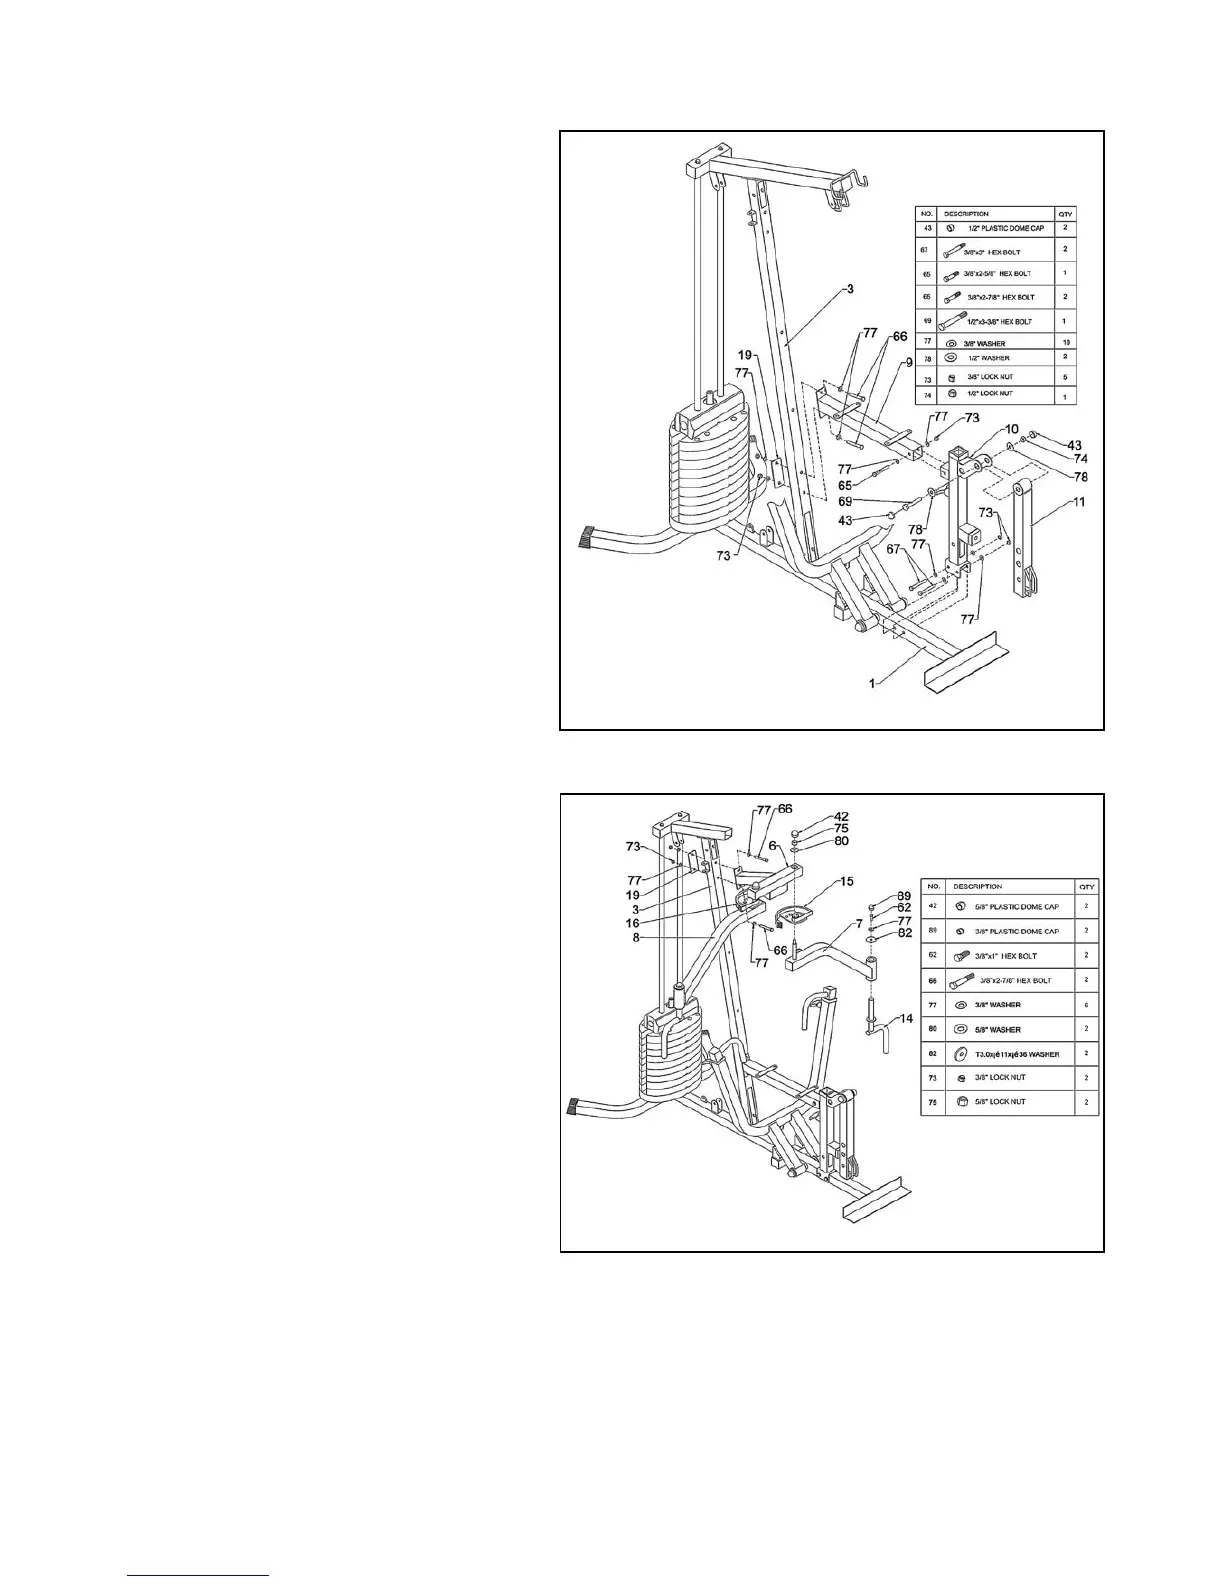
STEP 5
• AttachSeatCushionSupport(9)andConnect
Piece(19)toVerticalPost(3)usingtwo3/8”x
2-7/8”HexBolts(66),four3/8”Washers(77)
andtwo3/8”Locknuts(73).
• AttachSeatCushionSupport(9)toSeat
SupportPost(10)usingone3/8”x2-5/8”Hex
Bolt (65), two 3/8” Washers (77) and one 3/8”
Locknut(73).
• AttachSeatSupportPost(10)toMainBase
(1)usingtwo3/8”x3”HexBolts(67),four
3/8”Washers(77)andtwo3/8”Locknuts(73).
• AttachLegExtension(11)toSeatSupport
Post(10)usingone1/2”x3-3/8”HexBolt(69),
two1/2”Washers(78)andone1/2”Locknut
(74).
• Placetwo1/2”PlasticDomeCaps(43)overthe
1/2”x3-3/8”HexBolt(69)and1/2”Locknut
(74).
STEP 6
• AttachtheButteryExtension(6)and
ConnectPiece(19)toVerticalPost(3)using
two3/8”x2-7/8”HexBolts(66),four3/8”
Washers(77)andtwo3/8”Locknuts(73).
• FirstcutoffanddiscardthePlastictiethat
secures the 3/4”Oil Bushing(83) before
proceeding with assembly
• AttachLeftButteryArm(7)andLeft
AdjustablePlate(15)toButteryExtension
(6) using one 5/8” Washer (80) and one 5/8”
Locknut(75).Place5/8”PlasticDomeCap(42)
over5/8”Locknut(75).
• AttachHandleTube(14)toLeftButtery
Arm(7)using3/8”
x1”HexBolt(62),3/8”
Washer(77)andØ36xØ11xT3.0
Washer (82). Place one 3/8” Plastic Dome Cap
(89)overthe3/8”x1”HexBolt(62).
• Repeattheabovestepsasdescribedtoattach
theRightButteryArm(8)andRightAdjustable
Plate(16)totheButteryExtension(6).