NETWORK SET UP True Value Company
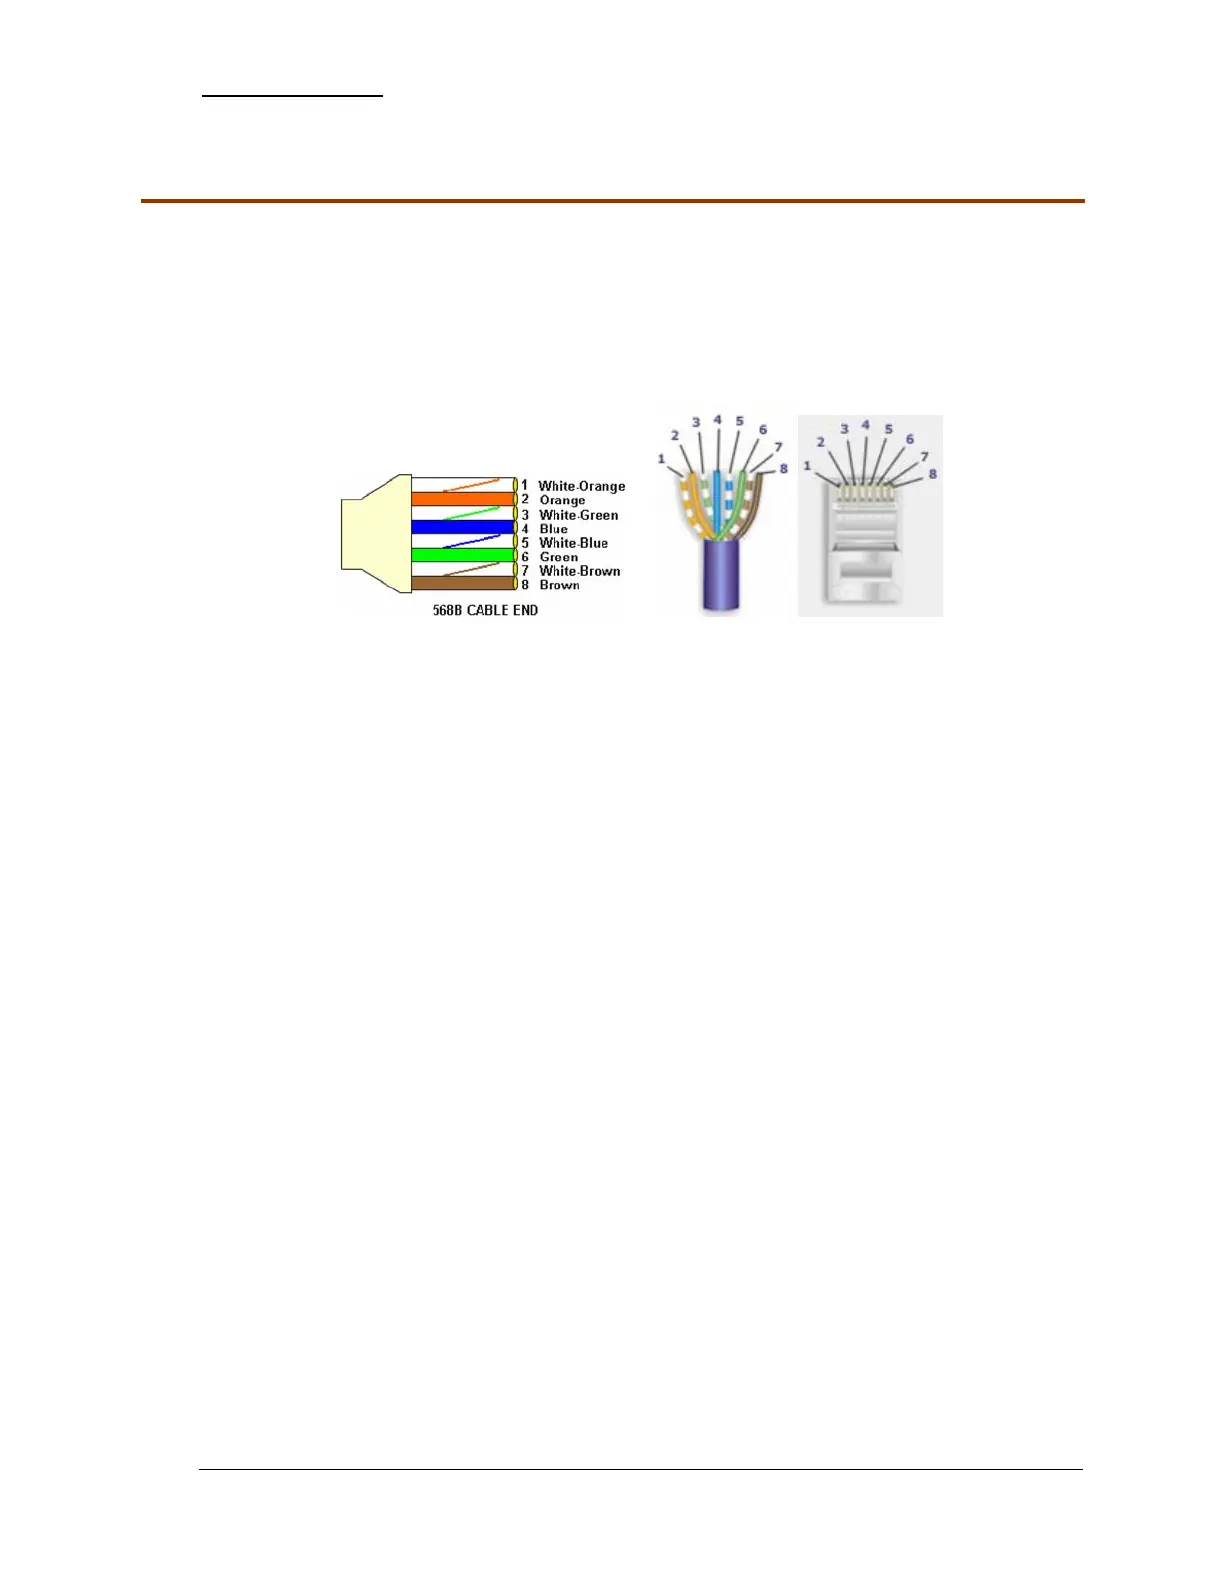
Ethernet Wiring Diagram (CAT 5e Cable)
CAT5e Cable is short for Category 5e cable. Cat5e cable is network cabling consisting of four
twisted pairs of copper wire terminated by RJ45 connectors.
¾ Cat 5e cabling supports frequencies up to 350 MHz and speeds up to 1000 Mbps.
¾ Solid CAT5e cable supports long cable runs and is designed for fixed cabling situations
like homes, offices, and buildings. The maximum length of each cable is 328 feet.
1. If you order CAT 5e cable in bulk lengths, you will need to assemble your own connectors
according to wiring standard 568-B as shown below.
2. Using a stripping tool, strip the cable jacket slightly more than one inch.
3. Untwist each pair of wires back to within 1/8" of the cable jacket.
4. Using your fingers, straighten each wire.
5. Utilizing the 568B diagram shown above, place the wires in the order displayed.
6. Bring all of the wires together, until they touch.
7. Recheck the wiring sequence with the 568B diagram shown above.
8. Grasp the wires firmly, between your thumb and forefinger, flatten them, and even wiggle
them a bit, to take out the curliness. The wires must lay flat and together, aligned as close as
possible.
9. While holding the wires firmly, cut off the wires 1/2" from the cable jacket. This is a very
critical step. If the wires are not cut straight, they may not all make contact into the connector.
10. You should cut the wires with some sharp wire strippers or even high quality scissors. You
need to avoid wire cutters that flatten the ends of the wires. This makes stuffing the wires very
difficult.
11. You must cut all of the wires at a perfect 90 degree angle from the cable at 1/2" from the end of
the cable jacket.
12. Stuff the wires into the connector, making sure the wires stay lined up.
13. Push moderately hard to assure that all of the wires have reached the end of the connector. Be
sure that the cable jacket goes into the back of the connector by about 3/16".
14. Place the connector into a crimp tool, and squeeze hard so that the handle reaches its full
swing.
15. Repeat the process on the other end.
16. Use a cable tester to test for proper continuity.
- 8 - RockSolid Equipment Installation Instructions_beta