Technical Section
Calibration
The EverWatch Face Velocity Monitor is a very versatile device which will work with a variety of
fume hoods. Because fume hoods vary in design and performance, the EverWatch monitor must
be calibrated on the fume hood it is installed. The calibration procedure is quite simple and can
be accomplished in a matter of minutes with a little preparation and practice.
Every EverWatch monitor shipped has an orange WARNING label attached indicating calibration
is required:
WARNING:
Unit is not calibrated.
Remove label only after field
calibration is complete.
This label is to be removed only after field calibration is complete.
Before beginning to calibrate the EverWatch monitor, take a few minutes to review the calibration
procedures below. The following equipment is required to perform the calibration:
Tape
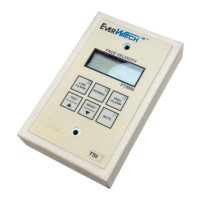
Portable Air Velocity Meter such as TSI VELOCICALC
®
or VELOCICHECK
®
meters
The calibration procedure can be broken down into the following:
Entering the calibration menu.
Establishing a zero flow velocity.
Setting the velocity calibration span.
Exiting the calibration menu.
Calibration Procedure
Power up the EverWatch monitor and allow the unit to warm up (30 to 60 seconds) before
beginning the calibration procedure. On initial power up the keypad is disabled and SEnS is
indicated on the display for approximately 30 seconds.
Note: All menu items described below are found in the Calibration menu.
1. Select CAL (calibration menu). See “Software Programming” if not familiar with
keystroke procedure.
2. Place a piece of tape over the velocity sensor opening to seal off the air flow through
the sensor (off white colored sensor is located inside of fume hood).
3. Select LCAL (zero calibration). Press the NORMAL key and CAL will flash for two
minutes. During this time the monitor automatically calibrates the sensor for zero
flow.
Note: If COdE is flashing on the display, the access code enable function is set to
on and an access code is required to enter the calibration menu. Enter the
calibration menu access code (code is located on last page of manual).
 Loading...