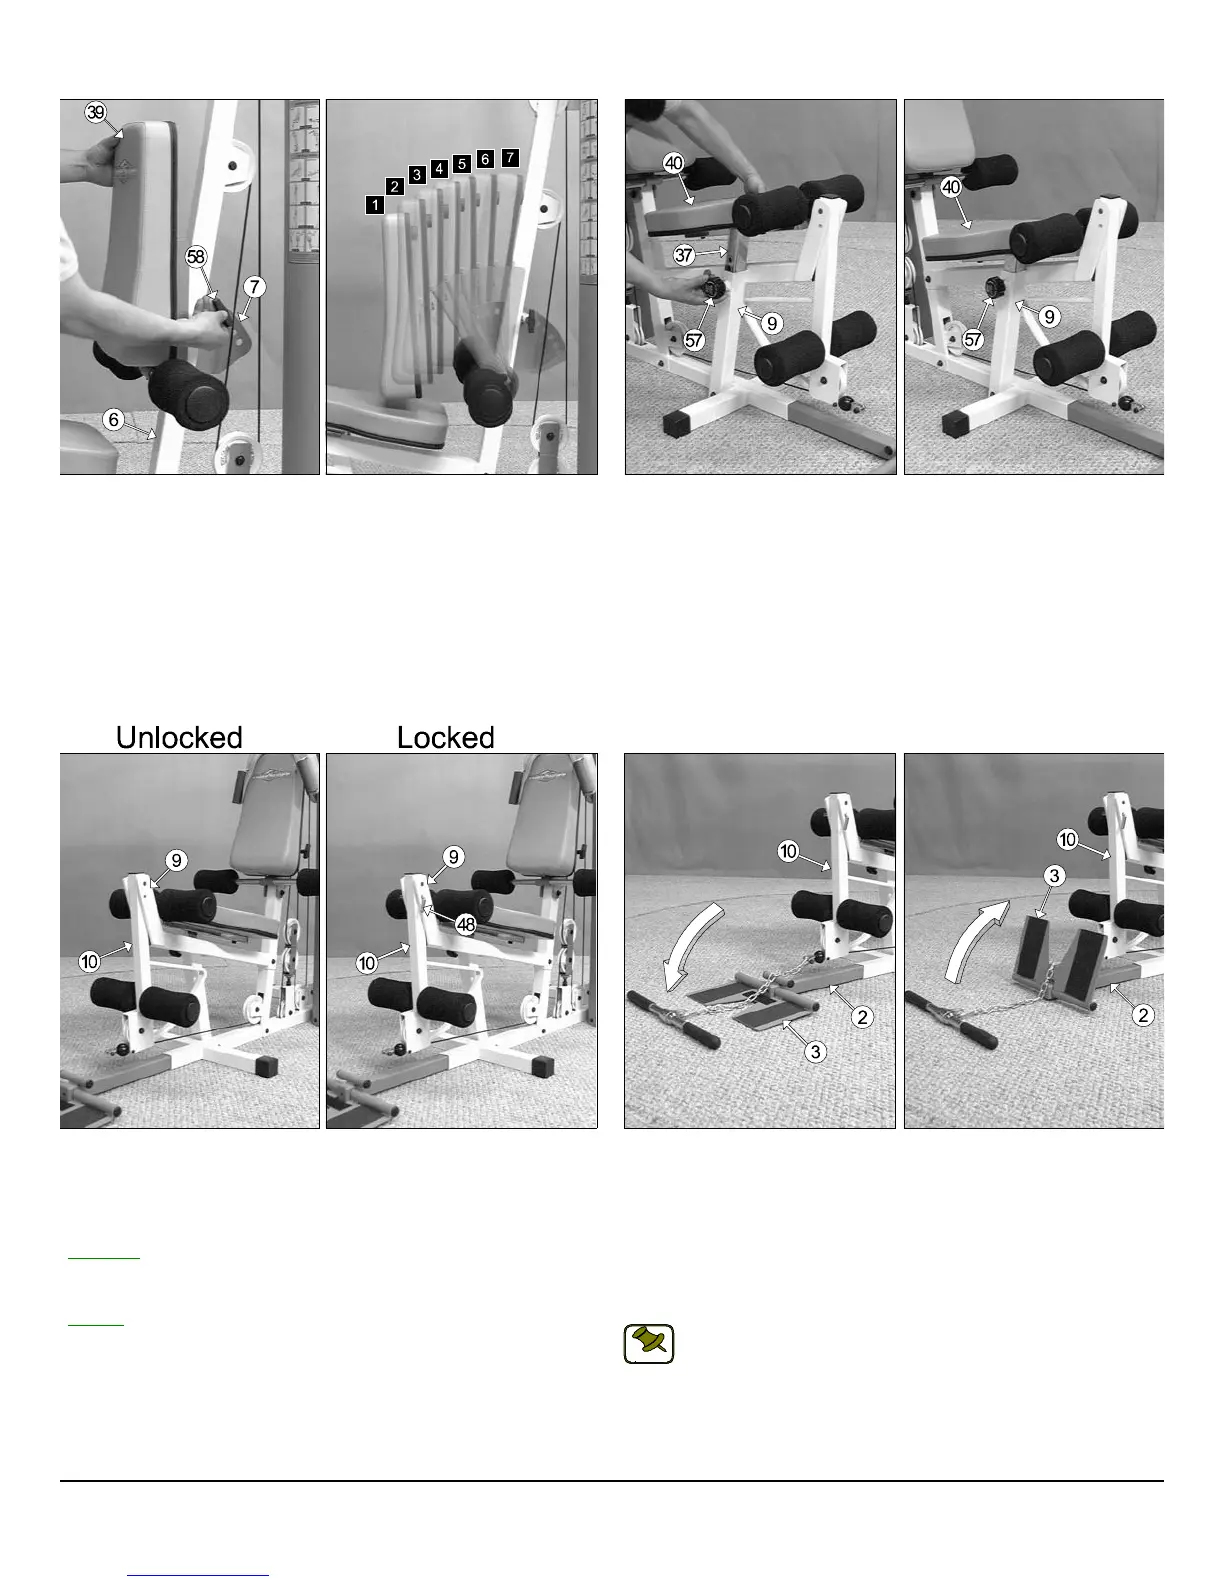
ig. 71 Back Pad (#39) adjustment:
. Grasp the Back Pad (#39).
. Pull the Push Pull Pin 1/2” X 5-5/8 (#58) to release the Back Pad
Bracket (#7) from the Front Upright (#6).
.Adjust the Back Pad (#39) to one of the seven available positions.
. Release the Push Pull Pin 1/2” X 5-5/8 (#58) and make sure it fully
engages into the selected hole of the Back Pad Bracket (#7).
Fig. 72 Seat Pad (#40) adjustment:
1. Grasp the Seat Pad (#40).
2. Turn counterclockwise then pull the Turn/Pull Pin w/Knob (#57) to releas
the Adjustable Seat Frame (#37) from the Leg Extension Bench Fram
(#9).
3. Adjust the Seat Pad (#40) to a desired height.
4. Release the Turn/Pull Pin w/Knob (#57) and make sure it fully engag
into the selected hole of the Adjustable Seat Frame (#37).
5. Complete the adjustment by turning the Turn/Pull Pin w/Knob (#5
clockwise.
us
men
ea
ures
ig. 73 Locking the Leg Extension Arm (#10)
. Locate the L-Locking Pin (#48).
. Insert the L-Locking Pin (#48) through the Leg Extension Bench
Frame (#9) and the Leg Extension Arm (#10), as shown above.
Unlocked
Leg Extension Arm used on Exercises:
Leg Extension
Leg Curl
Locked
Leg Extension Arm used on Exercises:
Low Row
Standing Arm Curl
Seated Row
Seated Chest Press
Seated Shoulder Press
Fig. 74 Positioning the Low Row Foot Support (#3)
1. Picture above at the left shows the Low Row Foot Support (#3) pos
tioned and ready for Standing Arm Curl Exercise. It is IMPORTANT th
when in this position, you must stand completely on the Low Row Fo
Support (#3) and not off. This is done to prevent the unit from tippin
during this workout exercise.
2. Picture above at the right shows the Low Row Foot Support (#3) pos
tioned and ready for the Seated Rowing Exercise.
Note: Do not drop the Low Row Foot Support (#3) or leave it in t
position as pictured above at the right. Always lower the Low Ro
Foot Support (#3) when not in use.
NOTE:
34 TS-1000 Home Gym w/Adjustable High-Low Pulley Syste