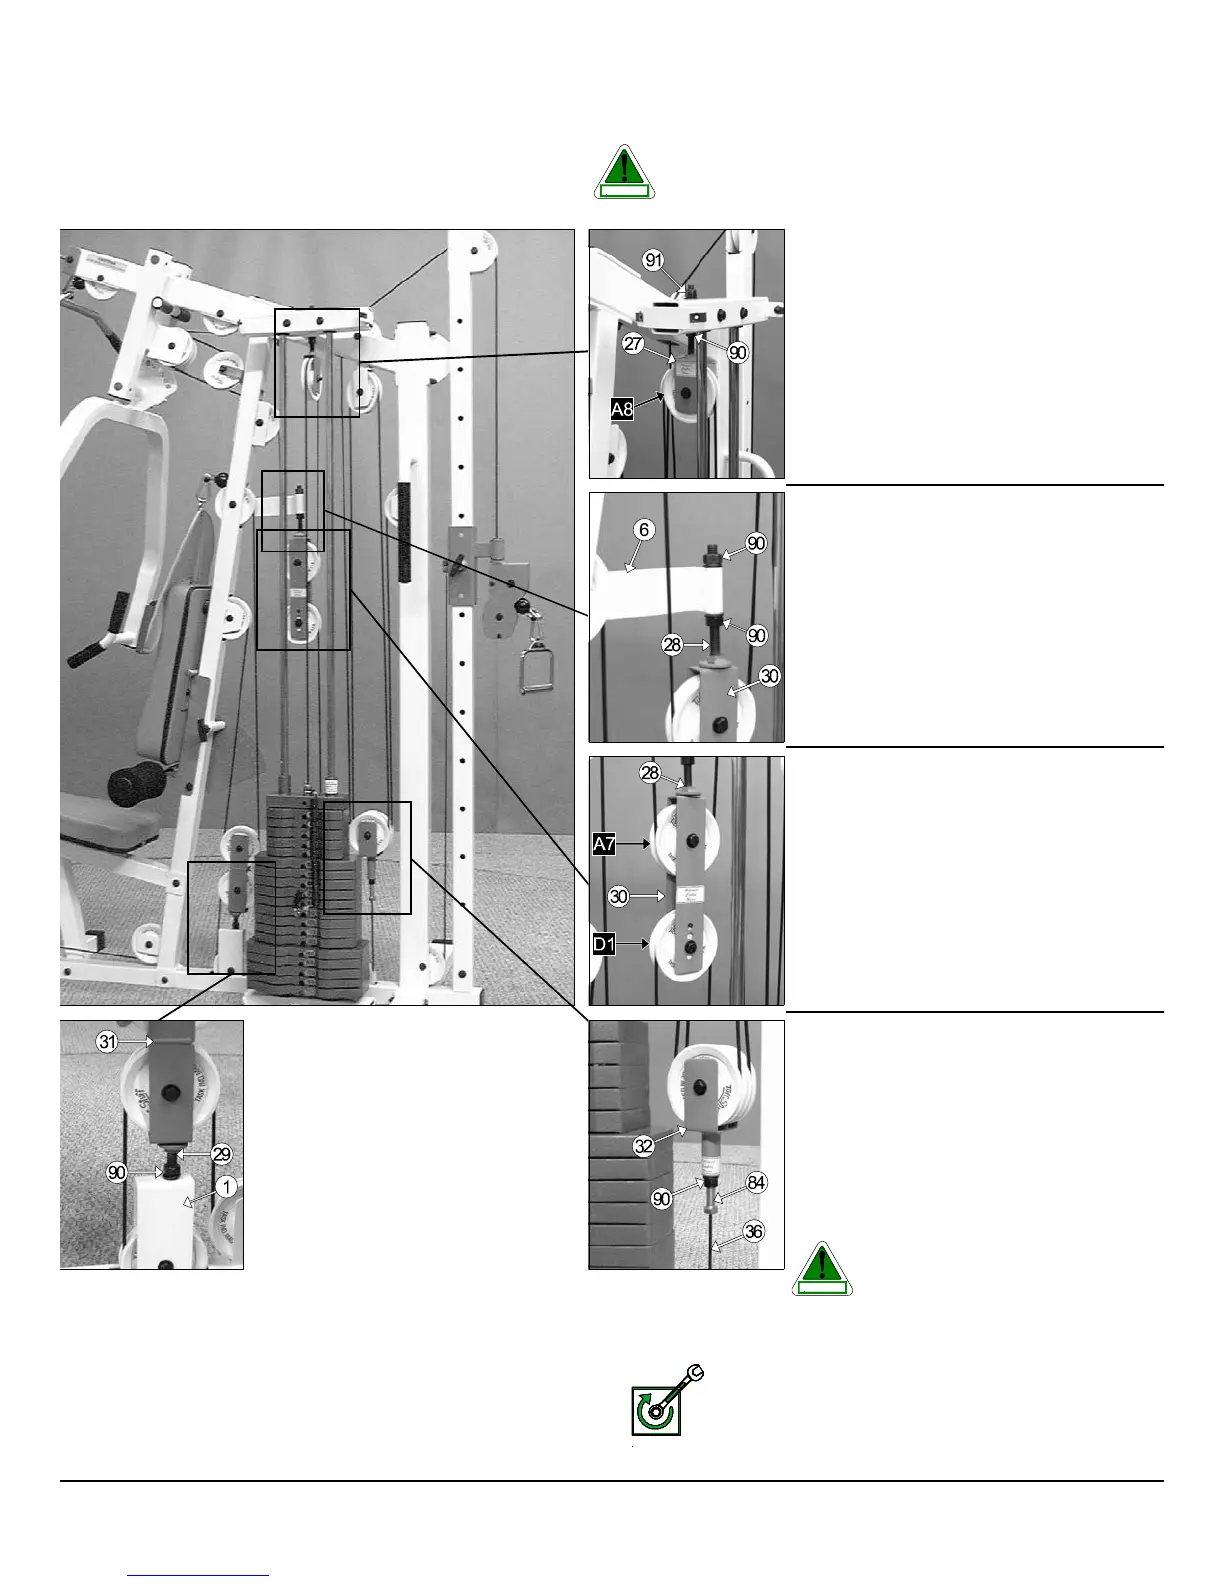
he Diagram below depicts the location of the cable adjustments on
ach work station. It is imperative that you maintain the cables’ proper
djustment to ensure a safe and smooth operation.
TS-1000 CABLE ADJUSTMENT DIAGRAM
Cable Adjustment for:
Adjustable Pulley Bracket (#27)
1. Loosen the bottom Regular Hex Nut (#90).
2. Adjust the top Nylon Insert Lock (#91) to give th
cable proper tension.
3. Re-tighten the bottom Regular Hex Nut (#90) t
complete the cable adjustment.
Adjustment for:
Long Adjustable Stopper (#28)
1. Loosen the two Regular Hex Nuts (#90).
2. Twist the Long Adjustable Stopper (#28) to le
or right until it is making contact with the Close
End Adj. Double Pulley Bracket (#30).
3. Re-tighten the Regular Hex Nuts (#90) t
complete the adjustment.
Cables should be inspected and adjusted periodically to avoid any
slack in the cables which would, consequently, prevent any dam-
age to the equipment or personal injury.
Cable Adjustment for:
Leg Extension/Abdominal Cable
(#36)
1. Loosen the Regular Hex Nut (#90).
2. Thread the Hex Tap Bolt 1/2-13 x 3 (#84) in
out of the threaded socket of the Floating Doubl
Pulley Bracket (#32) to give the Leg Extensio
Abdominal Cable (#38) proper tension.
3. Re-tighten the Regular Hex Nut (#90) to complet
the adjustment.
Caution: Make sure the Hex Tap Bolt 1/
13 x 3 (#84) is threaded at least 1/2” into th
threaded socket of the Floating Doubl
Pulley Bracket (#32) once the cable adjus
ment is complete.
22
S-1000 Home Gym w/Adjustable High-Low Pulley System
CAUTION
Adjustment for:
Short Adjustable Stopper (#29)
1. Loosen the Regular Hex Nut (#90).
2. Twist the Short Adjustable Stopper (#29)
to left or right until it is making contact with
the Closed-End Double Pulley Bracket
(#31).
3. Re-tighten the Regular Hex Nut (#90) to
complete the adjustment.
Cable Adjustment for:
Closed-End Adj. Double
Pulley Bracket (#30)
1. Remove the hardware from the Nylon Pulley 4 1/
Rd. (#67-Labeled D1).
2. By interchanging the Nylon Pulley 4 1/2 Rd. (#6
to the next adjustment hole it will make one inc
cable adjustment.
3. Re-tighten the hardware for the Nylon Pulley 4 1/
Rd. (#67) to complete the cable adjustment.
CAUTION
Fully Fasten: Proceed to Fully Fasten thes
hardware assemblies and all of the previous asse
blies that were left loosely fastened.
FULLY FASTEN