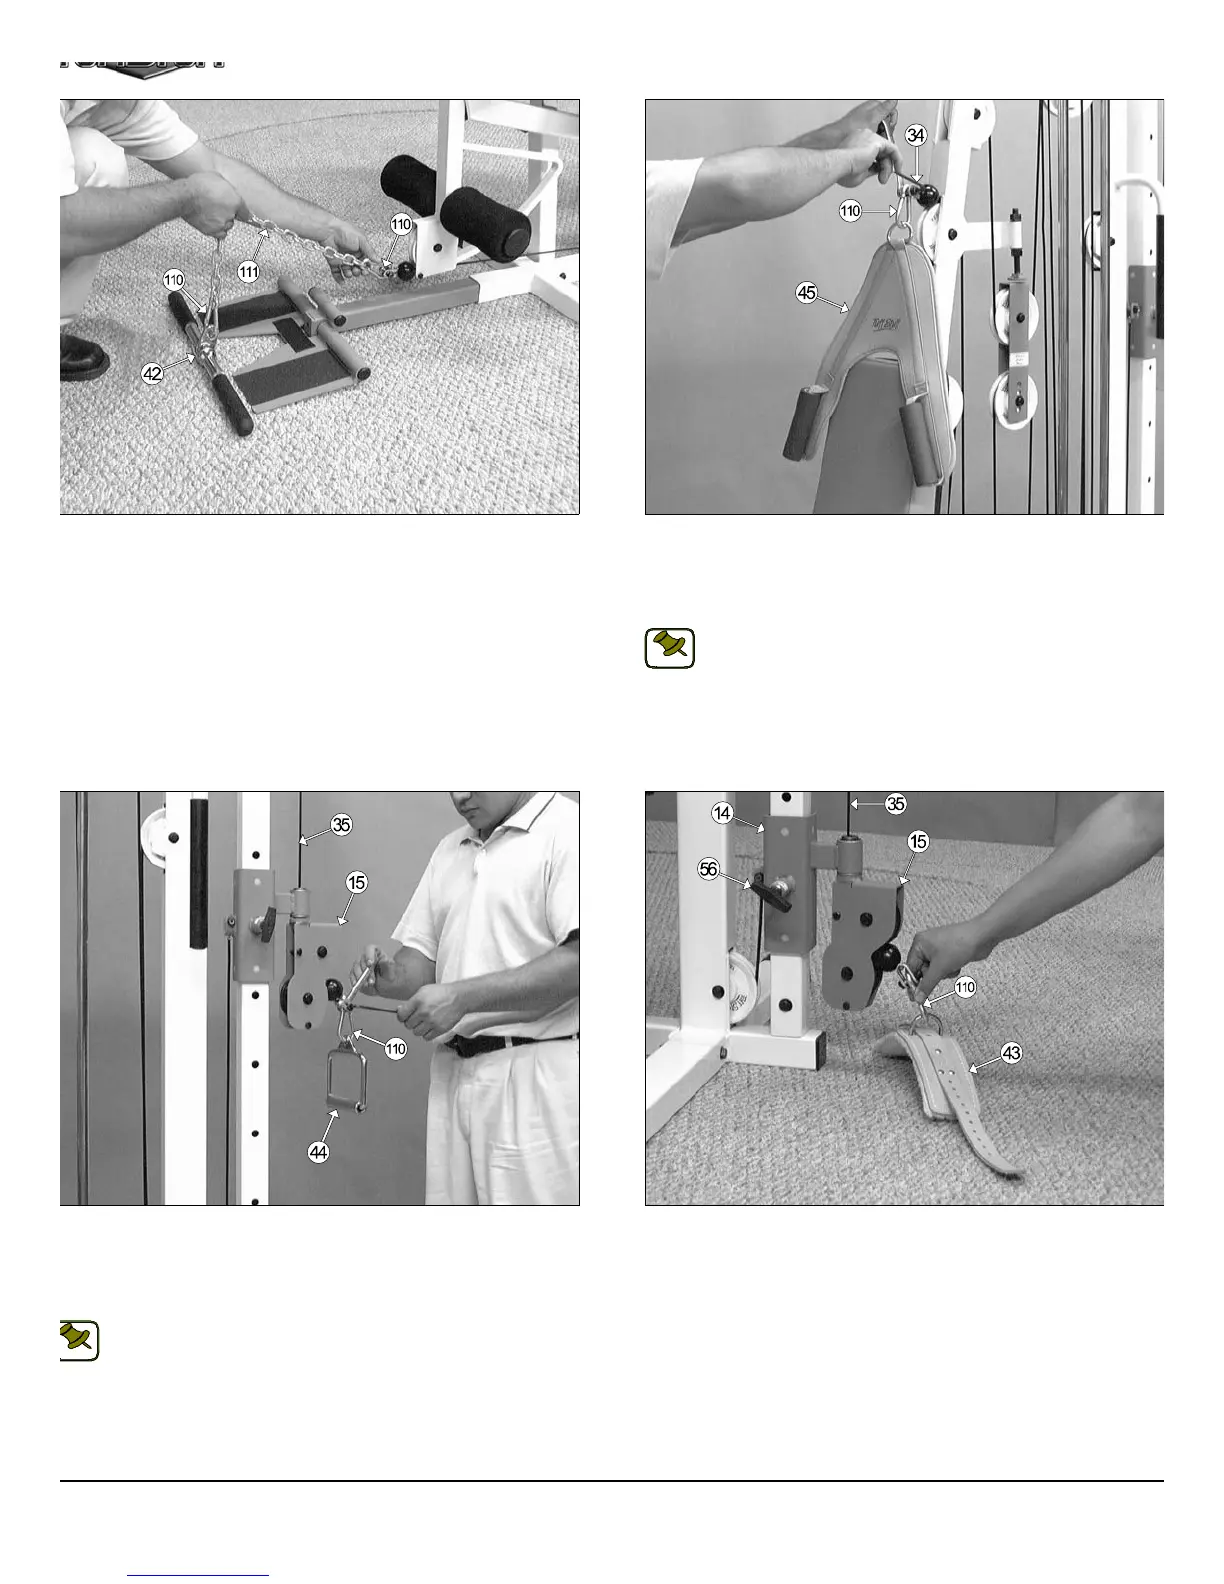
IG. 59 Locate the Coil Chain 3/16 X 21 (#111), two Snap Links (#110)
nd attach them to the Low Row Bar 20” (#42) and to the Leg
xtension/ Abdominal Cable (#34), as shown above.
FIG. 60 Affix the Abdominal Crunch Harness (#45) to the Leg Exte
sion/Abdominal Cable (#34) using one Snap Link (#110), one Should
Bolt 3/8 x 3/4 (#106), and one Nylon Insert Lock Nut 5/16-18 (#94). Us
the supplied Hex Key 3/16” (#114) and a 1/2” combination wrench to fa
ten this assembly properly.
Note: Refer to the Leg Extension/Abdominal Cable Mapping Di
gram on page 25 for further illustration of this assembly.
IG. 61 Affix the Chrome Stirrup Handle (#44) to the High-Low Cable
35) using one Snap Link (#110), one Shoulder Bolt 3/8 x 3/4 (#106), and
ne Nylon Insert Lock Nut 5/16-18 (#94). Use the supplied Hex Key
16” (#114) and a 1/2” combination wrench to fasten this assembly prop-
rly.
Note: Refer to the High-Low Cable Mapping Diagram on page 26
for further illustration of this assembly.
FIG. 62 The Leather Ankle Strap (#43) is another accessory that ca
be used at the High-Low Station. Adjust the High-Low Carriage (#1
to the first Adjustment setting, as shown above, then connect the Hig
Low Cable (#35) to the Leather Ankle Strap (#43) using the Snap Lin
(#110).
21 TS-1000 Home Gym w/Adjustable High-Low Pulley Syste
NOTE:
NOTE: