31
LEGACY CONTROLLER
INSERT SMART CARD
PRESS
g [BACK] TO
EXIT
SMARTCARD
FAULTS
CONFIG MENU
SETUP
TEST MODE
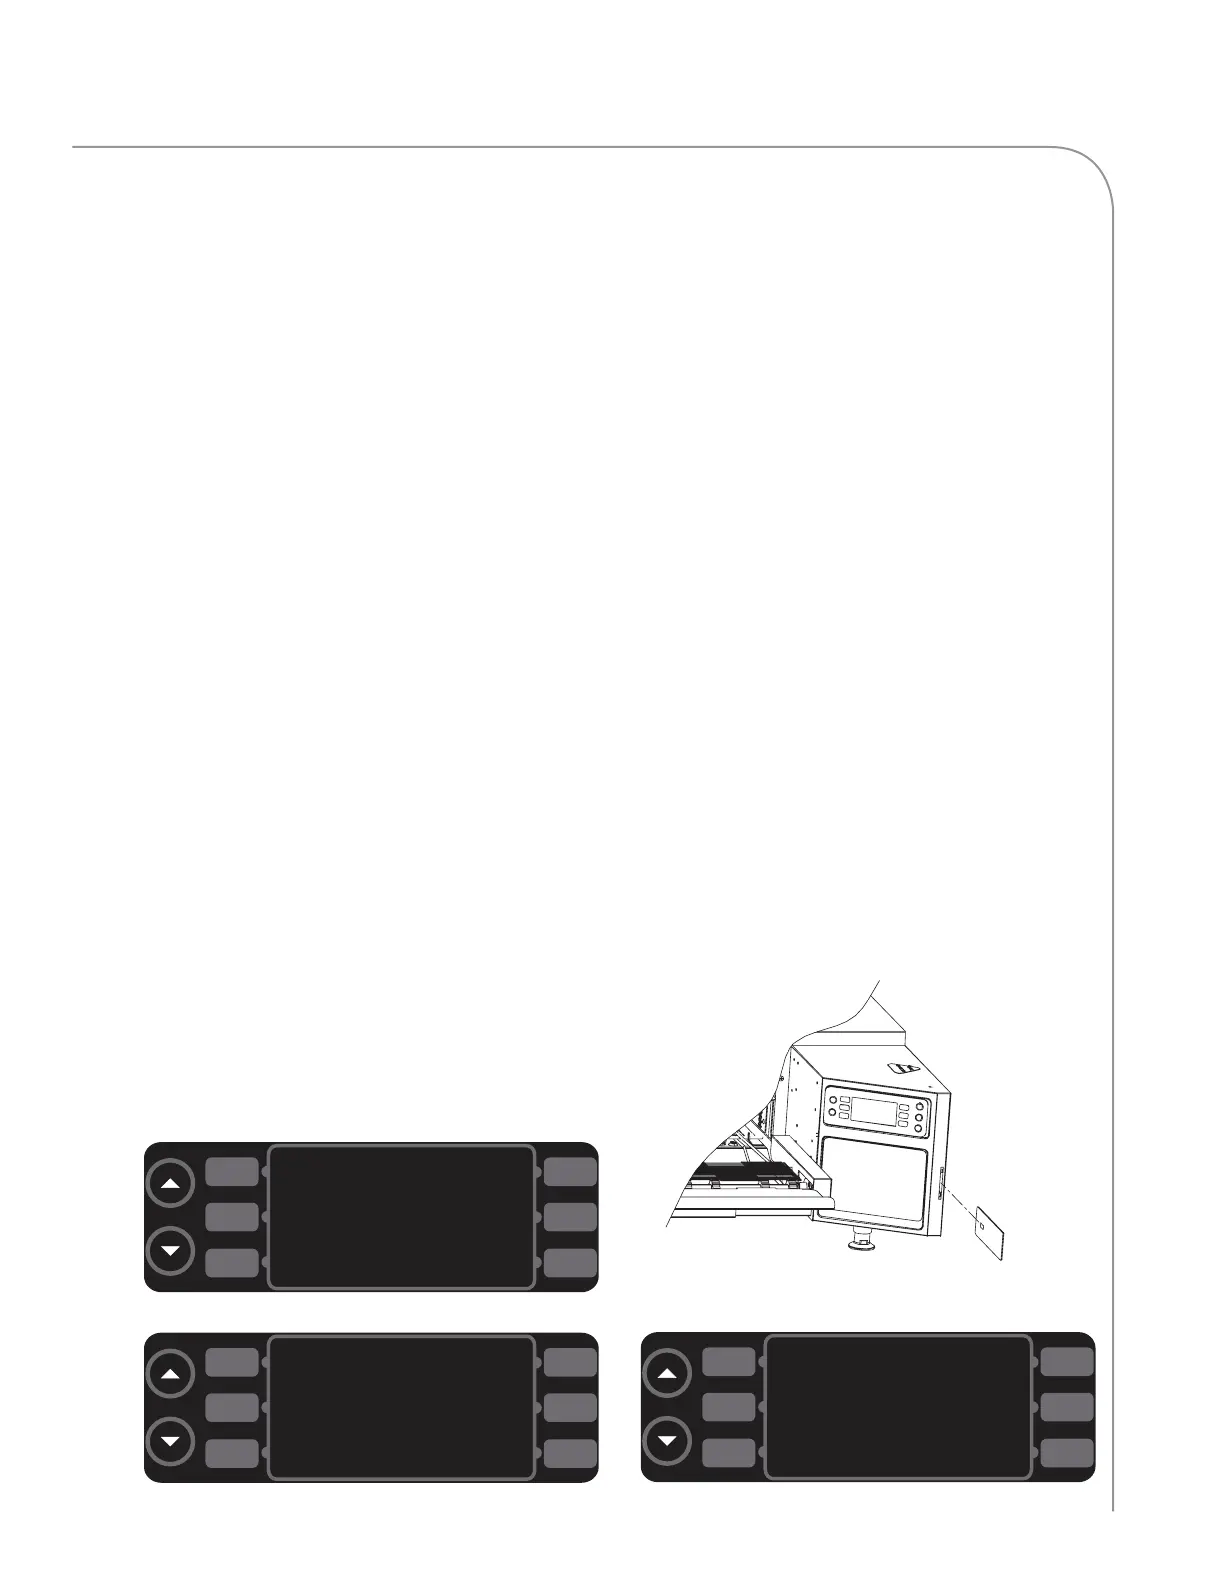
Figure 16: Config Mode
LOAD FROM CARD
SMARTCARD
SAVE TO CARD
Figure 17: Smart Card Screen
Figure 19: Insert Smart Card Screen
Figure 18: Loading a Smart Card
L1
L2
L3
R1
R2
R3
L1
L2
L3
R1
R2
R3
L1
L2
L3
R1
R2
R3
Configuration Mode
The config mode (Figure 16) serves four main
purposes:
1. To access the smart card screen.
2. To access the fault count screen.
3. To access the setup mode.
4. To access the test mode (service use only).
To access the configuration mode, touch the up
key from the oven off mode.
Smart Card Screen (Loading a Menu)
The smart card screen allows the user to
-Load a menu from smart card to oven.
-Save a menu from oven to smart card.
To load or save a menu,
1. Touch L3 (Figure 16) to access the smart
card screen (Figure 17).
2. Insert a smart card into the smart card slot
(Figures 18 and 19), with the gold chip
facing the front of the oven.
3. Load or save a menu.
- Touch R1 to load a menu from the smart
card to the oven (Figure 17).
- Touch R2 to save a menu from the oven to
the smart card (Figure 17).
Accessing the Fault Count Screen
From the configuration mode (Figure 16), touch
R1 to access the fault counts screen (Figure 20,
page 16). The oven will display the number of
faults that have occurred.
Accessing the Setup Mode
From the configuration mode (Figure 16), touch
L1 to access the setup mode. The setup mode
allows the user to customize several oven settings -
see below for more details.
Setup Mode
Figure 21, page 16.
The setup mode serves four main purposes:
1. To change the display temperature.
2. To access the edit option screen.
3. To change the display language.
4. To access the info screen.
To access setup mode, touch the up key from
the oven off or cooling down mode (to access
the configuration mode), and then touch L1.
HCT- 4201 / Rev S / January 2024
 Loading...