6
CLEANING
Step 6: Clean the Oven Interior, Continued
• Allow Oven Cleaner to penetrate stains for five minutes.
• Clean the oven interior with a nylon scrub pad.
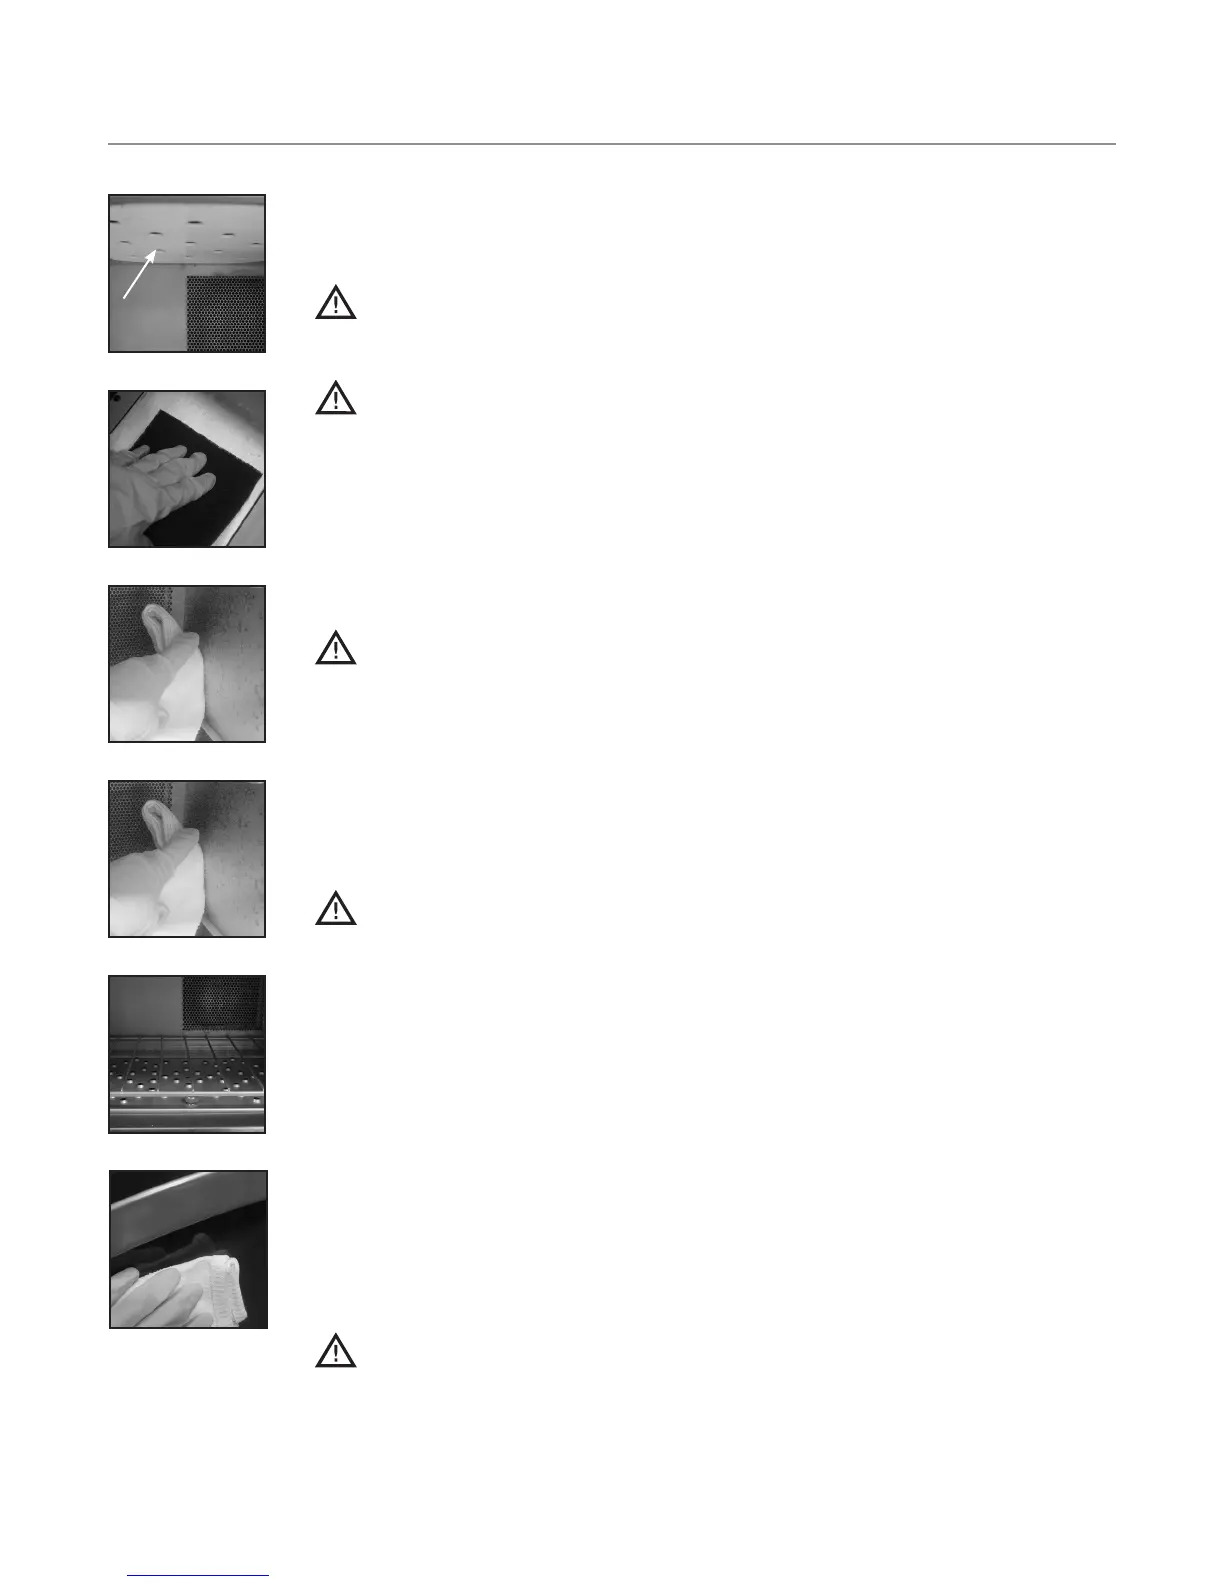
CAUTION: DO NOT attempt to scrub the upper jetplate (A). If food is stuck
to the oven ceiling, gently remove it without applying pressure to the glass
plate. Breakage will result in a non-warranty service call.
CAUTION: DO NOT remove the top glass jetplate (A); breakage will
result in a non-warranty service call.
Step 7: Clean and Dry the Oven Door
• Clean the oven door with Oven Cleaner and a nylon scrub pad.
• Wipe the oven door with a damp towel, and then a dry towel.
Step 8: Rinse or Wipe the Oven Interior
CAUTION: do not use a hose or water jet for cleaning. Doing so can damage
critical oven components, resulting in a non-warranty service call.
• Wipe down the oven interior with a clean damp towel.
• Dry the oven interior with a clean towel.
Step 9: Apply TurboChef® Oven Guard
• Spray TurboChef® Oven Guard onto a clean towel.
• Wipe the interior walls and the inside of the oven door.
CAUTION: DO NOT spray Oven Guard into the cavity, especially around the
holes on the back oven wall. Doing so can damage critical oven components,
resulting in a non-warranty service call.
Step 10: Reinstall Components
• Reconnect the wire rack to the lower jetplate, and reinstall both items.
• Close the oven door.
• Reinstall the filter, or replace it with a new one if the mesh is deteriorated, has
large openings, or has started to dislodge from the frame.
Step 11: Clean the Oven Exterior
• Wipe the oven exterior with a clean, damp towel.
• Remove the lower panel and remove large food particles.
• Wipe the panel with a clean, damp towel.
CAUTION: DO NOT spray chemicals into any openings, such as the louvers
on the side panels or the rear vent catalyst housing. Doing so can damage
critical oven components, resulting in a non-warranty service call.
• The oven is ready to turn on.
A
Step 6
Step 7
Step 8
Step 9
Step 10
Step 11
 Loading...