28
6. Lubricate shafts and press the double row ball bearings [9] onto rotor shafts and into end plate bores.
NOTE
These bearings have been ush ground at the factory. The inner race will
have a black dot etched on the surface. This dot must be up and visible
when bearings are installed. Secure with bearing retainers (14) and socket
head screws (30).
7. Check clearance between the face of the end plate and rotor lobes. See Assembly Clearances table
on page 41 for correct gear end clearances. If clearances are not within specications, recheck parts to
nd cause of improper clearances before proceeding.
8.2.3 INSTALLATION OF TIMING GEARS
8. Install spacer [17] (.260” {6.60 mm} thickness) on one shaft and spacer [18] (.200” {5.08 mm} thickness)
and oil slinger [20] on the other shaft.
NOTE
The oil slinger and its spacer should always be mounted on lower rotor for
horizontal ow units.
It can be mounted on either shaft for vertical ow units. Install timing shim in same location as found in
disassembly. This does not necessarily insure the unit will be in proper time. Adjustments can
be made later in the assembly process.
9. Insert gear keys [24] in their proper location and ush with top of shaft. Use the two keyways facing to
the right. A tight t is required. Coat shafts and keys with lubricant. Install drive gear (right hand helix)
on drive rotor (left side). To install driven gear, align reference marks as shown in Fig. 7. Install driven
gear carefully to avoid damaging any teeth when engaging opposite gear. Secure with spacers [57],
washers [25], and at head Allen screws [29].
NOTE
All timing gears must be used in sets, as they are matched and serially
numbered.
10. Remove assembly from press and stand on work table with gears down. Place blocks under end plate
to prevent assembly from falling over. Drive gear should remain on left side.
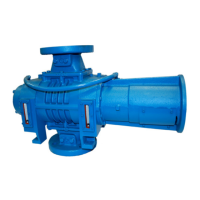
8.2.4 HOUSING AND FREE END ASSEMBLY
11. Place a small bead of sealer around the periphery of the end plate, encircling each bolt hole. Install
rotor housing [3] and secure with 4 screws evenly spaced.
12. Check clearance between end of lobes and housing using a at bar and feeler gauges or a depth
micrometer. Refer to Assembly Clearances table on page 41 for free end clearances.
13. Place a small bead of sealer around the periphery of the housing, encircling each bolt hole. Install free
end plate and secure with 4 screws.
14. 90/91 - Install mating rings same as gear end, No. 5.
92/93 - Install seal slinger same as gear end.
15. Install bearing spacers [123] on each shaft. Lubricate shafts and install roller bearings [10].
NOTE
Inner race of bearing has a ange on one side only. This ange must face
outward. See Figure 14.
16. Install oil retainer rings [14] with button head screws [30]. Only two required for each ring.
 Loading...