EasyManua.ls Logo

TUYA 96236 - User Manual

TUYA 96236
23 pages
Print Icon
To Next Page IconTo Next Page
Loading...
Quick User Guide
Smart Wireless Doorbell
Support POE and Unlock
Before using the product,
please read the quick guide carefully and keep it for future reference
Question and Answer IconNeed help?

Do you have a question about the TUYA 96236 and is the answer not in the manual?

Summary

Getting Started

App Download

Guides users to download the Tuya Smart and Smart Life mobile applications.

User Registration and Login

Adding the Smart Doorbell

Device Connection Methods

QR Code Connection

Detailed instructions for connecting the doorbell using a QR code scan.

Wi-Fi Connection Mode

Steps for establishing a connection using the Wi-Fi mode.

Cable Connection

Device Added Successfully

Connection Wiring - Option A

Connection Wiring - Option B

Connection Wiring - Option C

Unlocking the Door

Device Sharing

Adding Family Members

Motion Detection Setup

MicroSD Card Management

Cloud Storage Service

Wireless Chime Setup

Chime Setup - Part 1

Step 1: Initial Connection

Basic steps for connecting the chime to the doorbell and phone.

Step 2: Tune Selection

How to cycle through and select different tunes for the chime.

Step 3: Volume Activation

Procedure to activate the chime's indicator light using the volume button.

Chime Setup - Part 2

Step 4: Call Button Activation

Pressing the Call Button to activate the chime.

Step 5: Tune Playback

Pressing the Call Button again to hear the selected chime tune.

Power Supply Options

Technical Specifications

Device Settings Overview

Memory Reset Procedure

Master Password Setup

User Unlock Password Setup

User Unlock Password Deletion

RFID Key Setup

Alternative Key Addition Method

RFID Key Deletion

Keyboard Backlight Configuration

Doorbell Installation Guide

Overview

This document provides a quick user guide for a Smart Wireless Doorbell that supports Power over Ethernet (PoE) and unlock functionality. It covers setup, connection, operation, and technical specifications.

Function Description

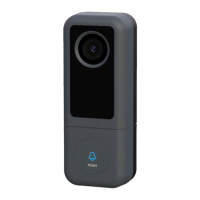
The Smart Wireless Doorbell is a security and video surveillance device designed for home use. It features a 1080P camera for video monitoring, a keypad for access control, and RFID card support for unlocking. The doorbell integrates with the Tuya Smart Home app (Tuya Smart or Smart Life) for remote management, including live view, playback, motion detection alerts, and device sharing. It can be connected via Wi-Fi or an Ethernet cable, and supports a wireless chime for audible alerts within the home. The device also offers cloud storage service for video recordings and is compatible with Amazon Alexa and Google Home for additional smart home integration.

Important Technical Specifications

Model: 96236 Camera Sensor: 1/2.9" CMOS GC2053 Video Resolution: PAL/NTSC: 1920*1080 DSP: MT816 Video Compression: H.264 Lens: 2.4mm, M12 lens Minimum Illumination:

  • Color: 0.01Lux@ (F1.2, AGC ON), 0Lux with IR
  • Black & White: 0.001Lux@ (F1.2, AGC ON), 0Lux with IR View Angle: 160° LEDs for Night Vision: IR LEDs (120°) Noise Reduction: Support 2D/3D WIFI Interface: Support RJ45: Support Reset: Support Tuya APP: Support SD Card: Support (Max Support 128G, high-quality SD card recommended) Unlock: RFID key & Password Audio Interface: Support SPK microphone Audio Compression: G.711 compression, support two-way talk, support for audio and video synchronization Day and Night Function: Support IR-CUT 433 DingDong: Support ONVIF: N/A Mobile Monitoring: Support iOS/Android Power Consumption: 100mA max. Power Supply (optional): DC12V~48V, PoE Operating Temp.: -40°C~+50°C Installation: Surface mount Accessory: Rain Cover

Usage Features

Getting Started: The device indicates its status with an indicator light: flashing means it's waiting for pairing, and solid means Wi-Fi is connected. Users need to download either the Tuya Smart or Smart Life app to register an account and add the device.

App Download and Registration: Users can download the "Tuya Smart" or "Smart Life" app from their respective app stores. New users must register an account, while existing users can simply log in.

Adding the Device: Within the app, users select "Add Device" and choose "Security & Video Surveillance" -> "Smart Doorbell".

Connection Methods: The doorbell supports three connection methods:

  1. QR Code Connection (Recommended): The smartphone scans a QR code generated by the app from 10-15 cm away. The device beeps to confirm, and the user taps "I Heard a Prompt" in the app to complete the connection. It's crucial to keep the phone and device close to the router during this process.
  2. Wi-Fi Mode: Users select the 2.4 GHz Wi-Fi network (5G is not supported) and enter the password. The app guides through resetting the device if needed, ensuring the indicator light is flashing rapidly.
  3. Cable Connection (Recommended): The doorbell can be connected to a Wi-Fi router using an Ethernet cable (CAT5/6). The device powers on, and the app searches for it on the same network.

Device Added Successfully: Once connected, the app displays the device's live view and various control options like playback, gallery, theme color, device volume, motion detection, lock, and edit settings.

Troubleshooting Connection Failure: If connection fails for a second user, a long press of the reset button for 1 minute is required, followed by waiting for the device to reboot. Simply quitting the app or power cycling the device will not resolve the issue.

Wiring Options: The manual illustrates three wiring options for connecting the doorbell with an electronic lock and power supply, including configurations with a Wi-Fi router and a PoE switch.

Unlocking the Door: From the app's live view, users can tap the "Lock" icon to unlock the door. A confirmation prompt appears before unlocking.

Device Sharing: The doorbell supports sharing with up to 10 mobile phones simultaneously. To share, the primary user creates a home in the app, adds members by entering their Tuya account, and then the invited members accept the invitation and add the device to their home.

Motion Detection: The doorbell supports PIR motion detection with an SD card. Users can enable motion detection alarms and adjust sensitivity levels within the app's settings. Notifications are pushed to the smartphone when motion is detected.

MicroSD Card Usage: The SD card slot is located at the bottom of the outdoor unit. It enables motion detection and video playback. The device supports up to 128GB high-quality SD cards. Before use, the SD card must be formatted via a computer or the app. For 8G/16G/32G cards, FAT32 format is required; for 64G/128G cards, EXFAT format is needed. The app also provides options to check SD card storage and format it.

Cloud Storage Service: An optional cloud storage service is available for recording videos, offering protection against data loss or theft.

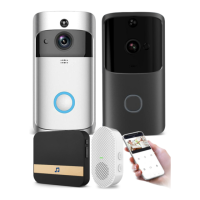
Wireless Chime Setup: The doorbell can be connected to an optional wireless chime for audible alerts inside the home.

  1. Step 1: Ensure the video doorbell is connected to the phone and the chime is plugged in.
  2. Step 2: Press the "Tune" button on the chime to cycle through 50 different tunes and select one.
  3. Step 3: Press and hold the "Volume" button on the chime for 5 seconds until the blue indicator is ON.
  4. Step 4: Press the "Call" button on the doorbell.
  5. Step 5: Press the "Call" button again, and the chime will play the selected tune, indicating successful pairing.

Power Supply: The IP doorbell supports various types of 12V 1A power adapters (EU, AU, UK, US types).

Maintenance Features

Memory Reset for Password and RFID Key: To reset, press the "SET" button for 3 seconds until a long beep is heard, then press it 3 more times quickly for three long beeps.

Master Password Setup:

  1. In standby mode, enter the default master password (123456) and press "#" to enter settings mode (double long beep).
  2. Press "0" and "#" to enter master password setup mode (one long beep).
  3. Enter a new 6-digit password and press "#" (one long beep).
  4. Press "*" to exit standby mode (double short beep).

Unlock Password Setting:

  1. Enter settings mode (master password + "#").
  2. Press "1" and "#" to enter user password setting mode (one long beep).
  3. Set a 3-digit cell number (000-199) and press "#" (one long beep).
  4. Set a new 6-digit user password and press "#" (one long beep if successful, double short beep if cell is occupied).
  5. To add more passwords, set a new cell number, then new 6-digit user passwords, and press "#".
  6. Press "*" twice to exit standby mode (double short beep).

Unlock Password Deleting:

  1. Enter settings mode (master password + "#").
  2. Press "2" and "#" to enter user password deleting mode (one long beep).
  3. Set a 3-digit cell number (000-199) and press "#" to delete the password (one long beep). To delete all user passwords, enter "99" and press "#".
  4. Users can continue deleting passwords by entering cell numbers and pressing "#".
  5. Press "*" twice to exit standby mode (double short beep).

RFID Key Setting:

  1. Enter settings mode (master password + "#").
  2. Press "3" and "#" to enter wireless unlock key setting mode (one long beep).
  3. Enter a 3-digit cell number (000-199) and press "#" (one long beep).
  4. Add RFID keys one by one to the recognized area within 20 seconds (one long beep if successful, double short beep if cell is occupied).
  5. To add more keys, set a new cell number, press "#", and add new keys within 20 seconds.
  6. Press "*" twice to exit standby mode (double short beep). Alternative way to add unlock keys: In standby mode, press "SET" briefly, then present keys one by one, and press "SET" to exit.

RFID Key Deleting:

  1. Enter settings mode (master password + "#").
  2. Press "4" and "#" to enter wireless unlock key deleting mode (one long beep).
  3. Enter "99" and press "#" to delete all RFID keys.

Keyboard Backlight Setup:

  1. Enter settings mode (master password + "#").
  2. Press "7" and "#" to enter keyboard backlight setup mode (one long beep).
  3. Choose an option:
    • "00#": Backlight disabled all the time.
    • "01#": Backlight enabled all the time.
    • "02#": Backlight enabled in working mode and disabled in standby mode.
  4. Press "*" to exit standby mode (double short beep).

Installation: The manual provides diagrams for surface mounting the doorbell, including recommended installation height (150-160cm) and viewing angle (90°). It also shows how to correctly position the doorbell to avoid obstructions.

TUYA 96236 Specifications

General IconGeneral
BrandTUYA
Model96236
CategoryAccessories
LanguageEnglish

Related product manuals