Ringtone Selection
9:55
- 8 -
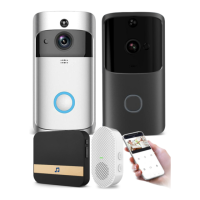
The video doorbell works with
12V DC
power source (power adapter provided), as well as an existing
12V~24V AC
hardwire power source. It enables you to make use of your legacy doorbell wiring for
retro-fit installation.
10. Installation
4
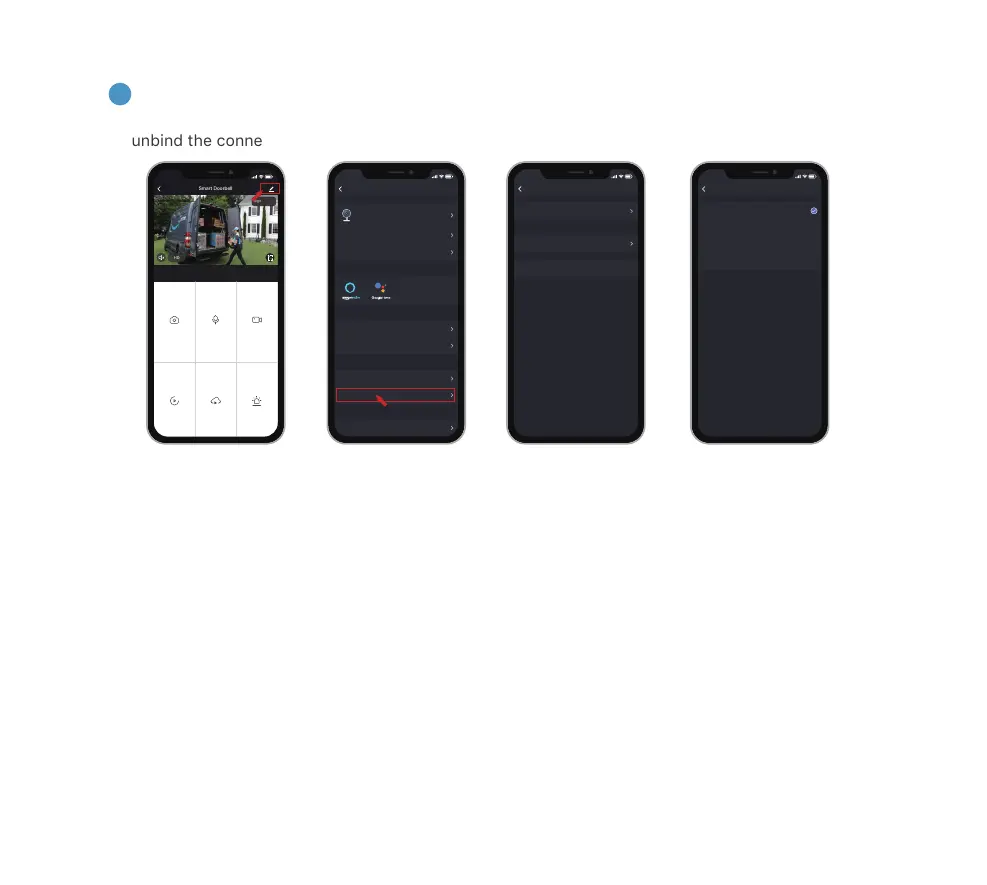
Chime settings
You can enter into the chime setting page following below setting steps, so as to select ringtones, or
unbind the connection with doorbell.
Step.3Step.2Step.1
NOTE:
1. Your doorbell communicates with the chime via Radio Frequency, but not WiFi.
2. You can assign different chimes as needed.
3. Press and hold
RESET
button on the chime for 5 seconds till the indicator flashes blue 3 times, and
you can also release the connection between the chime and its connected doorbell.
NOTE:
For retro-fit installation, you need to bypass your indoor mechanical chime so as to provide sufficient
power for the new video doorbell.
Step.4
Bell Settings
DIGITAL
Chime Type
Ringtone Selection
9:55
Ringtone 1
Digital
Unbind
Ringtone 1
Ringtone 2
Ringtone 3
Ringtone 4
Screenshot
Speak Record
Playback
Cloud Storage Alarm
Smart Doorbell
Signal: 86%
HD
2020-07-17 09:55:37
2020-07-17 09:55:37
9:55
Settings
Device Information
Tap-to-Run and Automation
Smart Doorbell
9:55
Basic Function Settings
IR Night Vision
Detection Alarm Settings
Bell Settings
Storage Settings
Auto
BASIC SETTINGS
THIRD PARTY SUPPORTED
ADVANCED SETTINGS
STORAGE