88
99
1010
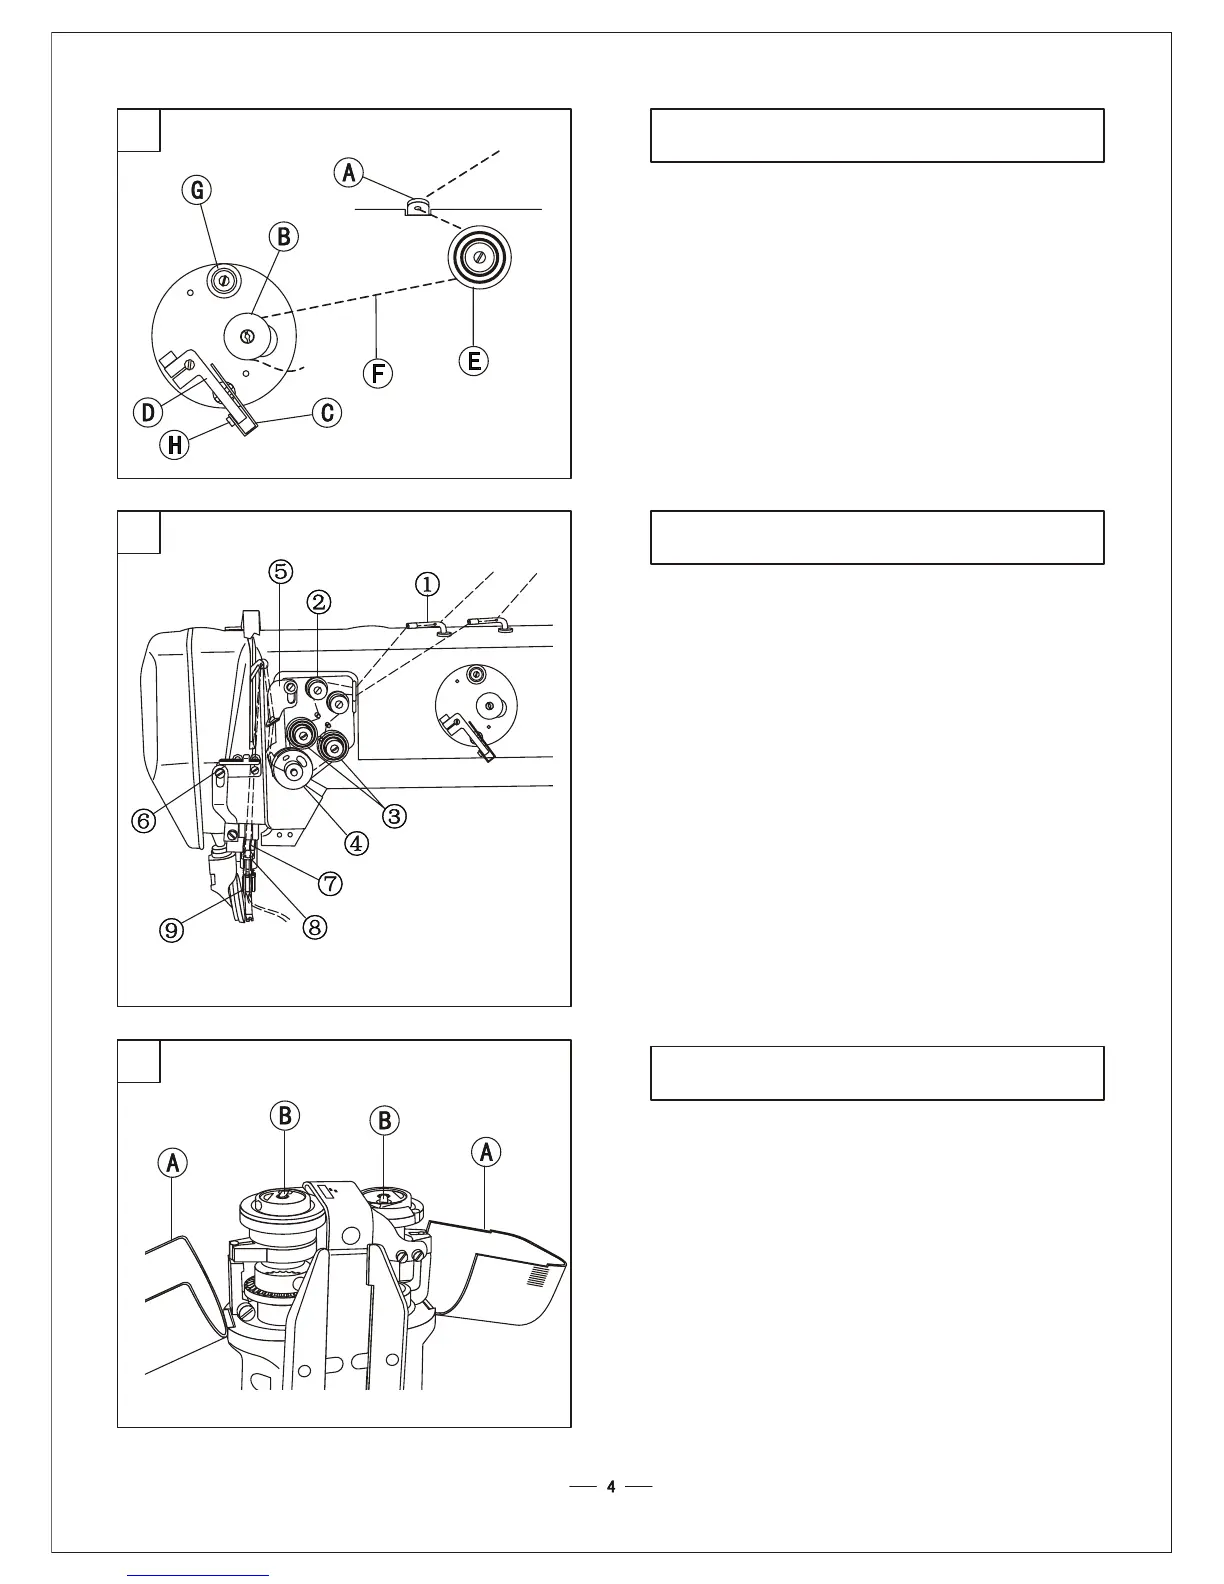
Install the bobbin B to the bobbin winder spindle,
pass the thread A between the tension disc E, and
then wind the thread a few turns around the bobbin.
Lift the lever D to make the latch lever C lock the
bobbin B. The machine will automatically wind
when sewing.(Lift the presser foot when wind
without running the machine.)
Do not overfill the bobbin, as it will make the thread
loosen down from the bobbin. The optimum capacity
of thread will be about 80% of the outside diameter
of the bobbin. The winding amount can be adjusted
by screw H.
After the bobbin is filled, the bobbin thread could be
cut down with the thread-cutting blade. Wind the
bobbin thread A two turns around the blade, then pull
it.
11. Winding the bobbin thread (Fig.8)11. Winding the bobbin thread (Fig.8)
When threading the needle thread, raise the needle
bar to its highest position, open the roller foot, then
lead the thread from the spool and pass it in the order
instructed.
1. Leading the thread down through the two-eye thread
guide 1 on the top of the machine.
2. To left pass the thread through right hole of thread
guide, then pass down it through the thread tension
disc 2.
3. Pass down through the thread tension disc 3.
4. To left pass through the thread control assembly 4.
5. Pass up through the upper thread guide 5,then pass
through the thread hole of the thread take-up lever
from right to left.
6.Pass down through the middle thread guide 6,lower
thread guide 7 and needle bar thread guide 8, then
pass through the hole of the needle 9 and draw out
over 100mm.
12. Threading (Fig.9) 12. Threading (Fig.9)
1. Open the rotating hook guard A.
2. Lift the bobbin case latch lever B.
3. Draw out the threads about 50mm from the notch of
the bobbin case.
4. Install the bobbin case into the rotating hook.
5. Close the bobbin case latch lever B.
6. Hold the needle thread by left hand, and turn the
balance wheel by right hand to put aside the bobbin
thread.
7. Close the rotating hook guard A.
13. Installing the bobbin and the bobbin case (Fig.10)13. Installing the bobbin and the bobbin case (Fig.10)