VLS Service Manual - REV2015.04
Table of Contents
Y-Axis
Page | 55
Y-Axis
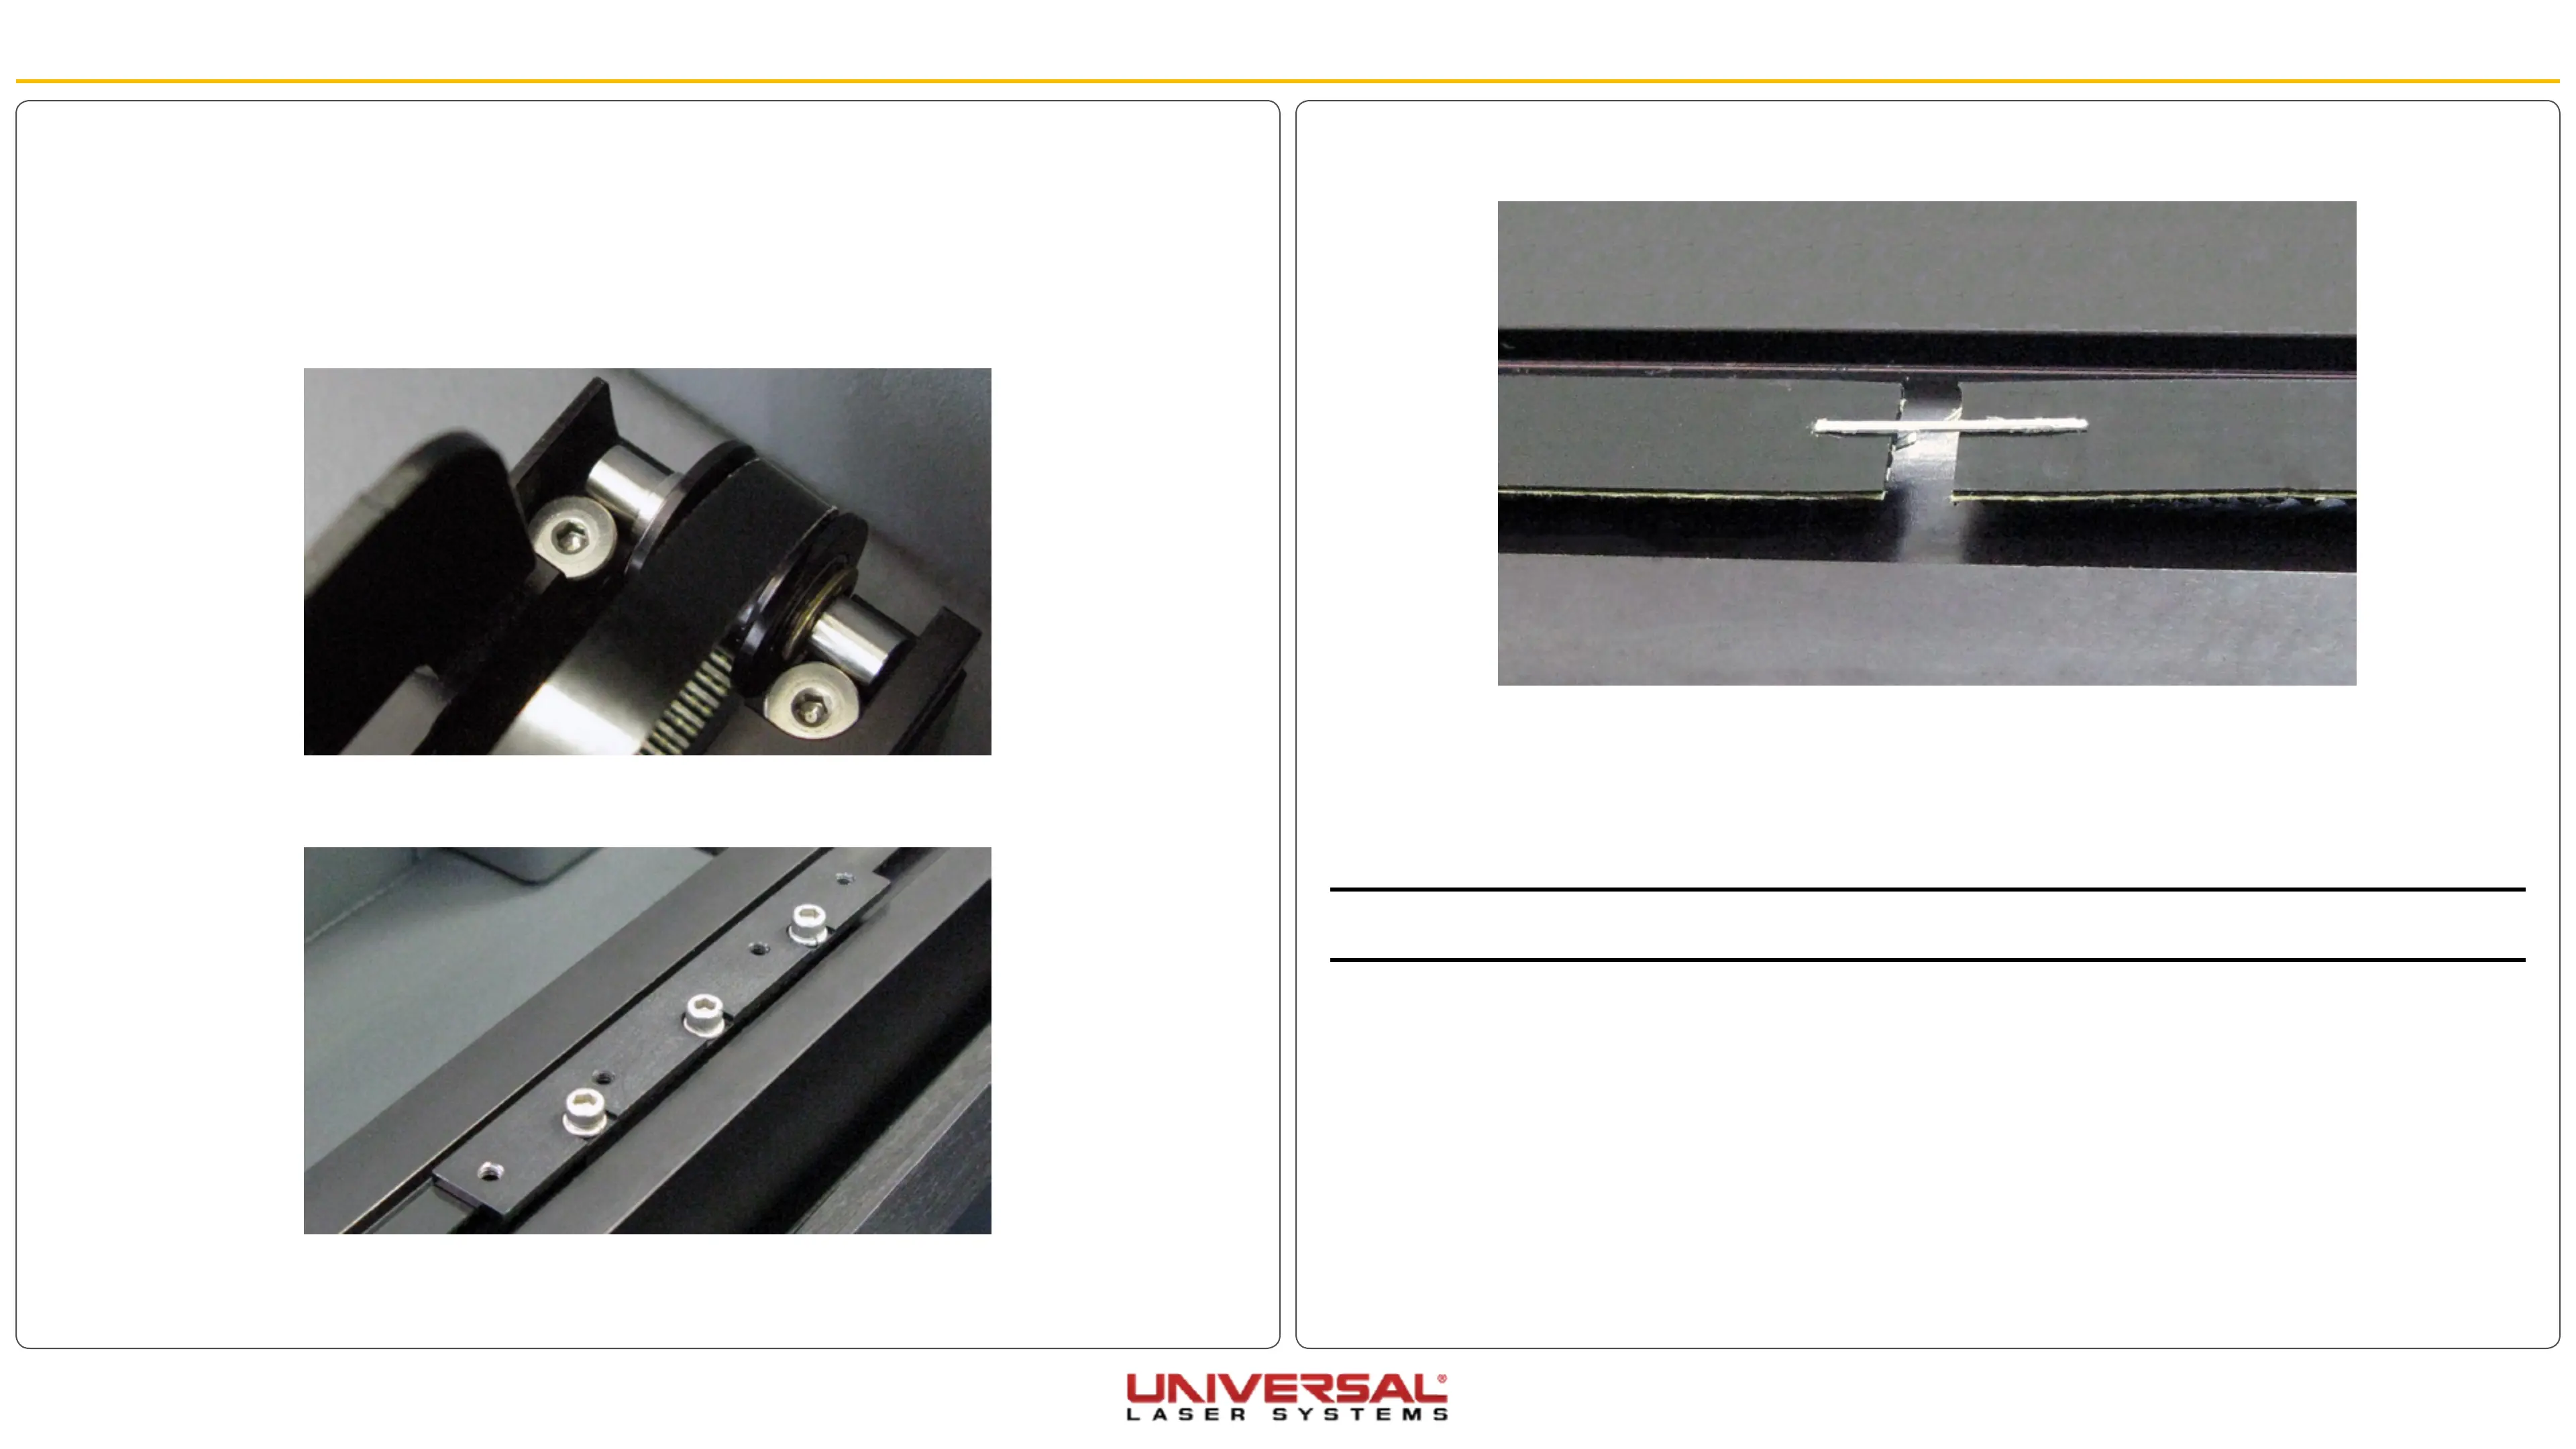
5. After the Y-axis Belt Clamp has been removed staple the new Y-axis Belt to the old belt. Do not overlap
the belt and make sure that the teeth are in the same direction.
6. Pull the other end of the old belt, allowing the new belt to be pulled through the inside of the Y-axis Rail.
Make sure you do not twist the belt as it goes through the rail. The teeth of the belt should face inward.
7. Once the new belt is completely through the Y-axis Rail, remove the staple and discard the old belt.
8. Insert the new Y-axis Belt ends into the belt clamp with the belt teeth facing inward. Pull the belt as tight
as possible by hand.
NOTE: For the next step, you will need a spring scale and a ruler. Make sure the ruler has the 0 point at the end
of the ruler. (Some rulers offset the 0 point from the end; do not use that kind of ruler.)
Y-Axis Belts
1. Power OFF and unplug the VLS.
2. Remove the X-Axis Arm.
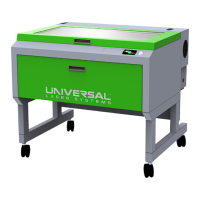
3. Locate and loosen the Y-axis Idler Pulleys at the front end of the rails, making sure to take the same
number of turns on each screw to loosen completely, DO NOT remove the screws.
4. On both Y-axis Rails is a Y-axis Belt Clamp. Unscrew all 6 screws, 3 on each, and set the screws and
clamp aside.