VLS Service Manual - REV2015.04
Table of Contents
Y-Axis
Page | 56
Y-Axis
Y-axis Idler Pulleys
1. Power OFF and unplug the VLS.
2. Remove the X-Axis Arm.
3. On both Y-axis Rails is a Y-axis Belt Clamp. Unscrew all 6 screws, 3 on each clamp, and set the screws
and clamp aside, DO NOT REMOVE the Y-axis Belt from the rail.
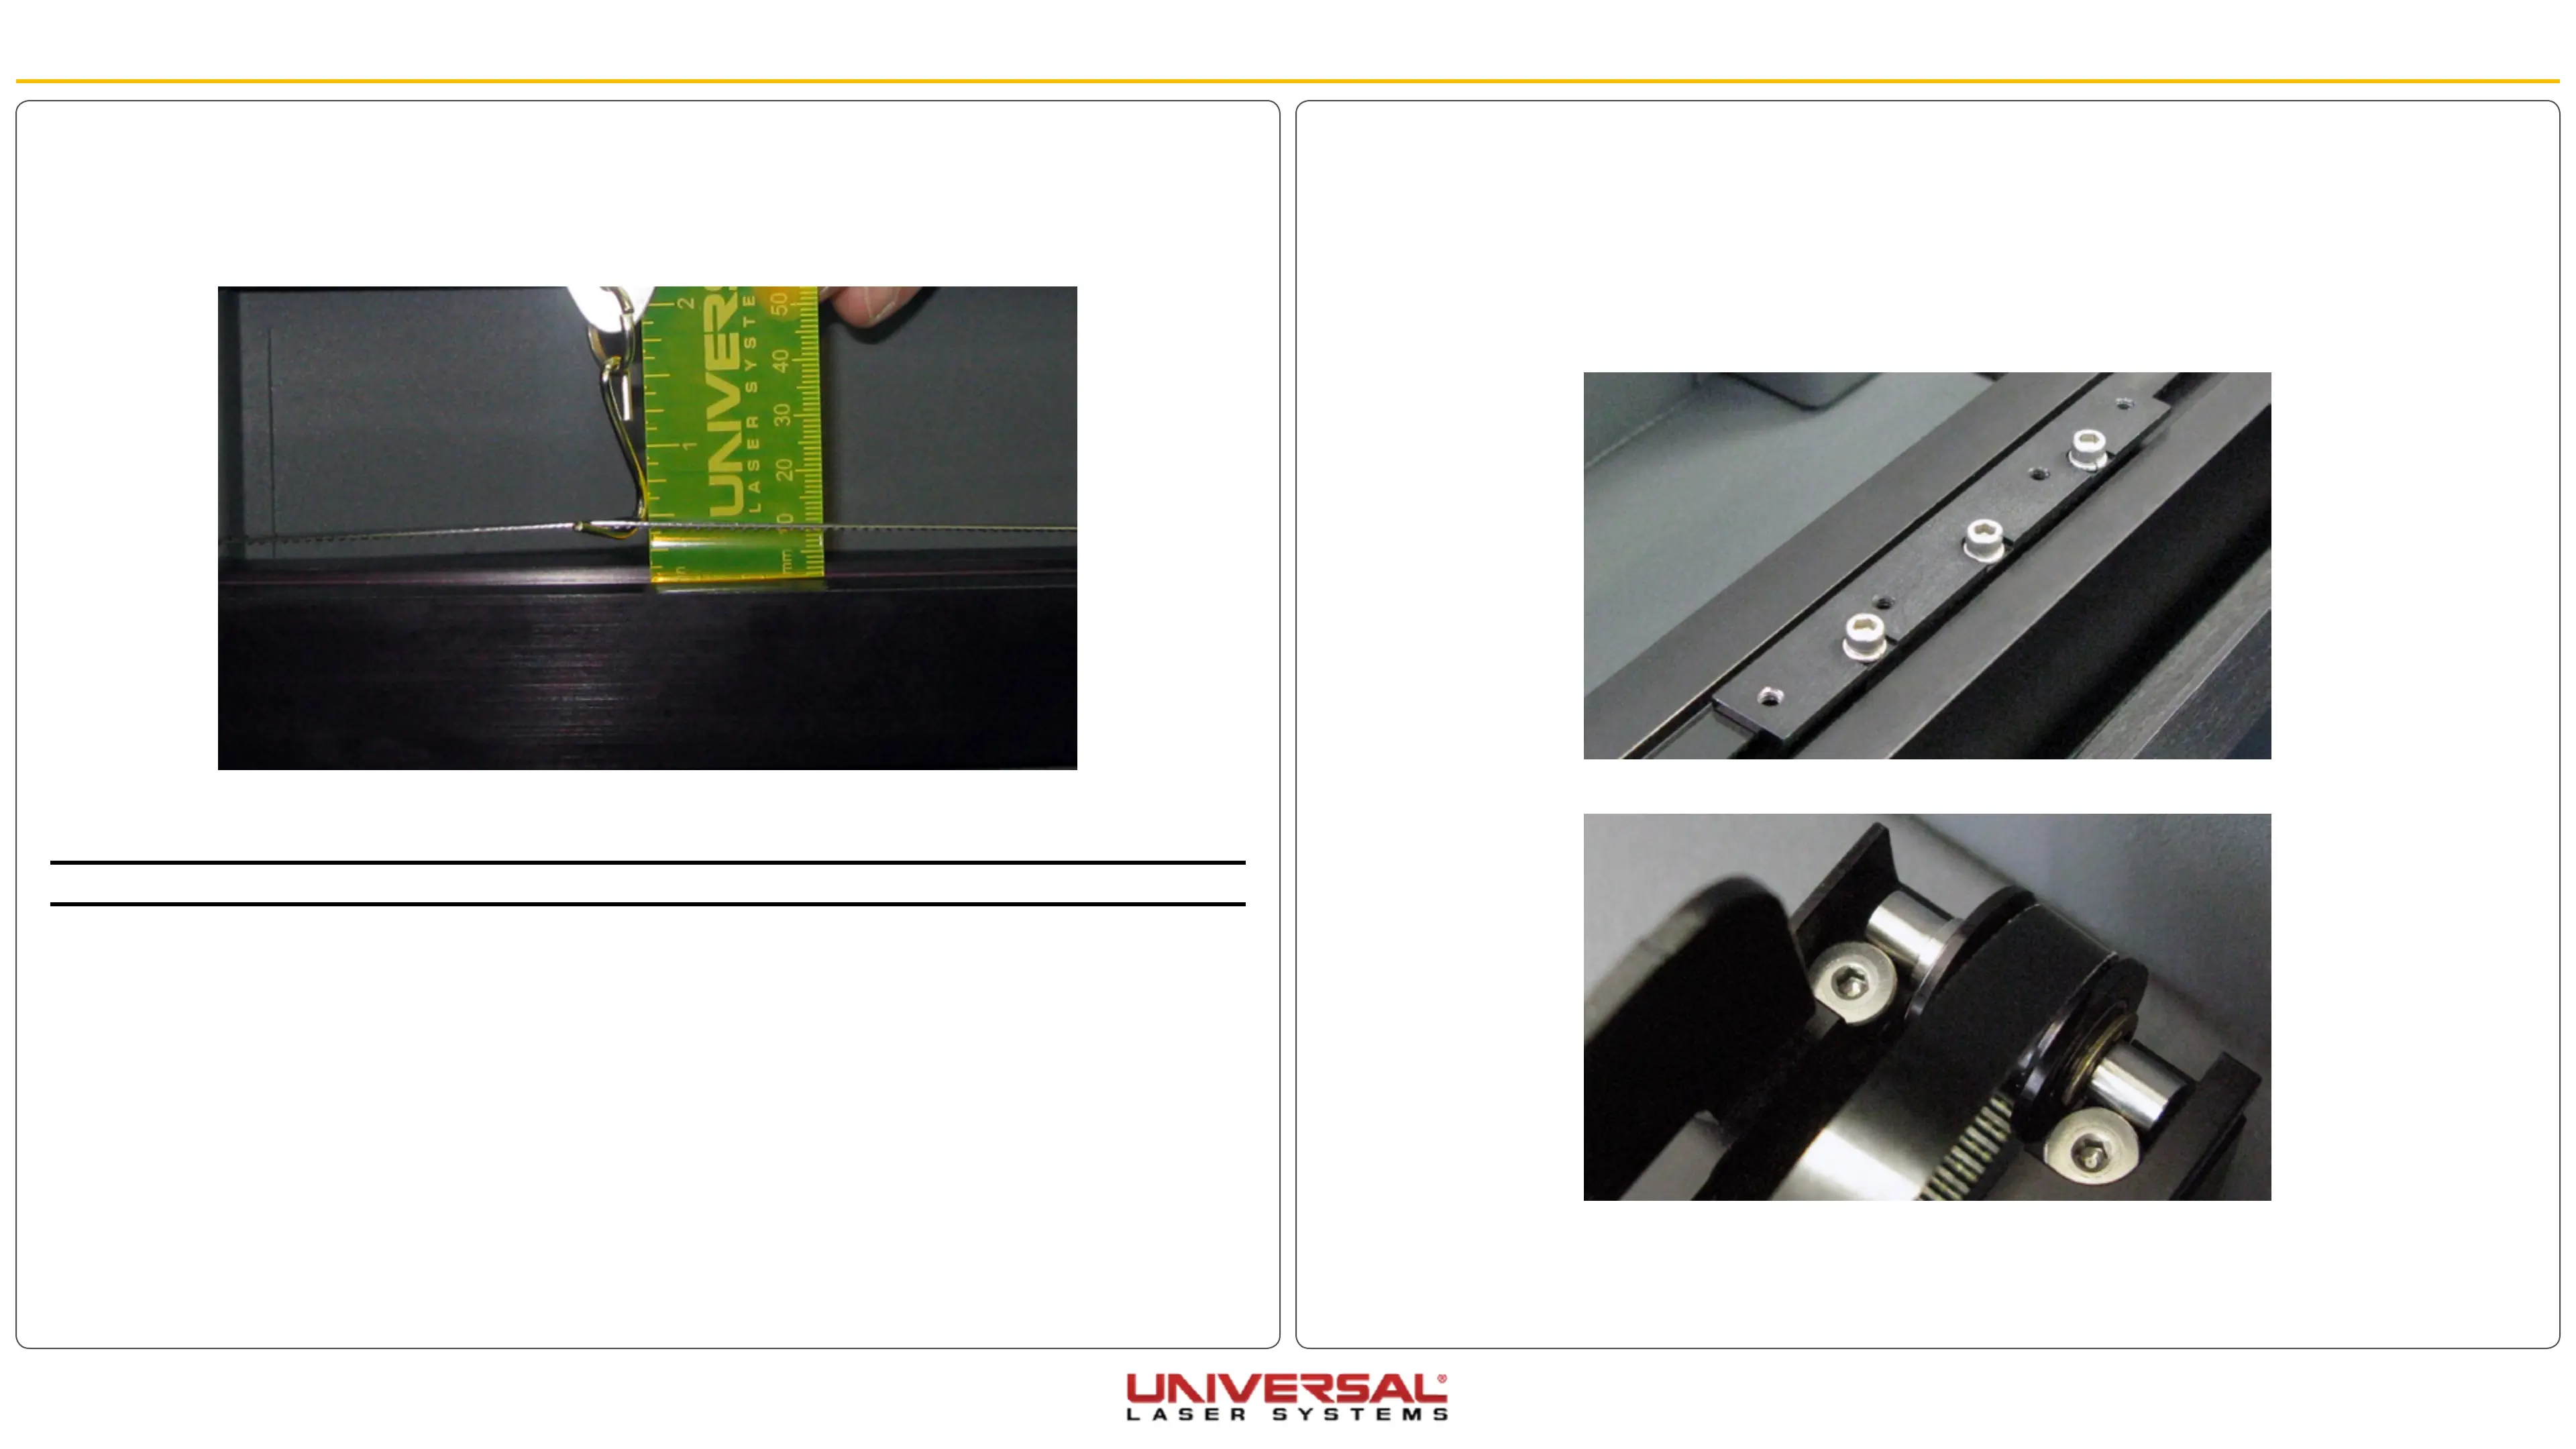
4. Locate and replace the Idler Pulley at the end of the Y-Rail.
5. Follow the instructions of Y-Axis Belts, beginning at Step 5, to finish the installation.
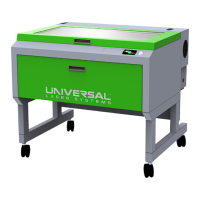
9. On the Y-axis rail, push the belt clamp all the way to the top on the Y-axis rail. Place the end of the ruler
against the middle of the Y-axis arm inside the belt groove. Hook the spring scale onto the middle of the
belt and pull the scale until you reach 1/2 inch. You should read 125 grams for (VLS4.60 and VLS6.60)
or 175 grams (VLS3.60). The belt should still be loose at this point, so the reading should be less than
what is required.
10. Locate the Y-axis Idler Pulleys that were loosened earlier. To tension the Y-axis belt turn BOTH
tensioning screws on the Y-axis rail the same amount.
NOTE: Failure to turn both screws equally will result in uneven wear causing the belt to fail prematurely.
11. Installation is opposite of removal.
12. Once everything is reassembled, perform the X-Axis Arm Alignment Check and Adjust (Squaring).