VLS Service Manual - REV2015.04
Table of Contents
Accessories
Page | 80
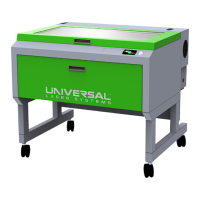
13. Remove the 4 screws holding the motor in position and carefully remove the motor from the rear drive
bracket.
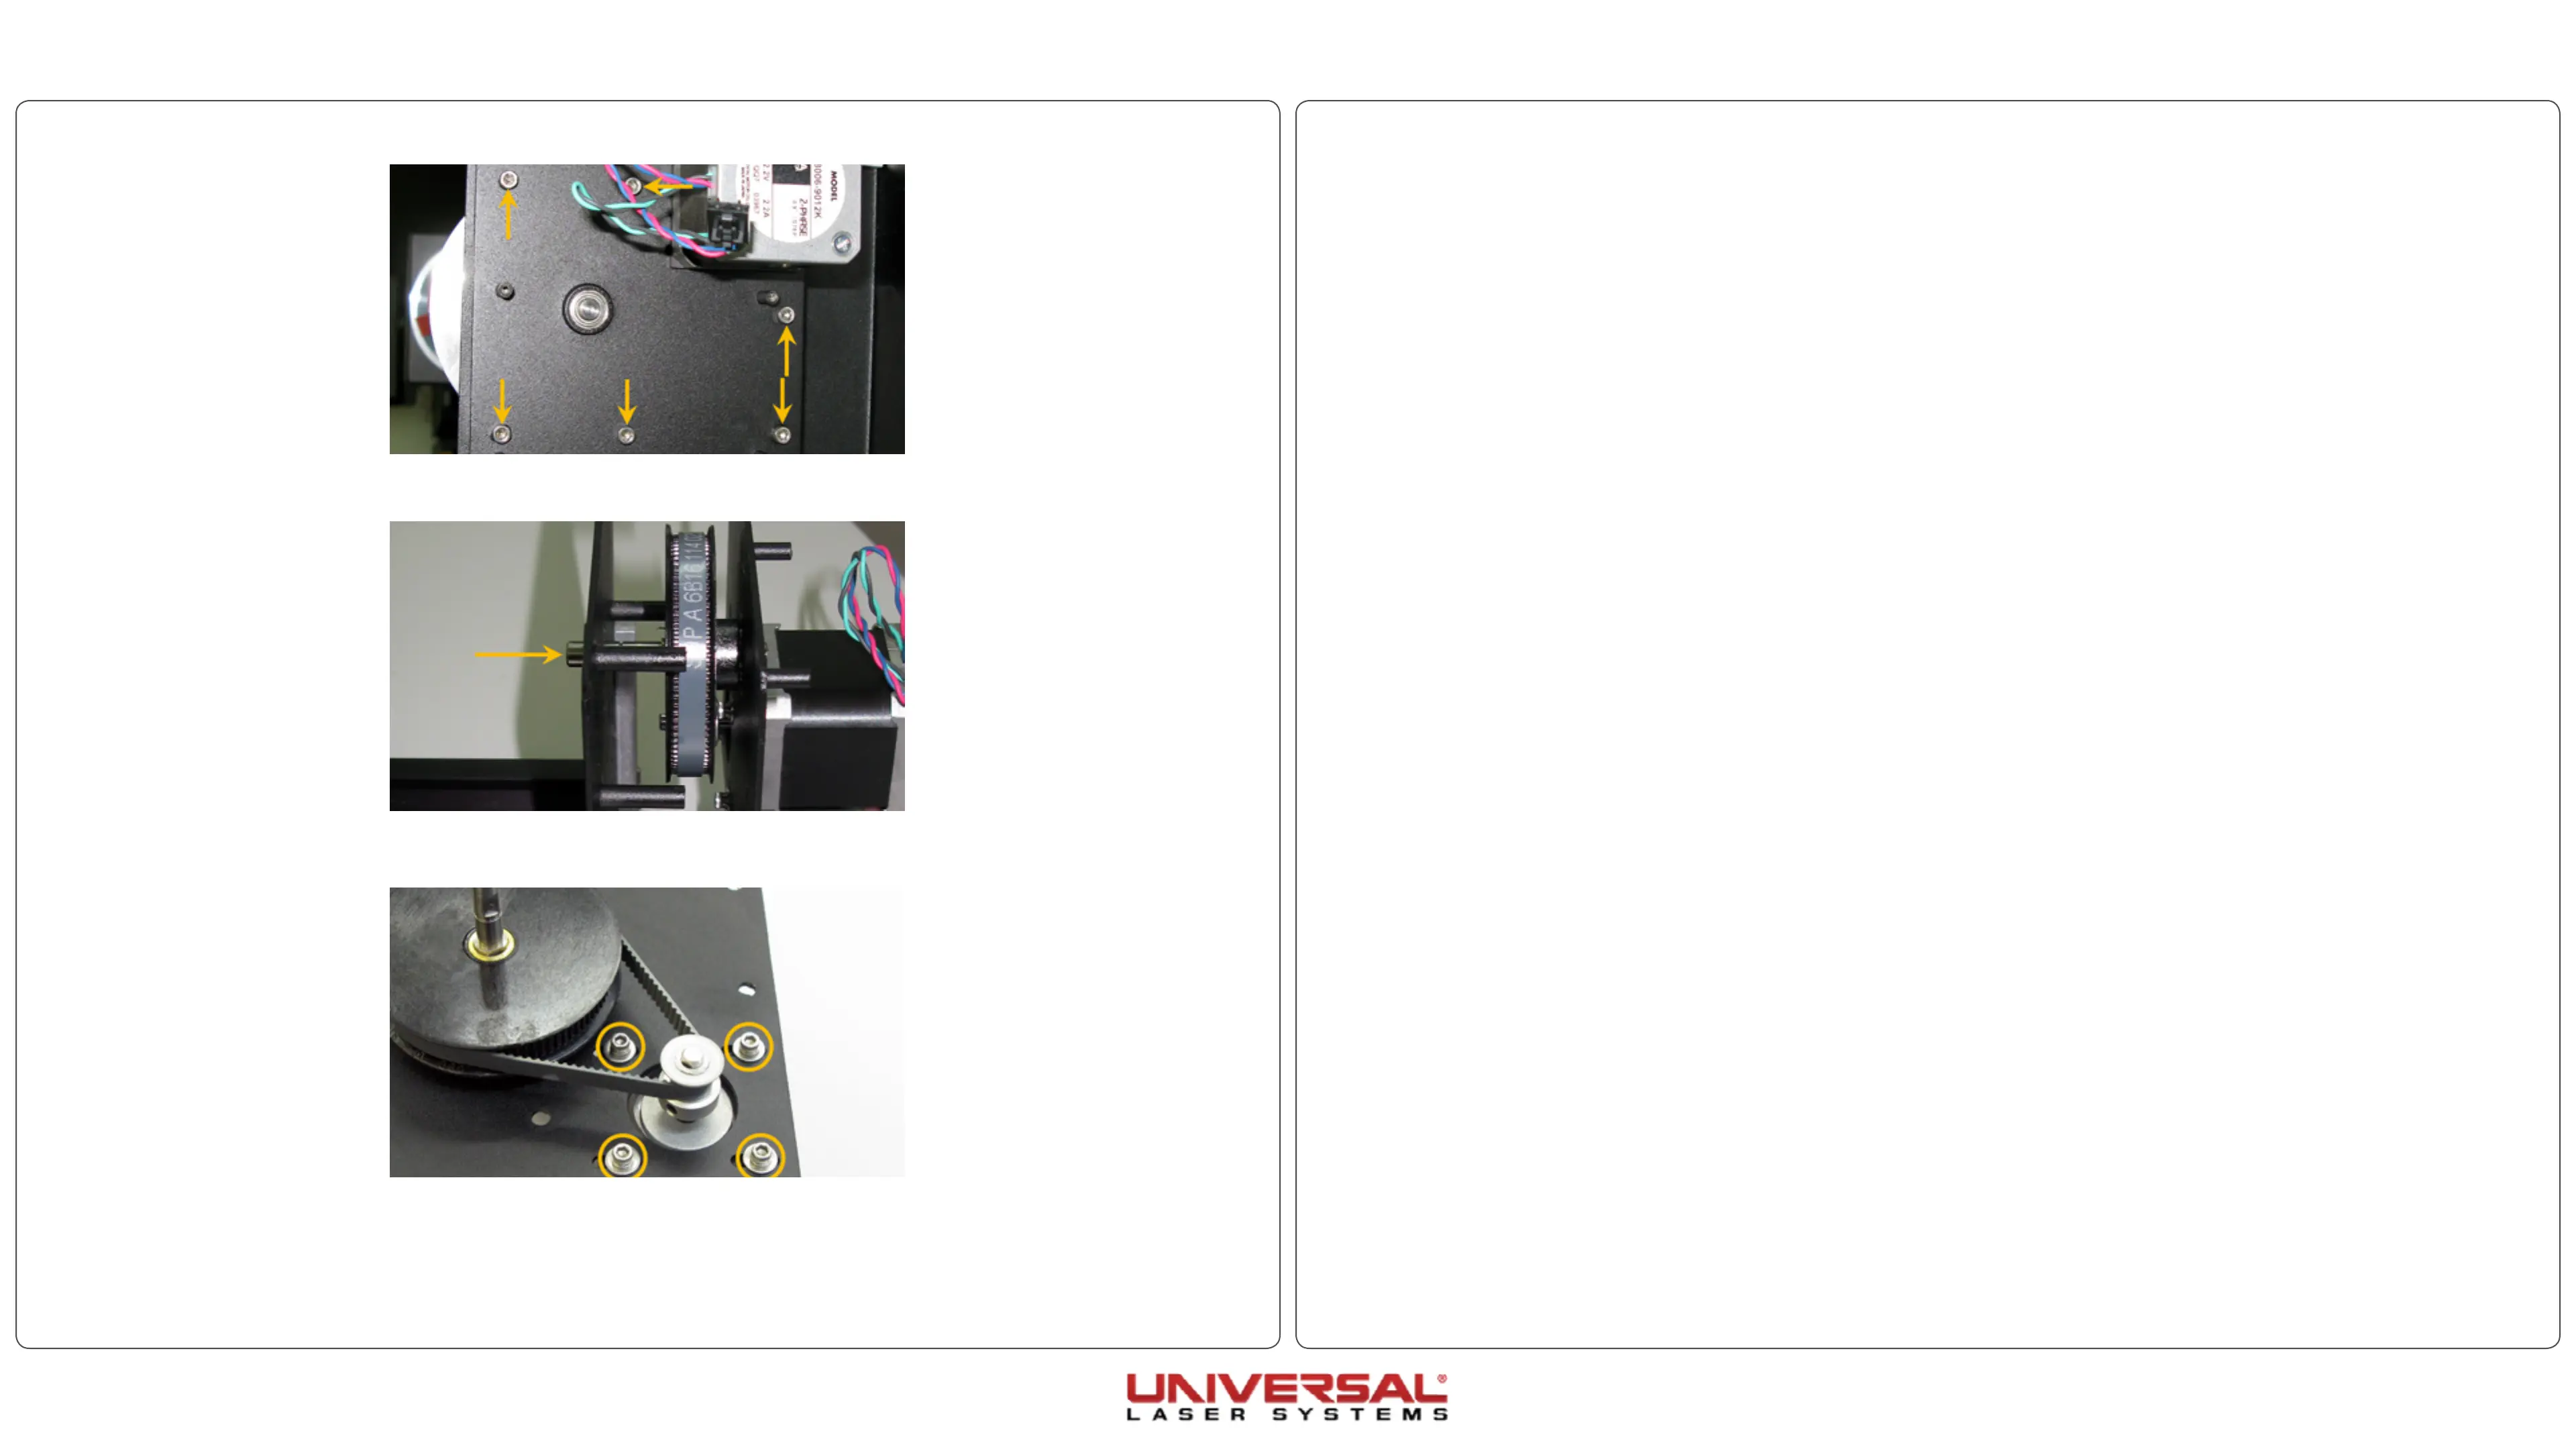
14. If transfering the drive gear, loosing the screw securing the drive gear in place on the drive shaft.
15. Installation is opposite of removal.
16. When reinstalling the belt, slide the motor to the lowest point on the rear bracket to tension the belt.
8. Remove the 5 screws securing the rear driver bracket to the front drive bracket.
9. Firmly press the drive shaft out of the front drive bracket. This will free the rear drive bracket from the
rotary.
10. Loosen the 4 screws holding the motor in place and shift the motor toward the top of the rear drive
bracket. Remove the belt.
11. Installation is opposite of removal. If replacing the motor, continue to step 13.
12. When reinstalling the belt, slide the motor to the lowest point on the rear bracket to tension the belt.