EasyManua.ls Logo

Unico 1200 Series - User Manual

Unico 1200 Series
12 pages
Print Icon
To Next Page IconTo Next Page
Loading...
1
1200 SERIES
SPECTROPHOTOMETER
USER’S MANUAL
United Products & Instruments, Inc.
182 Ridge Road, Suite E Dayton, NJ 08810, USA
TEL: 732-274-1155 FAX: 732-274-1151
www.unicosci.com sales@unicosci.com

Questions and Answers

Summary

General Information and Safety

Safety Precautions

Outlines safety requirements and precautions for using the spectrophotometer.

Electrical Safety Guidelines

Details electrical safety, power supply, and grounding requirements.

Protective Conductor Warning

Warns about potential dangers from interrupting the protective conductor.

Performance Verification

Emphasizes the need for performance checks for accuracy and reliability.

Instrument Introduction and Principles

Introduction to UNICO Spectrophotometers

Introduces the UNICO 1200/1201 spectrophotometers and their applications.

Working Principle Explanation

Explains the five main parts and their functions in the spectrophotometer.

Spectrophotometer Block Diagram

Illustrates the flow of light through the spectrophotometer's main components.

Specifications and Setup

Unpacking Instructions

Guides users on how to unpack and check the contents of the instrument.

Instrument Installation Guide

Provides instructions on where and how to install the spectrophotometer.

Operation Panel Overview

Introduces the operation panel for the 1200 and 1201 models.

Spectrophotometer Operation

Spectrophotometer Diagram

Shows a diagram of the UNICO 1200 spectrophotometer with labeled parts.

Key Button Functions

Explains the modes, zero adjustment, and print/enter functions of the buttons.

Sample Compartment Specifications

Specifies the types of cuvettes and pathlengths the sample compartment accepts.

Basic and Advanced Operations

Wavelength Selection and Display

Covers the WAVELENGTH knob and readout window for setting wavelengths.

Basic Sample Preparation and Analysis

Provides step-by-step instructions for basic sample preparation and analysis.

Instrument Warm-up and Zero Check

Details the procedure for warming up the instrument and checking the 0%T.

Concentration Measurement Mode

Explains how to determine unknown sample concentrations using a standard.

Maintenance and Calibration

Factor Mode for Concentration

Describes using a predetermined factor to convert absorbance to concentration.

Bulb Replacement Procedure

Details the steps and precautions for replacing the instrument's bulb.

Lamp Handling Caution

Warns against touching the lamp with bare fingers and advises using protective materials.

Wavelength Calibration Methods

Explains procedures for checking wavelength calibration using filters.

Calibration and Accuracy Checks

Holmium Oxide Filter Method

Details the procedure for checking wavelength accuracy using the Holmium filter.

Didymium Filter Method

Details the procedure for checking wavelength accuracy using the Didymium filter.

Absorbance Accuracy Verification

Explains how to check absorbance accuracy using neutral density filters.

Troubleshooting and Support

Stray Light Check Procedure

Details the method for checking stray light levels against standards.

Common Instrument Problems and Solutions

Lists common problems, their possible causes, and solutions for the instrument.

Authorized Service Contact Information

Provides contact details for UNICO authorized service and support.

Overview

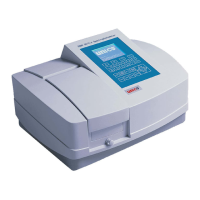
The UNICO 1200 Series Spectrophotometer is a single-beam, general-purpose instrument designed for laboratory use, particularly in the visible wavelength region of the electromagnetic spectrum (325 nm to 1000 nm). It is suitable for various applications including clinical chemistry, biochemistry, petrochemistry, environmental protection, food and beverage analysis, water and wastewater testing, and other quality control fields. The instrument features a digital display for photometric results and is designed for ease of operation.

Function Description

The spectrophotometer operates on a principle involving five main components: a light source, a monochromator, a sample compartment, a detector, and a digital display.

  1. Light Source: A halogen lamp provides the necessary light for analysis.
  2. Monochromator: This component isolates the specific wavelength of interest from the light source and eliminates unwanted second-order radiation. Light from the halogen lamp is focused onto the entrance slit of the monochromator. A collimating mirror directs the beam onto a grating, which disperses the light to produce a spectrum. A portion of this spectrum is then focused onto the exit slit by another collimating mirror.
  3. Sample Compartment: Designed to hold the sample solution, this compartment allows the light beam to pass through the sample. Filters within the compartment help to eliminate unwanted second-order radiation from the diffraction grating. The compartment can accommodate 10 mm test tubes or 10 mm square cuvettes with different cuvette holders, and it can accept pathlengths up to 50 mm with optional holders.
  4. Detector: After passing through the sample, the light beam reaches a silicon photodiode detector. The detector converts the transmitted light into an electrical signal.
  5. Digital Display: This display shows the absorbance or transmittance values derived from the electrical signal produced by the detector.

The instrument offers four measurement modes:

  • T (Transmittance) mode: Displays the percentage of light transmitted through the sample.
  • A (Absorbance) mode: Displays the absorbance of the sample.
  • C (Concentration) mode: Used to measure the concentration of unknown samples by comparing them to a standard solution. This mode is recommended when the relationship between absorbance and concentration is linear, and the standard solution's concentration should be higher than the most concentrated sample.
  • F (Factor) mode: A specialized mode for measuring unknown sample concentrations using a previously determined factor to convert absorbance readings to concentration.

Usage Features

The UNICO 1200/1201 is designed for straightforward operation with several user-friendly controls:

  • MODE Button: Cycles through the four measurement modes (T, A, C, F). An LED light indicates the currently selected mode.
  • 0A/100%T (∧) Button: Used to adjust the digital display reading to 100%T or 0.000A when a blank reference solution is in the sample compartment.
  • 0%T (∨) Button: In T mode, this button is used to adjust the digital display reading to 00.0%T by blocking the optical light beam with a black block (S-1200-111) placed in the cuvette holder.
  • ENT (PRINT) Button:
    • In A and T modes, it sends the displayed results to a printer.
    • In C mode, it sets the concentration value of the standard solution.
    • In F mode, it sets the factor number and then switches the instrument to C mode. To print results in C mode, the MODE button should be pressed until the LED light is off, then the ENT button.
  • WAVELENGTH Knob: Allows the user to select the desired wavelength in nanometers (nm). The selected wavelength is shown in the Wavelength Readout Window.

Basic Operation Steps:

  1. Warm-up and 0%T Check: Turn on the instrument and allow 15 minutes for warm-up. Check the 0%T by inserting the black block into the cuvette holder, closing the lid, and selecting T mode. The display should read 00.0%T; if not, press the 0%T button.
  2. Mode Selection: Select either T or A mode using the MODE button.
  3. Wavelength Selection: Turn the WAVELENGTH control knob to set the desired wavelength.
  4. Blanking: Insert a blank cuvette into the sample compartment, close the cover, and set 0.000A or 100%T using the 0A/100%T button. Remove the blank cuvette and set it aside.
  5. Sample Measurement: Rinse a second cuvette with the sample solution, fill it, wipe it, and place it in the sample compartment. Close the cover and read the T or A value from the digital display.

Concentration Mode Usage:

  1. Select the desired wavelength and A mode.
  2. Insert the blank solution cuvette and set 0.000A.
  3. Switch to C mode.
  4. Insert a standard solution of known concentration and adjust the digital display to match the standard's value using the ∧ and ∨ buttons.
  5. Press the ENT button. If the required factor is too high (>1999), divide the concentration by 10 and re-enter C mode, then adjust the standard value.
  6. Insert sample cuvettes to read unknown concentrations directly.
  7. To find the multiplier used to convert Abs to Concentration, switch to F mode after measuring all samples.

Factor Mode Usage:

  1. After setting wavelength and zero Abs with a blank solution, select F mode.
  2. Insert a sample cuvette.
  3. Use the ∧ and ∨ buttons to set the digital display to the desired multiplier value.
  4. Press the ENT button. The spectrophotometer will switch to C mode.
  5. Read the concentration value of the sample directly. If the sample concentration is too high, dilute the sample and multiply the reading by the dilution factor. Alternatively, divide the factor value by "10" or "100" and re-enter the "new" factor value, then multiply the readout by the corresponding multiple.

Maintenance Features

Regular maintenance ensures the longevity and accuracy of the spectrophotometer.

  • Bulb Replacement:

    1. Turn off and unplug the instrument.
    2. Remove the lamp access door at the back by unscrewing four set screws. Remove the black cover next to the access door.
    3. Loosen two lamp holding screws, remove the old bulb, and insert the new 6V/10W G4 bulb with horizontal filament all the way into the holder. Lightly tighten the holding screws.
    4. Plug in the power cord and turn on the instrument. Set the wavelength to 340nm.
    5. Observe the light beam through the bulb observation window to ensure the projection of light is aligned on the slit. If necessary, turn off the instrument, allow the bulb to cool, and adjust its position by pulling or pushing.
    6. Tighten the lamp holding screws and re-install the access door.
    • Caution: Always use tissue or cloth when handling the lamp to avoid contamination from bare fingers.
  • Wavelength Calibration Check:

    • While the instrument typically retains its wavelength calibration, it should be checked if the instrument has experienced severe shock or abuse.
    • This check requires a UNICO® Didymium filter (S-90-9116) or a Holmium Oxide filter (S-90-9115).
    • Holmium Oxide Filter Method:
      1. Warm up the instrument for 15 minutes.
      2. Select A mode.
      3. Set wavelength to 350 nm.
      4. Ensure the cuvette adapter is empty, place it in the sample compartment, and close the lid.
      5. Set zero Absorbance by pressing the A button.
      6. Remove the cuvette adapter, insert the Holmium filter, place it back in the sample compartment, and close the lid.
      7. Record the Absorbance reading.
      8. Advance the wavelength by 1 nm and repeat steps 4-7 until 370 nm is reached.
      9. Look for the maximum absorbance reading, which should be found within 359-363 nm.
    • Didymium Filter Method:
      1. Set wavelength to 800 nm.
      2. Ensure the cuvette adapter is empty, place it in the sample compartment, and close the lid.
      3. Set zero Abs by pressing the button.
      4. Remove the cuvette adapter, insert the Didymium filter, place it back in the sample compartment, and close the lid.
      5. Record the Absorbance reading.
      6. Advance the wavelength by 1 nm and repeat steps 2-5 until 815 nm is reached.
      7. Look for the maximum absorbance reading, which should be found within 805-809 nm.
      8. For an optional "middle" wavelength check, set the wavelength to 522 nm.
      9. Repeat the blanking and measurement steps (10-14) as above, advancing the wavelength by 1 nm until 536 nm is reached. The maximum absorbance reading should be within 527-531 nm.
    • Note: If your calibration filter includes a certified peak/valley curve, use those peaks for verification.
  • Absorbance Accuracy Check:

    • The absorbance accuracy should be verified against a set of neutral density filters that have been accurately calibrated to NIST standards. Contact UNICO® for more information on this procedure.

Troubleshooting:

The manual provides a comprehensive troubleshooting guide for common issues, including:

  • Inoperative Instrument: Check power connections, power outlet, voltage setting, and internal fuse. If the fuse is blown or an electronic component is defective, an authorized service engineer should be contacted.
  • Inability to Set 100%T (0.000A): Ensure the cuvette adapter is in the sample compartment. Check for blocked light beams due to misaligned holders or shutters. If the lamp is old, defective, or misaligned, it may need replacement or adjustment as per the bulb replacement instructions. Defective electronic components require an authorized service engineer.
  • Inability to Set 00.0%T: Check the sample holder and ensure the sample holder shutter is closed. Defective electronic components require an authorized service engineer.
  • Incorrect Transmittance to Absorbance Correlation: Check sample preparation and analytical procedures. Defective electronic components require an authorized service engineer.
  • Digital Display "Frozen" or Unresponsive to Sample Concentration Changes: If the concentration reading is "frozen," change the MODE from C to F, T, or A and then back to C to restart the measurement procedure. Check the sample procedure and wavelength setting. Insufficient sample volume or stray sample preparation vapors can also cause issues; ensure cuvettes are filled adequately and samples are prepared away from the instrument with proper ventilation. Bubbles or particles in the solution should be checked. Defective electronic components or loose wiring require an authorized service engineer.
  • Instrument Drift and Noise: Insufficient warm-up time, significant temperature changes, or improperly adjusted/old/defective lamps can cause drift and noise. Ensure the lamp is properly installed and adjusted. Unstable power supply or defective/dirty detector/electronic components require an authorized service engineer.
  • Incorrect Readings Obtained: This can be due to insufficient sample volume, wrong wavelength setting, failure to blank (0A/100%T), or failure to set 0%T. Check analytical procedures, wavelength setting, and wavelength accuracy. Stray sample preparation vapors or bubbles/particles in solution should also be addressed. If the instrument is out of electronic calibration, an authorized service engineer should be contacted.

The UNICO 1200 Series Spectrophotometer is designed for reliable performance in a laboratory setting, with clear instructions for both routine operation and maintenance to ensure accurate and consistent results.

Unico 1200 Series Specifications

General IconGeneral
Wavelength Range190-1100nm
Spectral Bandwidth2nm
DetectorSilicon Photodiode
DisplayLCD
Storage Temperature-20-60°C
Model1200 Series
TypeSpectrophotometer
Photometric Accuracy±0.3% T
Photometric Range0-200%T
Light SourceTungsten Halogen Lamp
Power RequirementsAC 110/220V, 50/60Hz
Measurement Range0-200% T, -0.3-3.0 Abs, 0-9999 C
Resolution0.1nm (Wavelength)
Power SupplyAC 110/220V, 50/60Hz

Related product manuals