Mounting panel thickness must be less or equal to 5mm (0.2”).
Ensure that the space considerations are met.
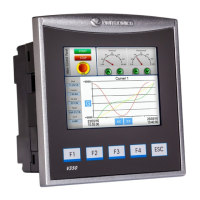
1. Prepare a panel cut-out according to the dimensions as shown in the previous section.
2. Slide the controller into the cut-out, ensuring that the Panel Mounting Seal is in place
as shown below.
3. Push the mounting brackets into their slots on the sides of the panel as shown below.
4. Tighten the bracket screws against the panel. Hold the brackets securely against the
unit while tightening the screws.
When properly mounted, the panel is squarely situated in the panel cut-out as shown
below.
The necessary torque is 0.5 N·m (5 kgf·cm)
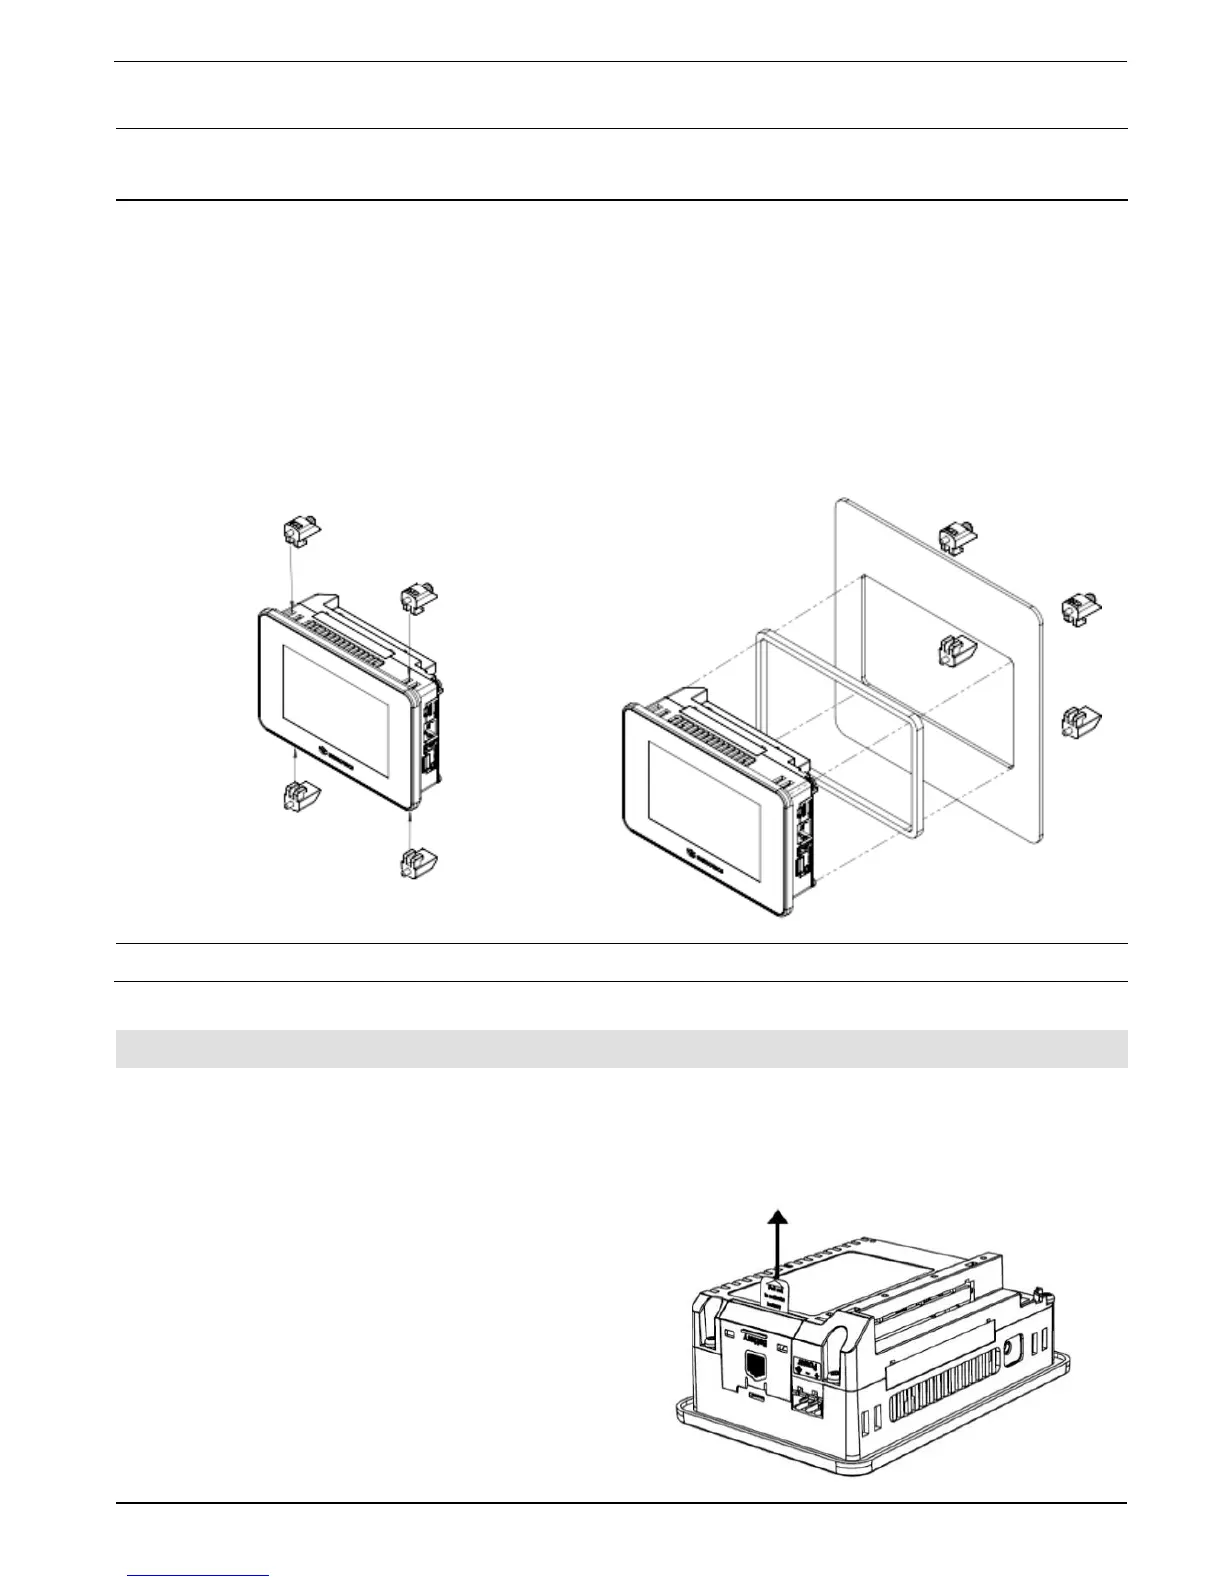
Battery: Back-up, First Use, Installation, and Replacement
Back-up
In order to preserve back-up values for RTC and system data in the event of power off, the
battery must be connected.
First Use
The battery is protected by a removable cover
on the side of the controller.
The battery is supplied installed inside the
unit, with a plastic tab preventing contact
which must be removed by the user.