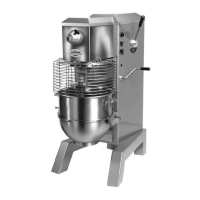
SPEED CONTROL ASSEMBLY (Figure13)
REMOVAL:
1. WARING: DISCONNECT THE ELECTRICAL POWER SUPPLY CORD.
2. Remove the mixer top cover (Figure 15 [4]) per section 2, Mechanics Maintenance “REMOVAL
OF TOP COVER” instructions on page 2.6.
3. Remove the rear access panel (Figure 15 [5]).
4. Remove the drive belt as described in section 2, Mechanics Maintenance “BELT REPLACE-
MENT” instructions on page 2.2.
W
ARNING: THE SPEED CONTROL LEVER IS SPRING LOADED. Hold the handle
while releasing the tension to prevent injury.
5. While holding the speed control lever (Figure 13 [1]), remove the two set screws [7] and rotate
the speed control lever counter clockwise two full turns to release the tension on the spring.
NOTE: The ball [22] and spring [21] may fall out of the speed control locating block [20] take
care to collect these.
6. Loosen the set screws [17] and drive the roll pin [2] from the speed control lever hub and
remove the speed control lever assembly [1].
7. Mark the position of the detent housing [24] and speed control bearing bracket [14] on the mixer
housing. This will aid in reinstalling the speed control assembly in the correct location.
8. Slide the retaining rings [16], cam [15], and spring [10] toward the locating block [20]. Remove
the key [8] from the shaft [9].
9. Remove the two Kep nuts and washers and remove the speed control strap [3].
10. Loosen the two Kep nuts [6] securing the detent housing [24] and the four Kep nuts securing the
speed control bearing bracket [14].
11. Push the speed control shaft [9] inward until it contacts the far wall of the mixer housing. Pull
the detent housing and shaft assembly toward the rear of the mixer and pull the shaft from the
bearing bracket [14].
12. Remove the shaft and belleville washer [23] from the detent housing.
13. Remove the spring [10], retaining rings 16[] and cam [15] from the speed control shaft[9].
14. Drive the roll pin from the speed control locating block [20] and remove the block.
15. Remove the screws and nuts and remove the speed control bearing [11] from the bracket.
NOTE:
the position of the longer screw. This screw holds the spring from rotating when the
speed control lever is rotated.
Page 7.1