OVEN SETUP
ACCESSORIES SETUP
PROOFER SETUP
SLOWTOP SETUP
UTILITIES
START
STOP
SERVICE MENU
CLIMA
POWER
OFFSETS
PREHEATING
WASHING
OPTIONS
START
STOP
OVEN SETUP
LOAD MODEL PARAM
UPDATE FIRMWARE
RESET TO FACTORY DEFAULT
START GUIDED INSTALLATION PROCEDURE
CALIBRATION
CLOUD MAIN SERVER
raw.velexcloud.com
SHOW FULL MENUS
OFF
INSTALLATION INFO
START
STOP
UTILITIES
START
STOP
WASHING
DETERGENT QUANTITY
100
WASHING DIAGNOSTICS
ON
WASHING VALVES TYPE
NORMAL
NUMBER OF ROTORS
1
START
STOP
WASHING VALVES TYPE
NORMAL
SELF CLEANING
START
STOP
WASHING
DETERGENT QUANTITY
100
WASHING DIAGNOSTICS
ON
WASHING VALVES TYPE
NORMAL
NUMBER OF ROTORS
1
START
STOP
WASHING
DETERGENT QUANTITY
100
WASHING DIAGNOSTICS
ON
WASHING VALVES TYPE
NORMAL
NUMBER OF ROTORS
1
START
STOP
NUMBER OF ROTORS
1
2
3
7
8
9
7
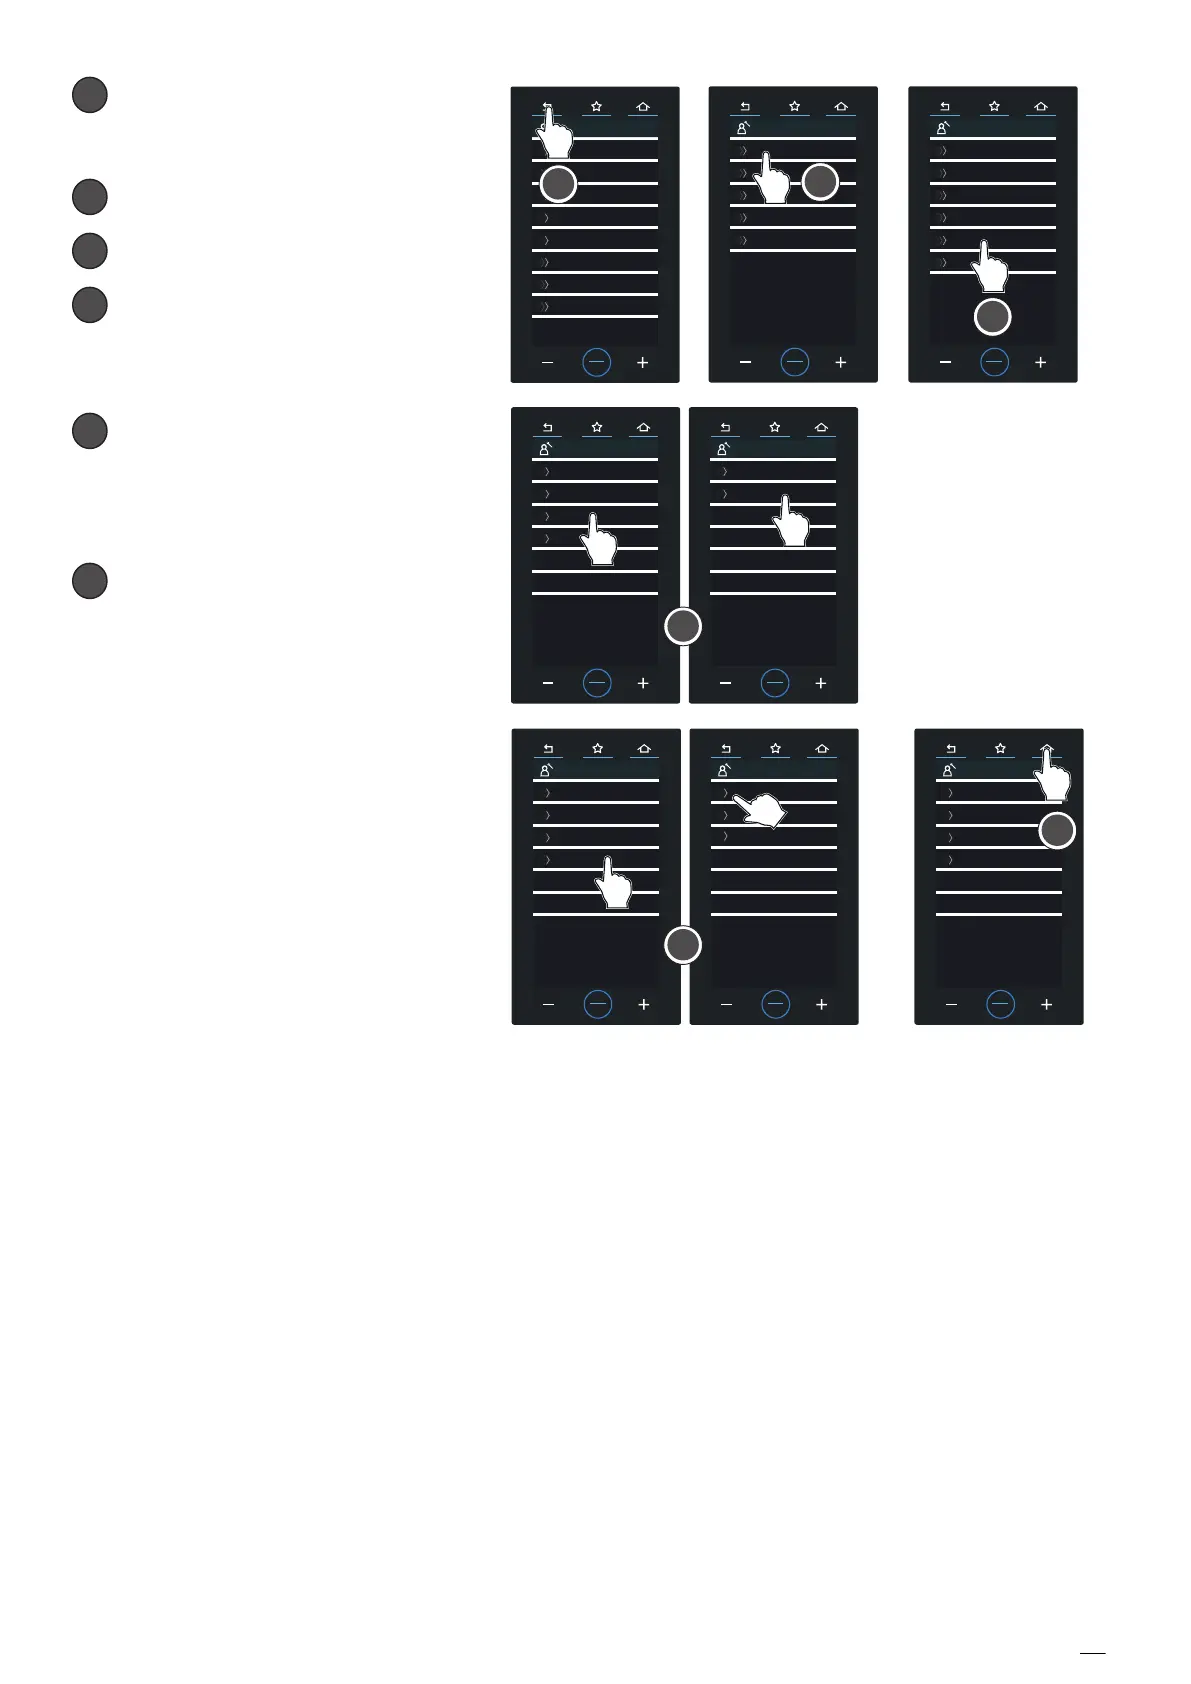
Go back to the service menu (using
the back arrow in PLUS ovens and
the “gear” icon in ONE ovens).
8
Press “OVEN SETUP”.
9
Press “WASHING”.
Press the “WASHING VALVES TYPE”
parameter and select NORMAL or
SELF-CLEANING according to the
type of washing valves of the oven.
(Only for PLUS ovens) Press the
NUMBER OF ROTORS parameter
and set it to “1”, “2” or “3” according
to the number of rotor arms of the
oven).
Save the settings by pressing one of
the home icons on top (the one in
the middle) for PLUS ovens or the
book icon for ONE ovens.
 Loading...