9
B-01286 USLR-XLT Maintenance (11-25-19)
Probe Shaft Inspection and Cleaning
Ensure the white molded probe remains clean and free of oils, greases etc.
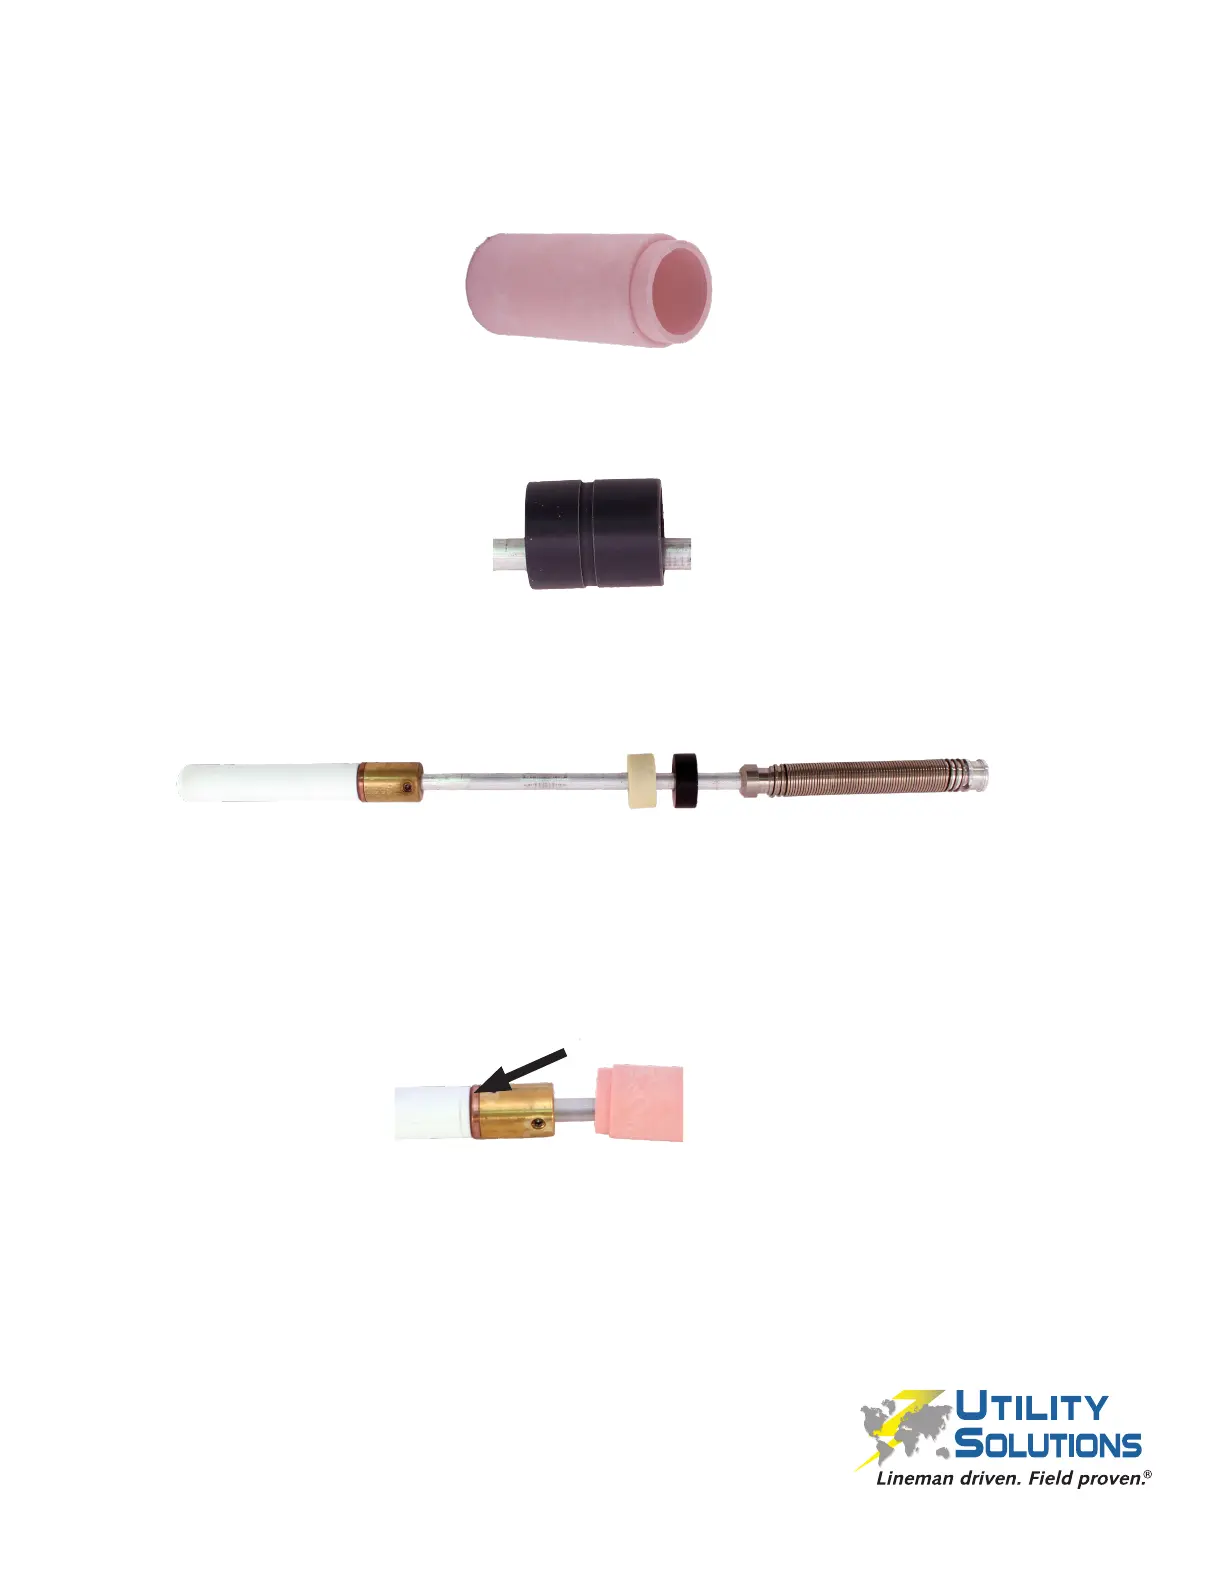
1. Verify the Pink Arc Snuffers (C-00554), two each for the XLT-1 and 4 each for the XLT-
2, are not cracked, chipped or otherwise damaged. Replace if necessary.
2. Inspect the Plastic Spacer (XLT-1 C-00528, XLT-2 C-00558) to verify it is not cracked,
chipped or otherwise damaged. Replace if necessary.
3. Inspect the XLT Probe Shaft Assembly (XLT-1 P-00049, XLT-2 P-00449) for damage
and replace if necessary. The assembly comes complete from the factory and should
not be rebuilt.
a) Inspect the white and black plastic discs to verify they are not cracked, chipped or
otherwise damaged. Verify they slide freely along the probe-shaft without dragging.
b) Inspect the inner copper coil for signs of fraying or damage. Insure it is rmly
fastened at each end of the coil pack.
c) Inspect the probe base for signs of excessive pitting or arcing.
d) Verify the arc ring is not loose.
e) Verify the white molded probe is rmly crimped to the probe base.
f) Verify the white molded probe is not cracked or chipped.
g) Use an all purpose very ne nylon mesh sanding pad to remove surface soot
deposits from the probe base. Avoid making contact with the white molded probe.
 Loading...