ENGLISH
- 39 -
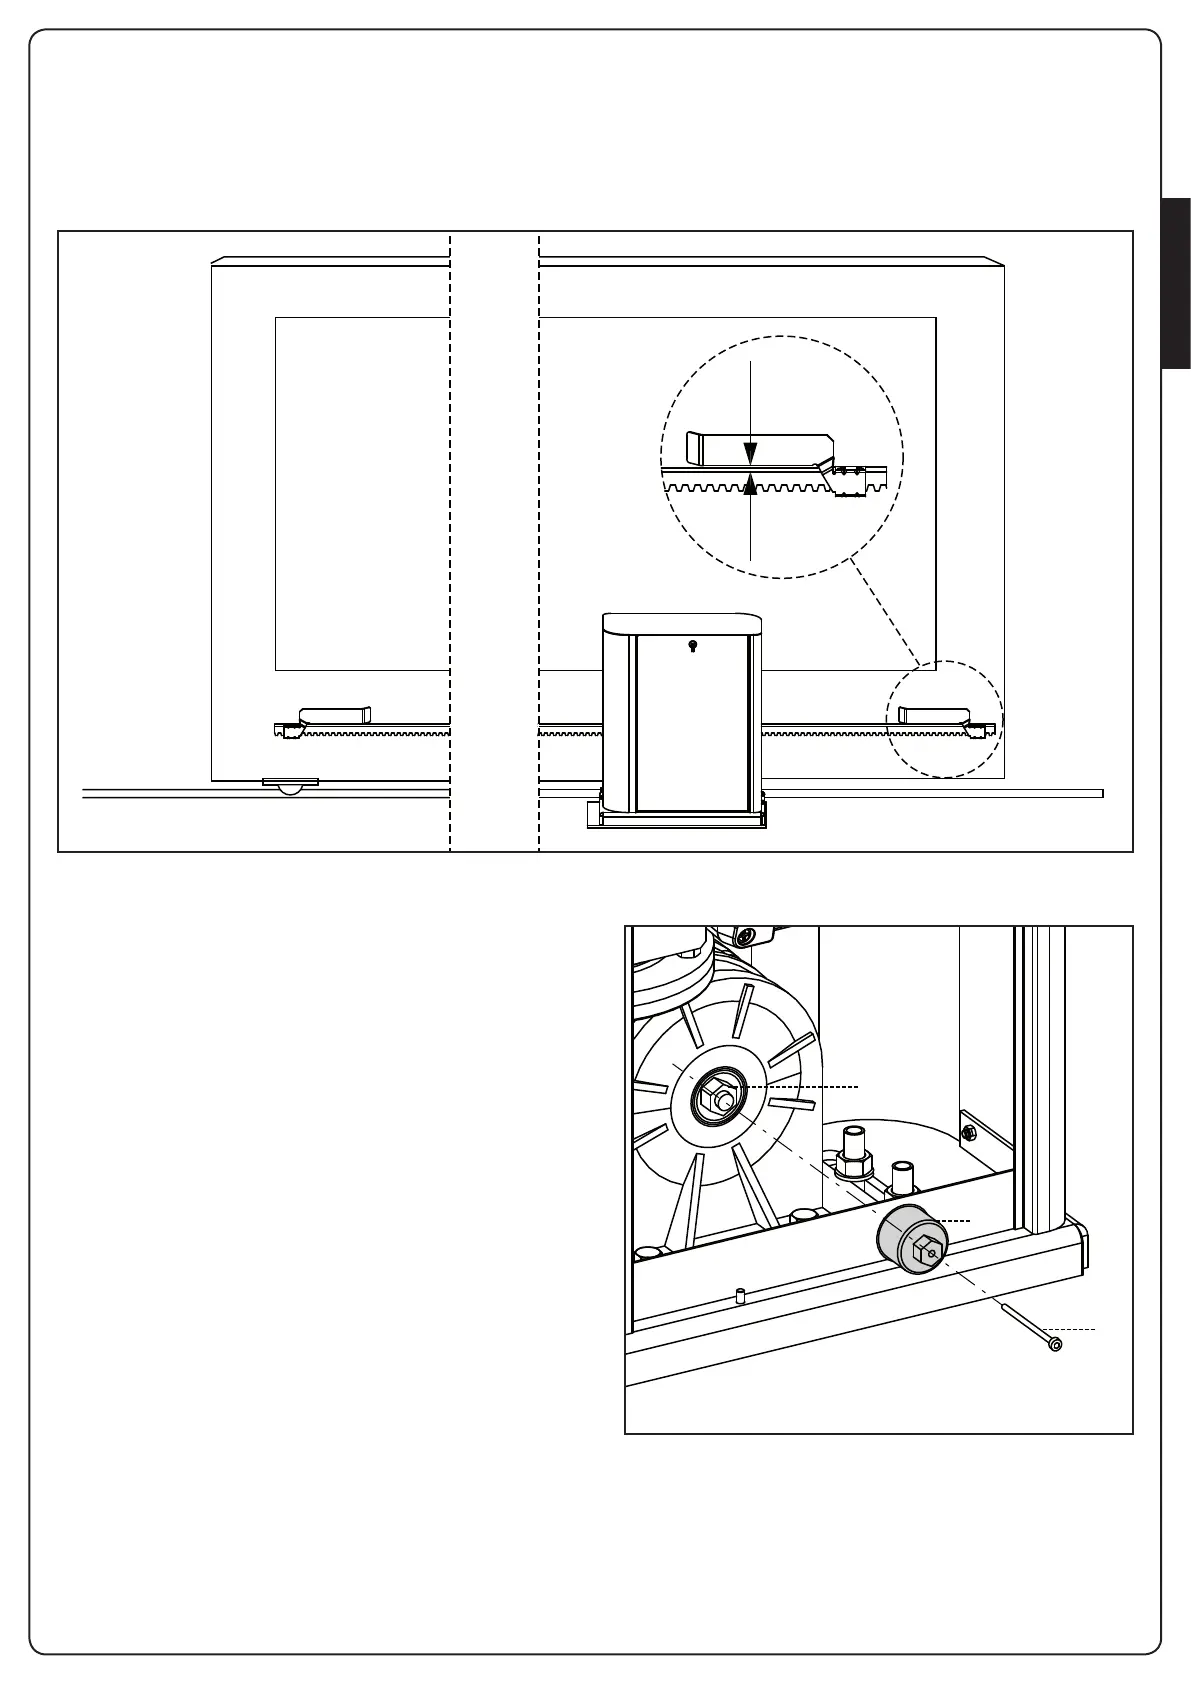
3.4 - INSTALLING THE MECHANICAL LIMIT
SWITCHES
Installlimitswitchesontherackandxthemusingthescrews
providedinthetoolkit.
m ATTENTION: check that the limit switch bracket will
work effectively on the limit switch spring of the motor.
If necessary add thickness between the lower part of the
rack and the limit switch bracket in order to keep to the
measurement as stated in the gure.
max 3mm
3.5 - TORQUE LIMITER
Toadjustthemotortorque,followtheinstructionsbelow:
1. Openthereardoor
2. UnscrewandremovescrewLwiththesupplied4”Allen
wrench
3. Screwclockwise(leftthread)theringnutKusingthesupplied
19”wrenchuntilremovaliscomplete
4. Inordertosetthemotortorque,operatetheself-lockingnut
Mwitha27wrench:
- screwbyhalfturnnutMtoincreasethetorque;operate
themotortoverifyifthetorqueisthedesiredone;
ifnecessary,screwagainnutM untilthedesiredvalueis
reached
- unscrewbyhalfturnnutMtodecreasethetorque;
operatethemotortoverifyifthetorqueisthedesiredone;
ifnecessary,unscrewagainnutMuntilthedesiredvalueis
reached
5. Aftertheadjustmentiscompleted,screwanti-clockwise(left
thread)theringnutKuptothreadend.
NOTE: if you overtighten the ring nut the motor is
released
6. FullyscrewscrewL
7. Closethereardoor
L
K
M