Field checking fixed transmitters
For instructions on using GM70 to check and adjust GMW90 series transmitters, see the GMW90 User
Guide at www.vaisala.com/gmw90.
Field checking GMD20 series transmitters (diffusion
sampling)
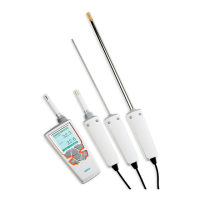
You can check the reading of a GMD20 series transmitter by using GM70 as a reference. Both readings can be seen on
the GM70 display simultaneously when using the connection cable GMA70 (optional accessory: for ordering information,
see Spare parts and accessories).
To carry out a field check:
1. Connect the GMA70 cable to either of the GM70's connector ports located on the bottom of the indicator.
2. Connect the other end of the GMA70 cable to the SERIAL COM pin connector of the transmitter component
board.
3. Switch on the MI70 indicator.
4. Set the GM70 probe next to the transmitter to be checked. Ensure that the probes are located in the same
conditions. Avoid breathing towards the probe as this alters the CO
2
concentration and disturbs the readings.
5. The reading of the transmitter is shown on the first or middle row of the display, depending on which connector is
used. Value of connector I is shown on the upper row of the display. Value of connector II is on the lower row of
the display. The difference of the readings is shown on the lowest row.
6. Compare the readings. In case there is a need for an adjustment, send the transmitter to Vaisala to be adjusted.
For contact information, see Technical support.
Field checking GMD20 series transmitters (pump-aspirated
sampling)
The pump-aspirated system feeds the same gas sample to both the reference probe and the transmitter to be checked.
Both readings can be seen on GM70's display simultaneously when using the connection cable GMA70 (optional
accessory: for ordering information, see Spare parts and accessories).
To carry out a field check of GMD20 series transmitters:
1. Connect the GMA70 cable between MI70 indicator's connector port and the SERIAL COM pins in the component
board of the GMD20 series transmitter. If not using the GMA70 cable, check the transmitter reading from the
transmitter output.
2. Connect one end of the sampling tube to the gas inlet (marked with IN) of GM70PUMP.
3. Connect the other end of the tube to the sampling port located in the middle of the GMD20 transmitter's
component board (protected with a yellow cap).
4. Insert the calibrated GMP220 series probe to the measuring chamber of GM70PUMP.
5. Turn on the MI70 indicator and GM70PUMP.
6. Compare the readings. In case there is need for an adjustment, send the transmitter to Vaisala to be adjusted.
For contact information, see Technical support.
Do not breathe towards the transmitter when checking the readings.
 Loading...
