1. Insert the probe into the field check adapter (as deep as possible, the perforated filter cover should be completely
inside the adapter).
2. Connect the tubing to the bottom port of the adapter.
3. Connect the adapter with the tubing to the flow meter, the pressure regulator and further to the reference gas
bottle. The side port of the adapter is left open for gas outflow.
4. Let the low end reference gas flow and stabilize with a flow rate of about 0.6 l/min. Follow the reading of GM70
and wait until the reading has fully stabilized. .
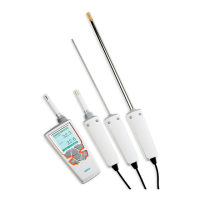
5. Take out the screw from the GM70 probe handle to expose the adjustment button (see Figure 1). Press the
button with a small screwdriver. When pressing the button, the indicator turns to adjusting mode.
6. Press OK to confirm that you are making an adjustment.
7. Select CO2 and press Select.
8. Press Yes to give the ambient pressure and temperature values. To continue adjusting, press Exit.
9. The adjustment mode is now active. Press Graph to confirm that the readings have stabilized. Go back and
press Adjust to select the adjustment method.
10. Select 1-point adjustment and press Select. Press Ready when the value has stabilized.
11. Give the reference concentration value by using the arrow buttons and press OK.
For example, if you are using pure nitrogen, enter value 0 ppm. For other reference gases, the
analyzed CO
2
concentration is typically printed on the bottle: use that value. Take care that you give
the correct value in correct units, as you cannot revert the earlier values after accepting the new
values.
12. Confirm the adjustment by pressing Yes. If you press No, you return to the adjustment mode display and
changes are canceled.
13. The adjustment is complete. Press Back and Exit to return to the basic display.
14. Shut off the gas flow.
15. Replace the screw onto the adjusting button.
Making an adjustment with 2 probes
You need to have 2 probe handles and 2 probes: 1 calibrated probe and the probe to be adjusted. It is recommended to
carry out the adjustment in a stable environment and near the concentration values in which the device is used.
To make the adjustment:
1. Switch on GM70.
2. Take the probe you want to adjust. Unscrew the probe handle screw to expose the adjustment button (see Figure
1). Press the button with a small screwdriver. When pressing the button, the indicator switches to adjusting mode.
3. Select CO2 and press Select.
4. Press Yes to give the ambient pressure and temperature values. Remember to check that pressure and
temperature values are the same with both probes. To continue adjusting, press Exit.
5. The adjustment mode is now active. Press Graph to confirm that the readings have stabilized. Go back and
press Adjust to select the adjustment method.
6. Select To same as CO2, press Select and then Yes.
7. The adjustment is complete. Press Back and Exit to return to the basic display.
8. Replace the screw onto the adjusting button.