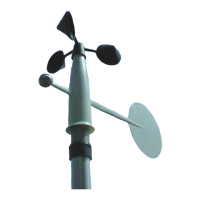
User's Guide ________________________________________________________
22 _____________________________________________________ M210375en-A
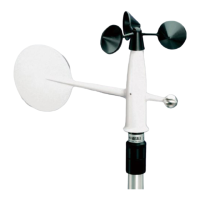
To replace the ball bearings, do the following (the numbers
refer to Figure 12 on page 23):
Anemometer bearings:
1. Loosen the hubnut (14) with fingers or a 10 mm tool
and remove the cup wheel (13).
2. Remove the ball bearing assembly (12) by unscrewing
it counterclockwise (with a 10 mm tool).
3. Insert a new bearing assembly (12). Tighten gently.
4. Fasten the cup wheel to the sensor. Tighten gently.
Vane bearings:
1. Proceed as described in steps 1 and 2 above.
2. Open the lock screw (11) of the tail assembly (10) and
remove the screw.
3. Remove the Seeger-ring (9) (with narrow point pliers).
4. Remove the bearing assembly (8).
5. Replace the bearings inside the housing with new ones.
6. Assemble the sensor in the reverse work order.
Note that part number 6 in Figure 12 on page 23 consists of
two parts. The lower portion has a notch that is aligned at
the factory in relation to the output of the potentiometer to
point north when the sensor is mounted.
The following numbers refer to Figure 12 on page 23:
1=Casing
2a = Reed switch PCB
2b = Potentiometer PCB
3 = Retainer
4=Sleeve
5 = O-ring
6=Base part
7 = Mast adapter sleeve
8 = Bearing assembly
9 = Seeger ring