9 10
11
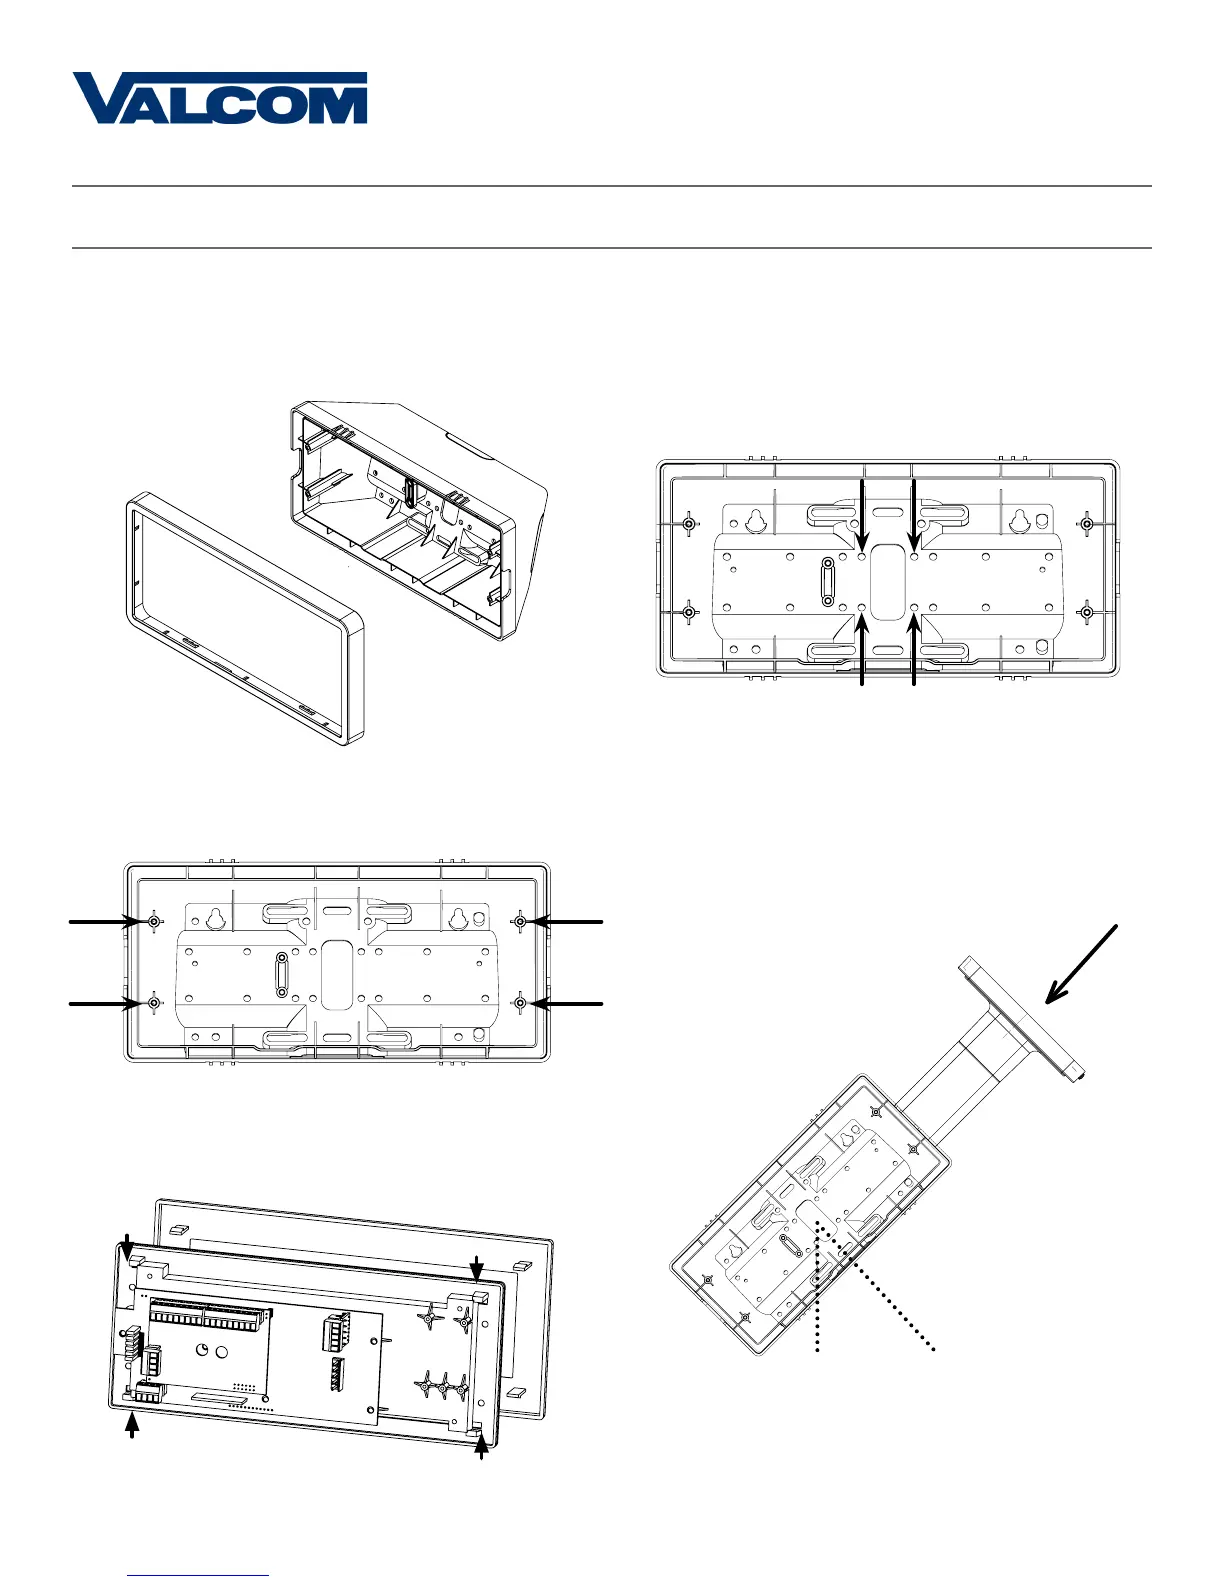
12
24
Valcom, Inc.
5614 Hollins Road
Roanoke, VA 24019
USA
P. 540-563-2000
F. 540-362-9800
www.valcom.com
Double Mount Installation
12) Thread at least fifteen inches (38.1cm) of
wiring from the gang box through the bottom of
the pole until each wire exits through the hole in
each adapter. Secure the wires by passing them
through the wire clamp.
10) Insert the four #8-32x7/16 screws through the
internal-tooth washers, then through each adapter,
and finally into the pole. Use a screwdriver to
tighten the screws so that the adapters do
not move.
11) Attach adapters to each other using adapter tab
screws, two on each side.
9) Detach the frame from the front of each clock
housing by pulling the bottom and top edges away
from the housing.
13
13) Detach the filter from the clock display board by
pressing inward on the red tabs.
Adapter holeWire Clamp