INSTALLER GUIDE
Page 40
© Baxi Heating U.K. Limited 2008.
Rotate the pivot bracket fully clockwise. The tap spindle should “bottom out” (i.e. the
tap should be fully open) after the pivot bracket has actuated the ignition microswitch
but before it has pushed the microswitch leaf against the microswitch body.
When refitting the thermocouple and interrupter block, make sure that the microswitch
wires are properly secured to give a good electrical contact.
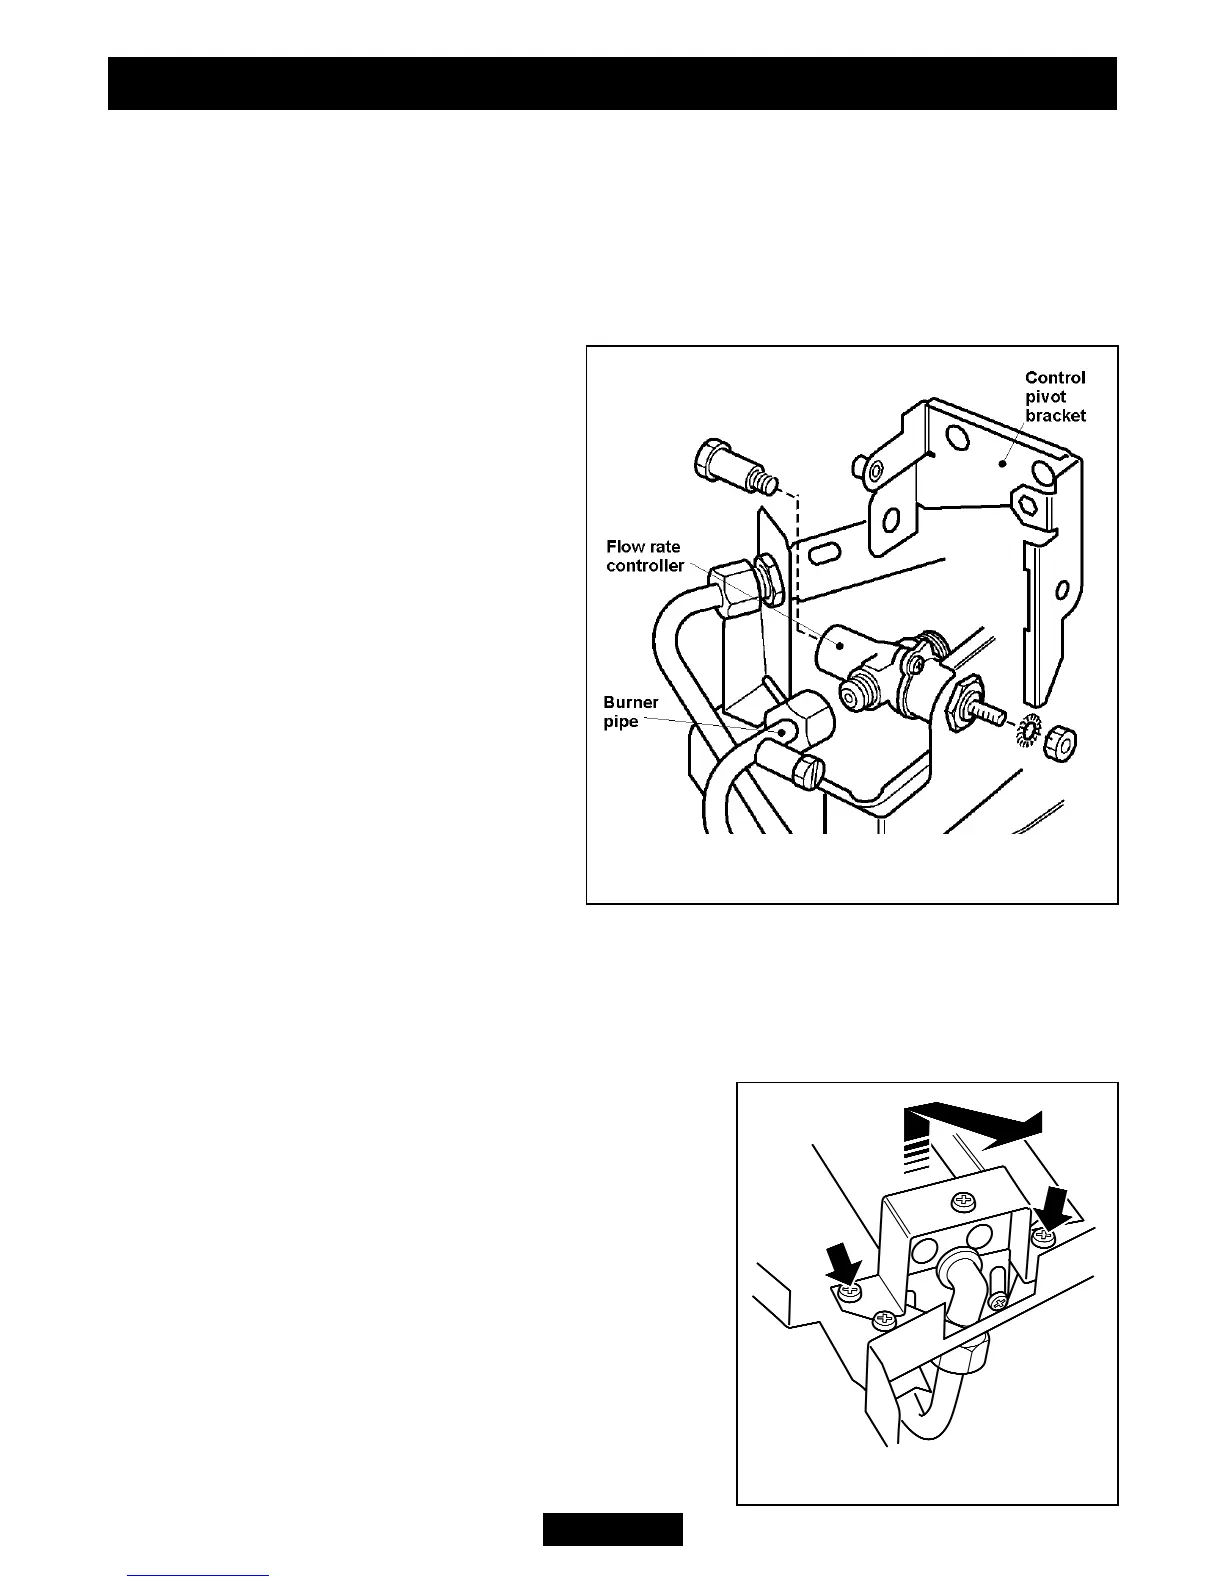
17.16 To remove the gas flow rate controller.
(See figure 44).
1. Remove the burner unit (See section
17.12).
2. If lying the burner on its back, ensure
that the work surface is suitably
protected. This will avoid damage to the
work surface.
3. Detach the shut-off tap as detailed in
section 17.15 paragraphs 2-6.
4. Detach the burner pipe from the
controller. Support the controller while
detaching to prevent excessive strain.
5. Remove the nut and washer securing
the control pivot bracket to the controller
at the front. Support the pivot bracket
while removing the nut to prevent
possible damage to the microswitch.
6. Remove the hexagonal bolt securing
the control pivot bracket to the controller at the rear.
7. Detach the control pivot bracket.
8. Remove the hexagonal nut securing the controller to the front mounting bracket
and remove the flow rate controller.
9. Refit in the reverse order.
17.17 To replace the burner.
(See figure 45).
1. Remove the burner unit (See section 17.12).
2. Support the elbow injector and unscrew the
injector nut.
3. Remove the two screws from the burner clamping
plate (See figure 45).
4. Lift the right hand side of the burner, slide it to the
right and lift clear.
5. Refit in reverse order.
Figure 45. Removal of burner
Figure 44. Flow rate controller


 To Next Page